Archives

Autodiagtool.de Is On Spring Promotion

In order thanks for regular customer’s support,Carobd.de is on big sales,most of products are free ship by Post,

Any needs,please go and see.

For Example:

Lexia-3 V48 PPS 2000 V25 with Diagbox V7.57 Deutsche Version with Original 921815C Chips

best-lexia-3-pp2000-v601-diagbox-04

OPCOM OP-COM 2009 V CAN OBD2 OPEL Support Deutsch&English

opcom-op-com-2009-v-can-obd2-opel-sp12-01

Renault CAN Clip Latest Renault Diagnostic Tool V156 With Multi-language

renault-can-clip-b-quality-best-09

And So on,want to know more,please check this link.


SuperOBD SKP-900 V3.9 Hand-held OBD2 Auto Key Programmer No Tokens Limitation

How to operate the SKP-900?

This operation instruction will tell you how to use your scan tool. For other vehicles, you
can perform it by referring to the instructions or according to operation tips on the screen.

Take FORD as an example, if all key is lost, you can use SuperOBD SKP-900 to match
key. Firstly, you must connect this device to the OBDⅡconnector via Main Cable.
Select Vehicle: [FORD]→[FOCUS]:

sk900-blog-1

Press [YES], and select ‘IMMOBILIZER’ according to your vehicle:

sk900-blog-2

Press [YES]

sk900-blog-3

Press [YES]

sk900-blog-4

Press [YES]

sk900-blog-5

ADD KEY: for matching new key
DELETE KEY: for deleting all registered keys and so the lost keys can’t be used neither
We suggest that you delete all keys before matching new keys.
Select [DELETE KEY] and press [YES]:

sk900-blog-6

As shown on the screen, you must add at least 2 new keys to start the engine after
deleting all registered keys.
Press [YES]

sk900-blog-7

Press [YES]

sk900-blog-8

Press [YES]

sk900-blog-9

It shows that deleting keys is succeeded.
Press [NO]:

sk900-blog-10

Press [YES]

sk900-blog-11

sk900-blog-12

According to the instruction on screen, you should insert a new key and turn IGN on.
You may see the IMMO indicator light will flash when inserting a key which cannot start
Engine.
Press [YES]

sk900-blog-11

Press [YES]

sk900-blog-16

Press [YES]

sk900-blog-15

sk900-blog-16

You have successfully programmed the first new key. Press [NO]:

sk900-blog-17

Press [YES], continue to program another key:

sk900-blog-18

Press [YES]

sk900-blog-19

Press [YES]

sk900-blog-20

sk900-blog-10

Press [YES]

sk900-blog-22

So far two new keys have been successfully programmed. Now you can use any one of them to start the engine. Of course, if you want add more keys, you just need to repeat the above operations.
Digimaster 3 White/Black Screen of Death (solved)

Some forum bros talked about their death screen (white or black screen of death) of their Digimaster iii. And now, we technicians offers some solutions.

digimaster-3-digimaster-iii-original-odometer-correction-master-1

First, please try to update your kernel
Then, try the following solution if white or black screen of death still appears on your Digimaster 3 after you have updated the kernel.
1. Remove SD card from D3 to cardreader,and connect to PC. After successful connection, click “Removable Disk(E:)” as showed in the picture.

Digimaster-2B3-dead-2Bscreen1

2. Delete the old file “YHTech” which is in the SD card.
3. Copy the “YHTech” files from CD, and save it in SD card.
4. Please insert SD card into Digimater3 after successfully copy and paste. Then connect to
network and turn on Digimaster 3, click “OK” for downloading when appear remark of “Please connectnetwork download hypervisors!” in the interface.It can be functioned aftersuccessful download.

How to install Diagbox V7.57 software for Lexia 3 Citroen and Peugeot

The Diagbox for Lexia 3 V48 PP2000 V25 Citroen and Peugeot diagnostic has newly upgraded to latest V7.57. Here is the step-by-step Daigbox V7.57 installation instruction:
ⅠInstall Lexia 3 DiagBox V7.57 setup1
1) Insert CD software into the computer
2) Open Diagbox V7.57 (E:) CD
3) Select and open setup1

1

4) After loading setup. Select system language

2

5) Accept SPTD setup license agreement.
6) Restart the computer
7) Select language again
8) Accept license agreement
9) Save file to a certain folder and click next

3

10) Select Alcohol 52% file on the desktop, select Add image from my computer Diagbox V7,57 and mount on Setup BDV0702

4

11) Setup is installing. Select language again.
Ⅱ Install DaigBox-setup
12) Open Diagbox.V07.02(F:) and open Diagbox-setup driver

5

13) Select language.  Installing setup driver will generate three folders on the desktop, EmalDiag, WEBEX and Diagbox. Accept the windows security alert

6

14) Diagbox software is loading.
Ⅲ Activate Lexia 3 DiagBox software
15) The system will prompt ACTIVATION message, click manually activation (3rd option)

7

16) Check your customer code and correct it if it is not correct

8

17) Please wait until the software complete installation. Usually it will take about 12 minutes. The waiting time depends on your computer configuration
18) After complete install, click Yes to continue When come to the PARAMETER program, fill in the Dealership Information and Technician information , including Company name, Address, Post Code etc

9

19) Click No when the system asks for new update. Select Citroen or Peugeot band in BRAND SELECTION program and then select detail vehicle model to check vehicle information.

10

20) Close the activation program. Unlock windows security alert
Ⅳ Update DiagBox to V7.57
You can not directly update DiagBox to V7.57. You have first update to V7.44, than update V7.44 to V7.49, then update V7.49 from V7.57.
21) Open DiagBox shortcut on the desktop, the software is updating to V7.02

11

22) When the system asks for an update, click no. Check the vehicle information again. Close the program.
23) Open DiagBox V7.57(E:) CD software on My computer. Select setup3 update V7.02 to V7.57 file.

12

24) Select DiagBox Update V7.xx to V7.44, select language, accept windows prompts

13

25) Enter the setup password, scary01

14

26) After update complete, select no to restart the computer now but restart the computer later.

Back to setup3 folder, select Update V7.44 to V7.49, follow the operation of updating DiagBox V7.xx to V7.44.
15
27) Select DaigBox Update V7.49 t0 V7.57. Follow the same update operation as previous update.
17
28) Here is the new DiagBox software program of V7.57
18
29) Please connect the device to the car, then use the short USB cable to connect with the computer, then it will prompt to install driver.
19
30) Select the application as LEXIA
20
31) Enter missing information
21
32) Come to the main diagnosis function, select the function you want to project.
22

Toyota G and Remote Function Dongle €28 Feedback

Toyota G and Remote Function Dongle price cut down to €28 + free shipping worldwide.

Details at blow link:

http://www.carobd.de/wholesale/toyota-g-h-chip-obd-remote-key-programming-device.html

toyota-g-h-chip-obd-remote-key-programming-device-blog1


I suppose you want to overview users’ feedback before place order, read following Toyota G and Remote Function Dongle feedback:

It works perfectly fine. I had not used it until now to do immo but remote programming works as advertised. Very simple. Tested on Toyota Highlander and Toyota Rav4 until now.Separate key and remote on these cars that I tested.

Remote section works perfect no problem tested on a 2009, 11, 15 Camry , RAV4 , Prius C

Following are supplier’s description, some function I haven’t tested, I attach here aim to give you a reference.

Toyota G and Remote Function Dongle Description:
Apply to 4D67,68,72(G), support both G and H chip, test on 2015 Camry

Toyota add remote control:
Get in the car and close the door, insert the key and turn the key on, insert the device into OBD. After the sound(Dee-), it will start to add the remote control.
After the sound ( Dee- Dee-),open the door, when hear the sound blaring. Press ‘ lock & unlock’ key at the same time. And press the’ lock’ key. If the blaring end, It’s OK.
Note: Switch is on the right.(add remote control)

Toyota add transponder:
Get in the car and close the door, insert the main key into the lock and turn the key on,and then insert the device into the OBD. If it will sound twice, it will start to add transponder.
After the sound (Dee-Dee-), 2-3 minutes later, anti-theft light is on. And then remove the key( anti-theft light will flash), insert the new key and doesn’t need turn the key,
anti-theft light will be off later.
Note: switch is on the left.( add transponder)


Original Digimaster 3 Software display

Digimaster 3 Function Menu


digimaster-iii-original-odometer-correction-tools-update-online-blog-1

Digimaster 3 IMMO code reader is applicable for the following car models

digimaster-iii-original-odometer-correction-tools-update-online-blog-2

Digimaster 3 workable market and cars: Europe, America, Japan and Korea, Motor and Engineering truck

digimaster-iii-original-odometer-correction-tools-update-online-blog-3

Digimaster 3 airbag resetting for the following brand cars

digimaster-iii-original-odometer-correction-tools-update-online-blog-4

Digimaster 3 supports audio decoding for the following cars

digimaster-iii-original-odometer-correction-tools-update-online-blog-5

Digimaster 3 workable market

digimaster-iii-original-odometer-correction-tools-update-online-blog-6

Digimaster 3 supportted European car list

digimaster-iii-original-odometer-correction-tools-update-online-blog-7

Digimaster 3 supportted Japanese and Korean car list

digimaster-iii-original-odometer-correction-tools-update-online-blog-8

Digimaster 3 supportted Japanese and Korean car list

digimaster-iii-original-odometer-correction-tools-update-online-blog-9

Digimaster iii support Motor type

digimaster-iii-original-odometer-correction-tools-update-online-blog-11

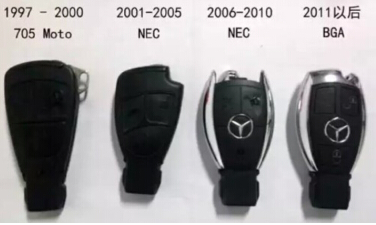
Digimaster iii program keys for Mercedes Benz and support models

digimaster-iii-original-odometer-correction-tools-update-online-blog-12

Digimaster iii make key for BMW and workable immobilizer type, D3 program ECU for BMW and
supported chip type

digimaster-iii-original-odometer-correction-tools-update-online-blog-12

Digimaster iii-please select the operation type: File, IC Read, CPU Program and Signal Generator

digimaster-iii-original-odometer-correction-tools-update-online-blog-14

Digimaster iii supported Citroen type

digimaster-iii-original-odometer-correction-tools-update-online-blog-15

Kindly Note

All digimaster 3 has already been registered before shipped out. So no need register again. Customer who want buy digimaster 3 please do have basic knowleage about chip desoldering.Techinical question about DIGIMASTER III, please check our techinical service next to the description.

2015.12 BMW ICOM ISTA-D 3.56 ISTA-P 3.57 Win8 HDD

BWM ICOM new V2015.12 ISTA-D 3.56.1.002 ISTA-P 3.57.2.002 diagnostic and programming Win 8 HDD is available in autodaigtool.de.
Latest version: V2015.12

ISTA-D 3.56.1.002

ISTA-P 3.57.2.002

VIN: 2015.10.14
Not connected 9000 days remaining
Support Engineer programming/Expert Mode
500GB Complete New HDD
Support Windows 8

BMW ICOM HDD V2015.12 / Win8 System ISTA-D 3.56.1.002 ISTA-P 3.57.2.002 without USB Dongle
Works together with BMW ICOM, BMW ICOM A2+B+C, ICOM A3
Support Multi-language in diagnose and programming, also TIS diagram circuit: Chinese, English and German

V2015.12 BMW ICOM Software HDD List and Functions:

BWM ICOM new V2015.12 ISTA-D 3.56.1.002 ISTA-P 3.57.2.002 diagnostic and programming Win 8 HDD is available in obd365.com.

Latest version: V2015.12

ISTA-D 3.56.1.002

ISTA-P 3.57.2.002

VIN: 2015.10.14
Not connected 9000 days remaining
Support Engineer programming/Expert Mode
500GB Complete New HDD
Support Windows 8

BMW ICOM HDD V2015.12 / Win8 System ISTA-D 3.56.1.002 ISTA-P 3.57.2.002 without USB Dongle
Works together with BMW ICOM, BMW ICOM A2+B+C, ICOM A3
Support Multi-language in diagnose and programming, also TIS diagram circuit: Chinese, English and German

V2015.12 BMW ICOM Software HDD List and Functions:

No. Software Name Software Function
1 ISPI-NEXT Admin Tools   ISPI-NEXT authorization software
2 ISPI Admin Client ISPI-NEXT authorization management and environment Configuration software
3 ISTA-D(Rheingold) Diagnostic and repair guide, including Diagrams and disassembly Figure
4 ISTA-P(ISSS-NEXT) Programming and coding software system
5 HDD-Update Navigation software upgrade back-office services (function with ISTA-P, need to Import map files)
6 KSD Work software
7 ETK Accessories Catalog
8 E-SYS Engineer Software for F series (available for programming and coding)
9 WINKFP Engineer Software for E series, for programming
10 NCS-Expert tool Engineer Software for E series, for coding
11 INPA Engineer Software for E series, for diagnosis
12 Tool32 Engineer Software for E series, able to run directly
13 BMW Coding Tool Auxiliary Software of Engineer Software for E series (Available to import model data to WINKFP and NSC)
14 NcsDummy Auxiliary Software of Engineer Software for E series (Available to modify NCS data)
15 IToolRadar Used to recognize ICOM, activate or release ICOM Port
16 EasyConnect Used to Configure the Environment Parameter of Engineer Software for E series, can activate or release ICOM Port

System Requirements:
Dual-core processor, better above I3; over 4G of memory

Laptop Recommendation:
It is recommended to use Lenovo ThinkPad: T61, T410, T420, T430, X200, X201, X220 X230 and other laptop with Intel chipset, such as I3/ I5 / I7 series.


2016.02 Nissan Consult 3 III Plus V54.20 Free Download

comsult-3-blog-4

Free download:

Nissan Consult-3 Plus V32.11 – (tested by OBD365 technicians)

Nissan_Consult-III_Plus_v54.20.rar [298.64 MB]- (from a forum)

Code: http://www.nissan-global.com

NOTE: you may be at risk to update consult 3 +, and please take responsibility for your try.

Computer requirements:

– O.S.: Windows XP

– CPU: Pentium/Athlon 400 MHz or higher
– RAM: 512 MB of system memory
– Hard Drive: 2 GB of available space
– Bluetooth or USB interface
– DVD-ROM

Language:

English/ French/ German/ Spanish/ Italian/ Japanese/ Russian/ Finnish/ Greek/ Chinese(Simplified)/ Chinese(Traditional)

Consult iii plus software installing steps:
1. Install the software in the “CONSULT-III_APPL” file folder;
2. Install the patch in the “CONSULT-III Patch” file folder;

CONSULT-III PLUS function:

work for all Nissan car , Infiniti car and Nissan GTR car to 2012.
work with obd-16 connector for the new kind of car, work with 14 pin connector for the old kind of car.
support Nissan car electronic system diagnostic
Nissan electromobiles such as Leaf.
support all Renault.

The different of MS906 and DS708

autel-maxisys-ms906-blog-1

The different of MS906 and DS708

Look at the table:

Item Name Autel MaxiSYS MS906  Autel MaxiSYS DS708
Brand Original Autel Original Autel
Language English, Spanish, French, German, Japanese, Portuguese(Only English available now, other languages will add in future) One device two language, English+another(French, German, Portuguese, Spanish and so on)
Update Update online one year for free Update online one year for free
OS AndroidTM 4.0 Windows CE
Support Cars Almost of European, Amercian, and Asian cars Almost of European, Amercian, and Asian cars
Programming No No
ECU Coding No No
Memory Memory 2GB RAM & 32GB On-board Memory Max.4 Gigabyte SD card
Screen Display 9.7 inch LED capacitive touch screen with 1024x768P resolution Backlit, 7″ TFT (800*480 dpi) color display with touchscreen
PS:
MS906 work better and run faster then DS708Autel MaxiSYS Pro MS908P support online ECU coding and online programming(but online programming only available to part original software)


Toyota Camry change mileage with Digimaster 3

How to change mileage for Toyota Camry with Digimaster 3? Please follow the instructions as follows.

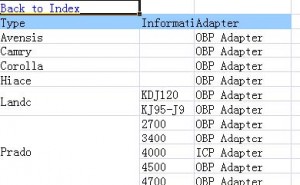
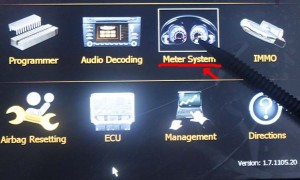
1.Firstly open “digimastar3 vehicle list” file and search Camry, as shown bellow, OBP adapter needed, then find out the OBP adapter in the tool box. Open digimaster3, choose “Meter System” in the menu list.

digimaster3-obp-adapter-1

digimaster3-obp-adapter-2

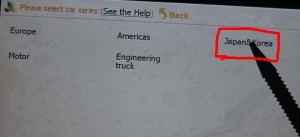
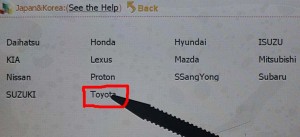
2.Select Japan & Korea

digimaster3-obp-adapter-3

3.Select Toyota

digimaster3-obp-adapter-4

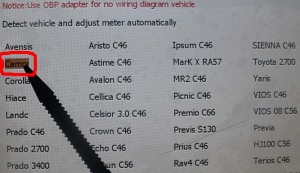
4.Select Camry

digimaster3-obp-adapter-5

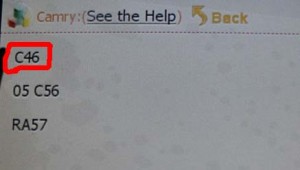
5.Display C46 as follows, which indicates to remove the Instrument and to find C46 chip. Note: the same as to the other cars models, when it displays chip model, just to remove the Instrument and find the corresponding chip model.

digimaster3-obp-adapter-6

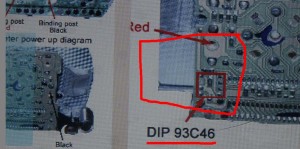
6.The following picture tells the location of dip 93c46, now remove dip 93c46.
Note: be careful not separate chip angle and no short-circuit.

digimaster3-obp-adapter-7

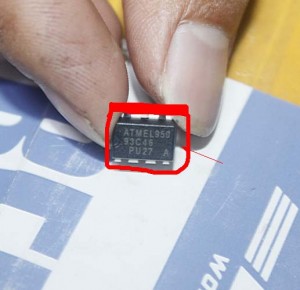
The removed 93c46 chip like this.

digimaster3-obp-adapter-8

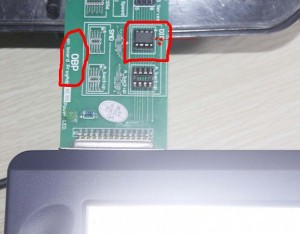
Weld the chip in the right location as bellow and connect the OBP adapter with Digimaster 3, (Note: notice 93C46 direction)

digimaster3-obp-adapter-9

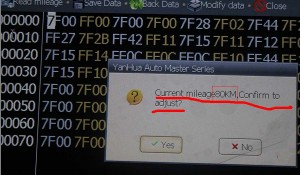
In the Digimaster III, click Next, read out Chip mileage value 80KM, select “Yes” to adjust the mileage value you want.

digimaster3-obp-adapter-10

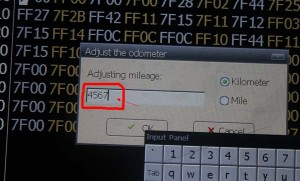
For example, in the box “Adjusting mileage”, enter 4567, and then click “OK”.

digimaster3-obp-adapter-11

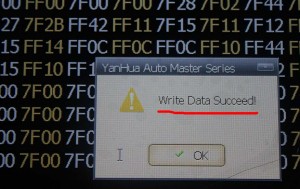
Write Data succeed!

digimaster3-obp-adapter-12