Archive | August 2015

New Arrival Cost-effective Lexia-3 V48 PP2000 V25 with Diagbox

New Arrival Lexia-3 V48 PP2000 with diagbox V7.57.
New with original chip and support peugeot 307
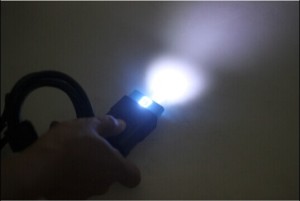
The most important is main cable come with LED light, better for night work!

1. Support multi-language: English/ German/ French/ Japanese/ Russian/ Spanish/ Portuguese/ Swedish/ Turkish/ Dutch/ Polish/ Italian/ Hungary/ Greek/ Czech

2. It works for both Citroen and Peugeot. Now support Peugeot 307!
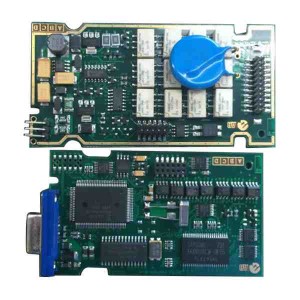
3. Lexia-3 PCB edge is golden with original full chips. Double PCB has 7pcs optocouplers, which are 100% original and new.
4. lexia-3 relays are 12pcs, which are 4.5V, it is more stable.
5. PP2000 have 2pcs Optocouplers

cost-effective-lexia-3-v48-tool-5 cost-effective-lexia-3-v48-tool-15 lexia-3-v48-led-light-display lexia-3-v48-pcb-display

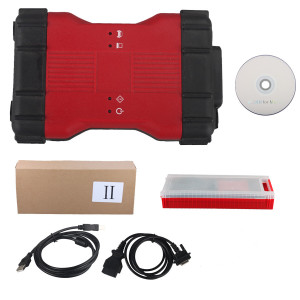
New Arrival VCM II 2 in 1 Diagnostic Tool for Ford IDS V96 and Mazda IDS V95

New Arrival VCM II 2 in 1 Diagnostic Tool for  Ford IDS V96 and Mazda IDS V95

VCMII 2 in 1 for Ford and Mazda Description

VCMII 2 in 1 is an OEM diagnostic interface for the vehicles of Ford and Mazda. It can be compatible with OEM software of Ford IDS and Mazda IDS

Top 5 Reasons to get VCM II

1. FORD IDS Version: V96, Mazda IDS Version: V95
2. Support virtual machine, Ford and Mazda software can be installed on one computer.
3. Support multi-languages: English/Japanese/Portuguese/Romanian/Korean/Dutch/Polish/Turkish/Spanish/French/Italian/Croatian/Danish/German/Swedish/Finnish/Slovenian/Czech/Russian/Greek/Chinese
4. Update by CD with unlocked firmware
5. Support both new and old vehicles.

Requirement on Computer

1. Computer has at least 4GB Memory
2. Computer need produced after 2000 year, too old computer can not run the software.
3. OS needs to be WINDOWS XP SP3.

new-vcmii-diagnostic-tool-for-ford-ids-mazda-11

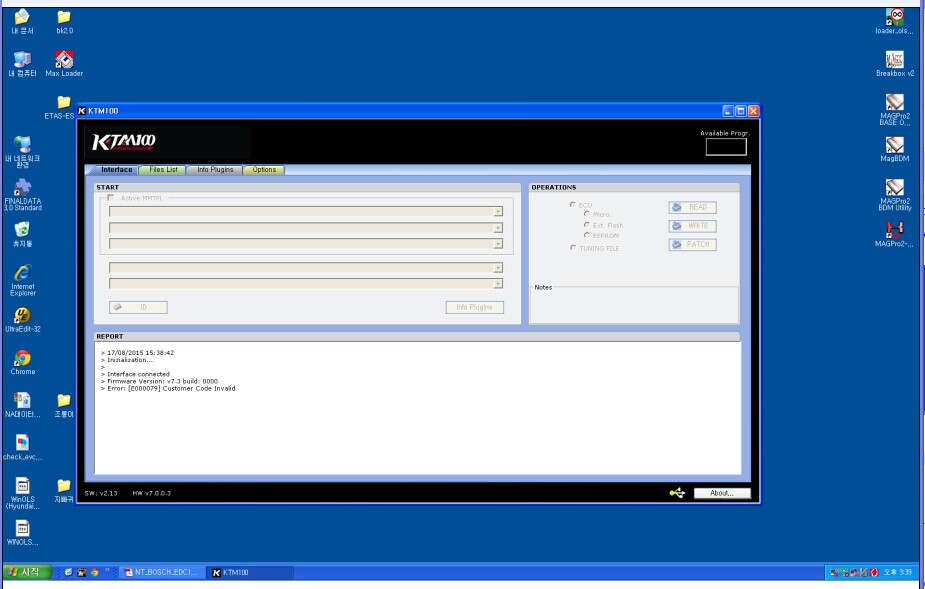
KTAG KTM100 No Message on Software Error

One of our customer had been installed KTM100 software well.

But there is no message from the software.

So he find us and offer the error pic to us , as following

ktm100-no-message-error


How do we solve it when we met this problem ?

Our engineer offered some solutions

First:Pls check there is no internet on your laptop.

Second:Pls check if the driver is installed well or not.

Third:Pls check TF card is good or not.

After checking by our customers , he finally find the problem.

The problem is TF card. After repairing TF card, the communication is normal now.


Latest Volvo VIDA DICE 2014D No Communication Error

Hi Jenny.
It is installed on Win 7 ultimate
No error message, problem is shown on (1) photo. No connection to vehicle, and Vida cannot see dice.
Picture of Dice connected to car (ignition on) and PC (vida running) (2) please not at the moment USB (dice) is connected to pc the USB COM light blinks few times.
I am running explorer 11 (3)
I did run Dice diagnostics pictures (4-8) shows all 4 test results.
Hope you can identify my problem.
(1) Problem
(2)
(3)
(4-8) Dice diagnostic
Additional info
I did now try uninstall all Vida and dice related. Restart.
Then i did uninstall first Explorer 11, restart, than explorer 10, restart.
Now I am running explorer 9 (as mentioned on your homepage)
Instal all again, restart, patch, restart.
No change, no connection to dice.
USB drivers for dice does install automatically. At that moment there is blinking lights at dice USB COM light.
If i disconnect USB cable bluetooth light turns on. (this pc does not have bluetooth).
Vida did instal in suggestet (by vida) folder C:\vida
Patch did run on C:\
Also try on C:\vida   (result in error)
The following is the solution from my customer
Hi Again… 🙂

Problem solved…
If the pc has dot net (Net frame works) 4.5.1 or newer installed this causes communication problems..
I did uninstall Netframeworks 4.5.2 on my pc and communication works.
If the should run into same problem.
Thank you for your time anyway.
Enjoy your weekend.
Regards

Solutions about VXDIAG NANO Ford Can not be used problem

New Arrival VXDIAG VCX NANO for Ford/Mazda 2 in 1 with IDS V95
Top 5 Reasons to get VXDIAG VCX NANO
1. FORD IDS Version: V95, Mazda IDS Version: V95
2. Perfect replacement for Ford VCM 2
3. Support multi-languages:Deutsch,French,Italian,Spanish,Swedish,Dutch,Finnish,Dannish,Norwegian,Portuguese,
4. Update by CD with unlocked firmware
5. Support both new and old vehicles.
Requirements on Computer
Processor:Core CPU 2GHz+
Memory:4G Bytes or more
Hard Disk:40G or more
Display:Resolution 1024×768 or higher
Network Interfaces:LAN 10/100M or 802.11b/g
Communication Interface:USB2.0 or USB 3.0
Operating System: Windows XP SP3/Win7/Win8/Win8.1
VXDIAG VCX Nano Description
VXDIAG VCX NANO is an OEM diagnostic interface for the vehicles of Ford and Mazda. It can be compatible with OEM software of Ford IDS and Mazda IDS
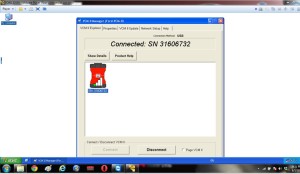
But when installing the software, one of our customers who met this kind of problem.
vcmii-error-message-1 vcmii-error-message-2
How to solve this problem?
Our engineer offer some solution for this problem just as reference.

Notice: No Antivirus Program On Laptop. 

Step 1: 

Download the Ford IDS V81 Software By the following link:

You need to download them all. After download, put them into one folder.

Note: 

V81 Version is mainly for Programming, So if you don’t need to program your vehicle in future, no need to download those files, Just go on to Step 2. If you need program the vehicles, you must download all those V81 Files. You could choose.

Step 2:

Download the Ford V91 Software by the following link:

http://www.fordservicecontent.com/Ford_Content/IDS/IDS-91.01_Full.exe

This link can not be opened by browser, if you do in that way, you will get 404 error.

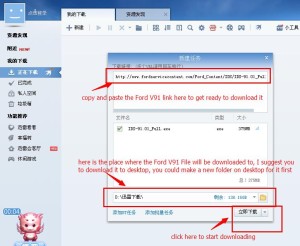
This link need to started by a tool named Xunlei Download Tool, Please install it by the following link

If you can not open this link, I have shared the setup file of it in the folder,

you could just double click it, and then install it, it is very easy.

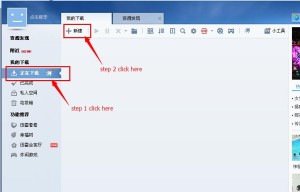
After you finished installing this Xunlei download tool, operate it as below:

(It might be in Chinese, just do as same as I show you below)

图片2 图片1

Step 3: 

After we finished download V81 and V91, let download V96 right now.

After you finished download of all those different version files. Please do the installation as the video shows.

图片3

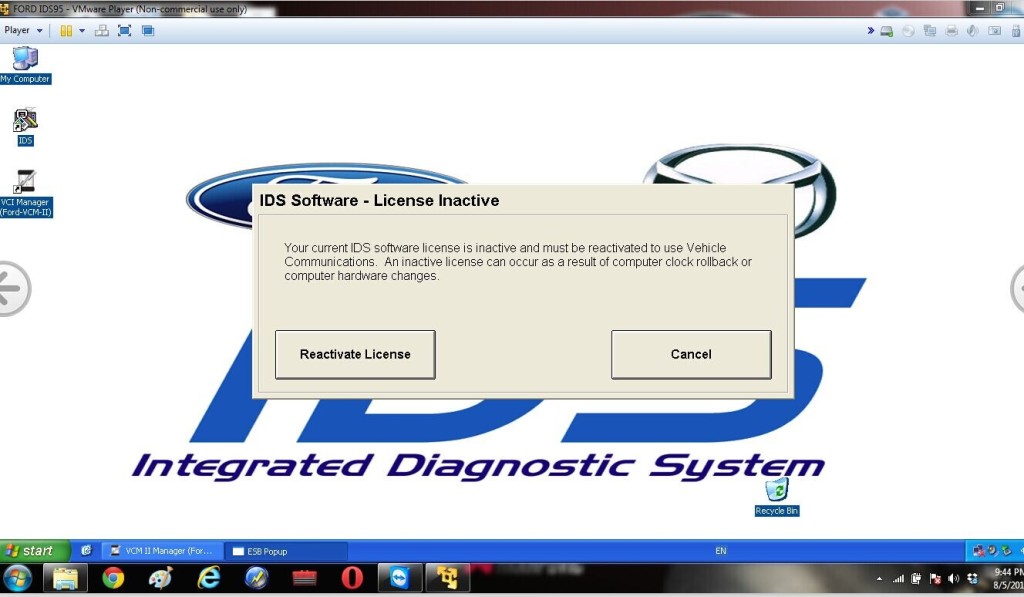
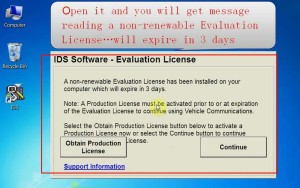
This is the installation video shows how to install those different version files, and while you installing V91 version, you might get a message below:

图片4

This is normal. And you get this message, you could go on to install V96 Version, if you did not get this message “ expire in 3 days”, or you get any other errors, please shows us, and that might means you have failed. But please contact with us first to make sure the problem.

Best Price Renault CAN Clip V146 is now Updated to V151

Renault CAN Clip Latest Renault Diagnostic Tool V151 With Multi-language

5 Gründe für Renault CAN Clip kaufen
1.Newest Version:V151
2.Multi-Language
3.Deutsche Version
4.Easy Installation
5.Special for Renault Models

Language

German,English,Brazil,Denish,Spanish,Finnish,French,Italian,Norwegian,Dutch,Portuguese,Romania,Swedish.
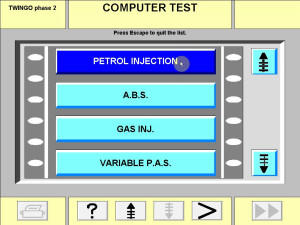
see the following pictures shows.(Picture one shows the optional country; Picture two shows the Language available)

Function

1. See all the information relating to the vehicle
2. Computer test
3. Automatic test of all computers
4. Airbag test
5. Ccantool (OBD tests)
6. Base Doc (access to Technical Notes)
7. Physical measurements
8. Antipollution
9. Multimeter

Renault CAN Clip Crack Steps

1.After finish Installation, DO NOT run your CLiP!!!
2.copy the RSRwin.ext to C:\CLIP_X91\Lib\Application\
3. Then run your CLiP, choose “Register me now” and in the next
Windows,please select “NO“!
4. Use this Key for Registration:

333DEF-111DEF-111DEF-222DEF-221DEF-000DEF


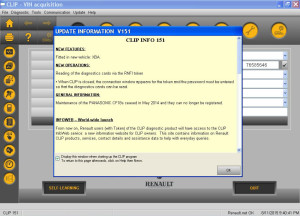
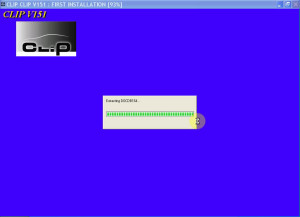
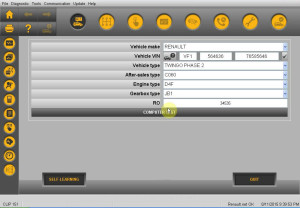
Renault CAN Clip V151 Software Display

renault-can-clip-v151-software-list-4 renault-can-clip-v151-software-list-1 renault-can-clip-v151-software-list-3renault-can-clip-v151-software-list-2

MB SD C4 Was Locked!! How to solve ?

One of customers who bought a MB SD C4 device from us.

But the software compatible with SD C4 is not from us.

When he finished the installation and connected with his models W204.It happened to be locked.

He was sad with the device and dont know how to do it.

After sending email to us with the error message, and according to our engineers’experience. The device must be sent back to repair.

Here is the error message to show the device is locked

Once getting this problem, we can ask factory for repairing. But even if it is repaired well,also can not be used. Because our device only compatible with our software. Or the software from China.

So pls make sure the device and the software are from one supplier.


MB Carsoft v7.4 multiplexer software installation step-by-step

Mercedes Benz Carsoft 7.4 MCU controlled Interface will provide you live data display, ECU information and repair information. Here is the step-by-step software installation guide provided.

Installation procedure

Step 1: Copy the whole Carsoft-MB74 File folder from the software driver CD to your hard-disk driver D or other hard driver. It is more stable and reliable to install the MB Carsoft 7.4 software from hard-disk directly

Step 2:

In the hard-disk driver where you pasted the whole Carsoft-MB74 software, please open the File folder of Carsoft-MB74, then open the file holder of “Step1-MB74-Installer”, double click “SETUP CARSOFT.exe” to run the MB Carsoft software installation part 1.

Step 3:

The MB Carsoft software installation proceeds automatically, click “Next” button for software installation when you see the MB Carsoft V7.4 Welcome surface

Step 4:

The MB Carsoft software installation asking about Software License Agreement, click “Yes” button to proceed the MB Carsoft V7.4 software installation.

Step 5:

The MB Carsoft software installation asking about directory in your hard-disk, you can change the directory or keep the default directory “C:/Program Files/CARSOFT/MB” as it is, then click “Next” button to proceed the MB Carsoft V7.4 software installation.

Step 6:

The MB Carsoft software installation asking about the name of this program, you can change the program name or keep the default name “CARSOFT” as it is, then click “Next” button to proceed the MB Carsoft software installation.

Step 7:

The MB Carsoft V7.4 program will be installed into your computer automatically.

Step 8:

After the MB Carsoft program be installed in your computer, you need to click “Finish” button and select the column of “Restart computer” to finish the software installation part 1, then restart your computer for system recognizing on the MB Carsoft device.

Step 9:

In the hard-disk driver where you pasted the whole Carsoft-MB74 software, please open the File folder of Carsoft-MB74, then open the file folder of “Step2-ST2”, double click “MBv74Stage2e.exe” to continue the MB Carsoft software installation part 2.

Step 10:

After you click “MBv74Stage2e.exe” to continue the MB Carsoft software part 2, the Carsoft-MV V7.4 Stage II Installation surface will be shown up, then click “Start” button to proceed software installation part 2.

Step 11:

Then the software installation surface will show up “Crasoft MB V7.4 Stage II Installed successfully…”, click “Close” button to finish the software installation part 2.

Step 12:

In the hard-disk driver where you pasted the whole Carsoft-MB74 software, please open the File folder of Carsoft-MB74, then open the file holder of “Step3-ST2SP1”.

Step 13:

In the file holder of “Step3-ST2SP1”, you may find “MBV742SP01E.exe”, double click “MBV742SP01E.exe” to continue the MB Carsoft software installation part 3.

Step 14:

After you click “MBV742SP01E.exe” to continue the MB Carsoft software installation part 3, the Carsoft-MB V74 SP01 installation surface will be shown up, then click “Start” button to proceed software installation part 3.

Step 15:

Then the software installation surface will show up “Searching Carsoft files…”, then there is a dialog window shows up “Necessary files not found, (please install MB V7.4 State II first)”, just click “Confirm” button to finish the software installation part 3.

Step 16:

In the hard-disk driver where you pasted the whole Carsoft-MB74 software, please open the File folder of Carsoft-MB74, then open the file holder of “Step4-ST2SP1-crack”, copy all 6 files in this holder.

Step 17:

Then paste all those 6 new files into the file holder of “cm70f” at directory C:/com70f/(this directory was created during the MB Carsoft software installation automatically). The system will ask you if you want to replace old file during pasting those 6 new files into the file holder “cm70f”, click “Yes” button to replace all old files by cracked 6 new files in “cm70f” file holder.

Step 19:

Also, copy all 6 files from the file holder of “Step4-ST2SP1-crack” holder, and paste all those 6 new files into the file holder of “MB” at directory C:/Program Files/CARSOFT/MB as well, similar to step 17-18, you need to replace all old files by those cracked 6 new files in the “MB” file holder too.

Step 20:

In the hard-disk driver where you pasted the whole Carsoft-MB74 software, please open the File folder of Catsoft-MB74, then open the file holder “Step5-crack-other-files”. There are 2 files “CARSOFT74MC Crack.exe” and “MB 7.4 crack.exe” in this file holder.

Step 21:

Copy “CARSOFT74MC Crack.exe” file from the file folder “Step5-crack-other-files”, then paste this “CARSOFT74MC Crack.exe” file into the file holder of “cm70f” at directory C:/cm70f/.

Step 22:

After you pasted the “CARSOFT74MC Crack.exe” file into the file holder of “cm70f” at directory C:/cm70f/, then double click “CARSOFT74MC Crack.exe” to run this cracking program…

Step 23:

The “CARSOFT74MC Crack.exe” program will show up a dialog window, click “PATCH” button to proceed.

Step 24:

After you clicked the “PATCH” button, there is a directory selecting window shown up, select file “CARSOFT74MC.exe” from the file holder of “cm70f” at directory C:/cm70f/, click “Open” button to proceed cracking the MB Carsoft 7.4 program.

Step 25:

After you clicked the “Open” button, the “CARSOFT74MC.exe” file will be cracked, and a “Crack successful” dialog window will be shown up, then click “Confirm” button.

Step 26:

In the hard-disk driver where you pasted the whole Carsoft-MB74 software, please open the File folder of Carsoft-MB74, then open the file holder “Step5-crack-other-files”. There are 2 files “CARSOFT74MC Crack.exe” and “MB 7.4crack.exe” in this file holder. Copy “MB 7.4crack.exe” file from the file holder “Step5-crack-other-files”, then paste this “MB 7.4crack.exe” file into the file holder of “MB” at directory C:/Program Files/CARSOFT/MB.

Step 27:

After you pasted the “MB 7.4crack.exe” file into the file holder of “MB” at directory C:/Program Files/CARSOFT/MB, then double click “MB 7.4crack.exe” to run this cracking program. Similar to step 23 to step 25, the “MB 7.4crack.exe” program will show up a dialog window, click “PATCH” button to proceed.

Step 28:

After you clicked the “PATCH” button, there is a directory selecting window shown up, select file “mb.exe” from the file holder of “MB” at directory C:/Program Files/CARSOFT/MB, click “Open” button to proceed cracking he MB Carsoft 7.4 program.

Step 29:

After you clicked the “Open” button, the “mb.exe” file will be cracked, and a “Crack successful” dialog window will be shown up, then click “Confirm” button to finish the whole cracking procedure.

Step 30:

Then you can run the MB Carsoft 7.4 program now, click “Star” button at the left corner, select “Programs” menu, then select “CARSOFT” folder, click “Mercedes” to run the MB Carsoft program.

Step 31:

Then you can see the MB Carsoft Diagnostic program surface, click “Star MB V7.4S” button to go ahead the MB Carsoft program.

Step 32: Then you can apply full functions of MB Carsoft Diagnostic program with the hardware together.
Digiprog3 compare with Digimaster 3

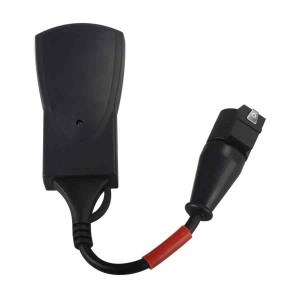
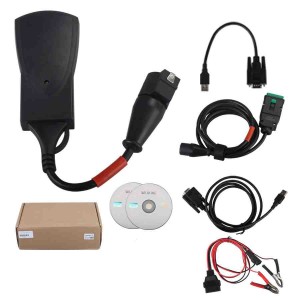
If you want one mileage correction device to do most normal brand cars, you can chooseDigiprog3 is enough. But for the new and high-end cars, you need to use Digimaster 3.
At the same time, if you want to choose one multi-function mileage correction, theDigimaster 3 is the best choice. Digimaster 3 contains the advanced technology of programming new keys for BMW and Benz, CAS-BDM reading/writing and resetting; 35080V6 erasure etc.
Digiprog3 compare with Digimaster 3


Similarity and Difference between CARPROG and FGTech

Item Number CARPROG FULL Without Tokens Limitation&Easy Installation Main Unit of CARPROG FULL
Version 7.28
Update By Email、CD
Language English
Tokens NO Need
Function Support Airbag Reset Well & opel pin code,other functions is not good.(This item is not good for mileage correction and ECU programming, for odometer correction tool, please check Digiprog 3; for ECU Programmer, please check: Fgtech, Ktag or Kess V2)
Tips No Antivirus Progarm, No Internet Connection Before installing Software
Package Main unit+ all cables+ software Only main unit
Difference Completed device Not
FGTech Galletto 4-Master this new system developed with high-speed USB2 technology is the fastest and most secure product on the market. Our system comes furnished complete with all Car, Truck, Motorbyke, Marine, BDM MPCxx , BDM Boot Mode, checksum.
Item Number FGTech Galletto 4 Master BDM-OBD Function CARPROG FULL Without Tokens Limitation&Easy Installation
Software Version 2014 V54 V7.28
Language English, Italian, German, French, Spanish, Portuguese, Czech, Turkish English
Update NO via email
Tokens NO NO
System Windows XP Windows XP
Main Function ECU Programming airbag resetting