Archive | October 2016

MPPS V18 Software Download – 100% working with MPPS eu clone

Free downloads MPPS V18 driver and software here!

MPPS V18 mega link:

https://mega.nz/#!Jo9WSDwZ!a0HJHJlUzhnY4oxf5v-ZZ5_LIlkpr_N34O8jbz3o3iU

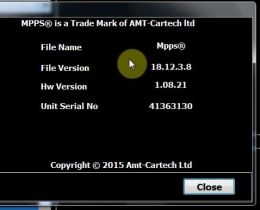
It’s MPPS v18.12.3.8.

Crack version

No need pass

Tested without issues

Safe to use

So, 100% working on MPPS hardware v1.08.21

MPPS hardware v1.08.21:

install-mpps-v18-windows-7-blog-1

Only this version can works with mpps v18 software above

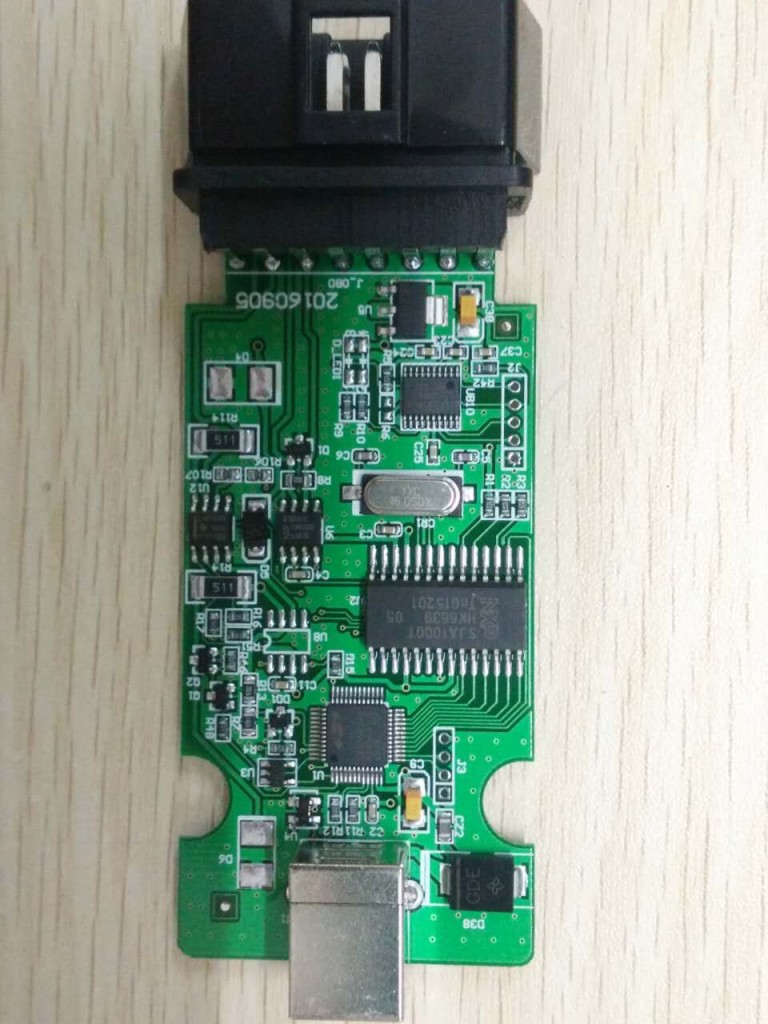
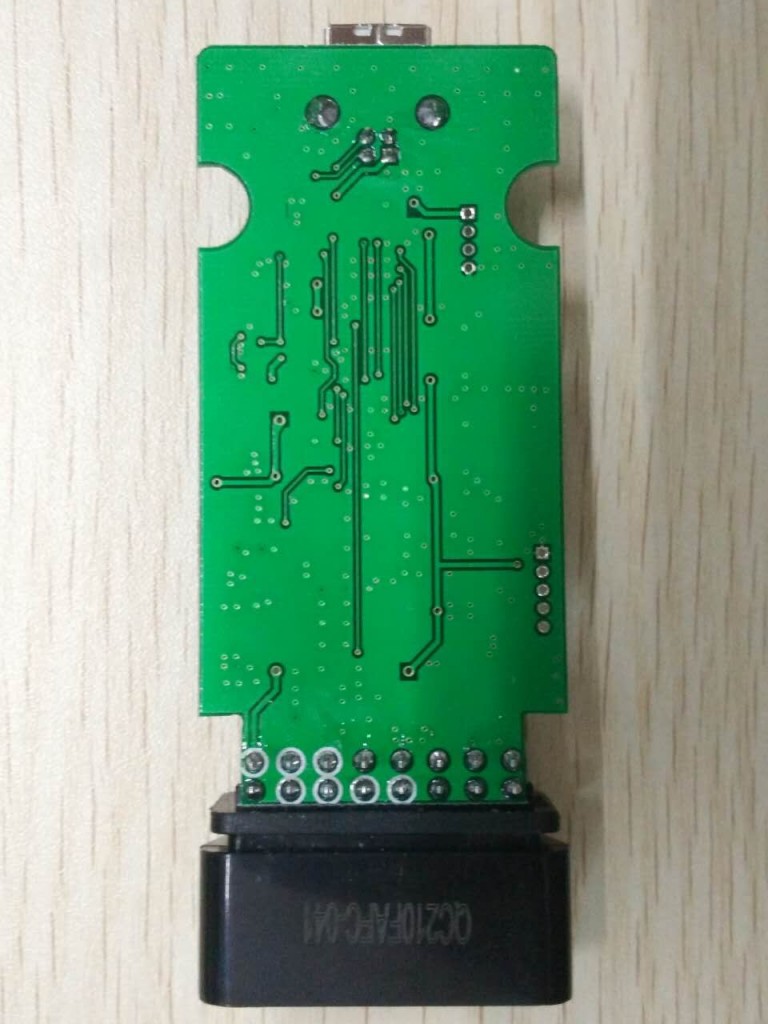
MPPS fw: v1.08.21 printed circuited board:

mpps-v18-pcb-blog-2

mpps-v18-pcb-blog-3

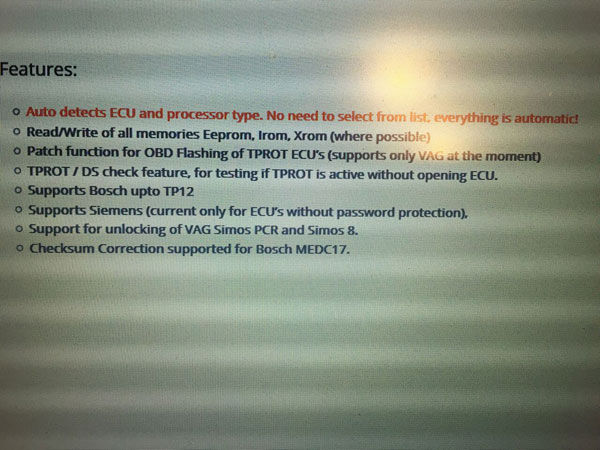
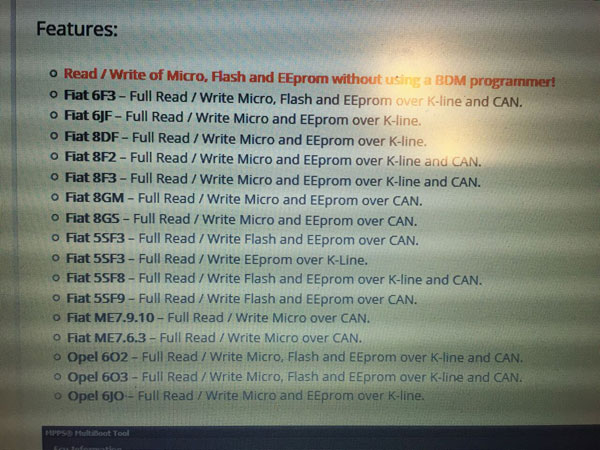
Mpps sw: v18.12.3.8 + fw: v1.08.21= reading / writing ecu(TRICORE + MULTIBOOT) + checksum

mpps-v18-ecu-chip-tuning-tool-blog-4

mpps-v18-ecu-chip-tuning-tool-blog-5
Mpps v18 car list:

https://mega.nz/#!840nybSY!feEzxiZBAswuda8F-9tcwnnZxmZeJcRTE2NSTfYevVI

SuperOBD SKP-900 update to V4.5 No Tokens Limitation

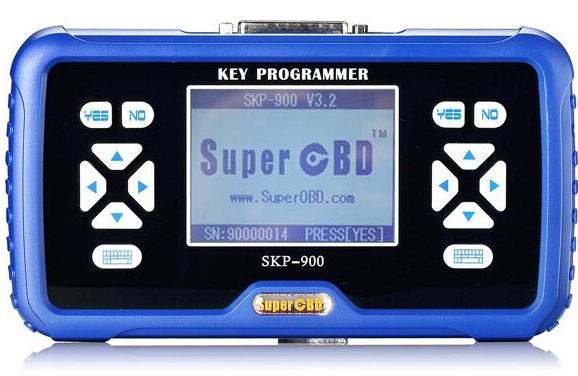
Super SKP-900 Key Programmer is original tool via OBD2,it is support almost all vehicles in the world till year 2015,especially good at USA cars,but not good in Japen Car(Support Toyota G chip).

skp-900-auto-key-programmer-32-blog-1

SKP-900 don’t need pincode and tokens,you can program as many as you can.When programming keys for many vehicles,it can read pin code for some vehicles,but not all,those vehicles can not be read need to get pincode from other place.

Now,the newest version of SKP-900 is V4.5,new update information below:

SKP-900 V4.5 update (22th. Oct 2016):

-Dodge RAM1500 PIN CODE Read by OBD 2006

-Dodge RAM1500 Remote Key Program 2006

-Correction and add Toyota models: SIENNA; ALPHARD; CAMRY; PRADO; RAV4; CROWN; COROLLA; REIZ; LAND CRUISER; VIOS; TUNDRA; HIGHLANDER; EZ; LEVIN; PRIUS; YARIS; PREVIA

Easy to Update Your SKP-900 Key Programmer
 1). Register online with the Dealer Code 1001.
 2). After registering, we will upload your own update file, After that. you will find it in ” My Update” when you log in the Official Website again.
 This period will take about 2 days.
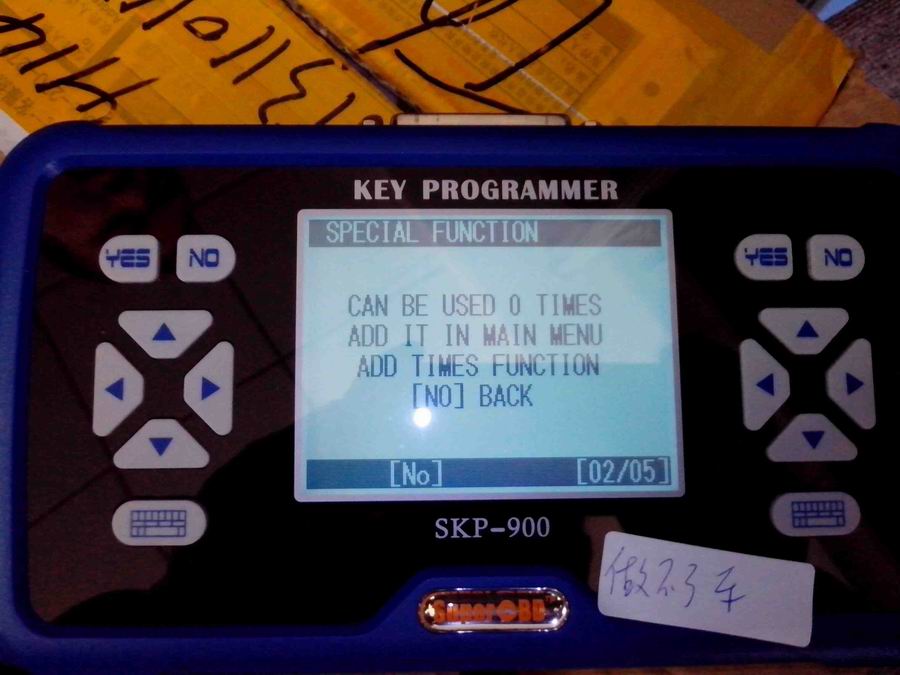
When the error as in pic shown, it means the tokens is used up. Customers need to add tokens .
skp900-tokens-used-up-error-blog-2

Customer Share:

Here is for USA cars:

2013 CHRYSLER 200 – WORKS FINE
2008 DODGE CHARGER – WORKS FINE
2013 FORD EDGE – WORKS FINE
2011-2013 FORD F-150 – WORKS FINE
2013 MUSTANG – WORKS FINE

2012 JEEP COMPASS – WORKS FINE
2008 JEEP WRANGLER – WORKS FINE
2014 KIA RIO – WORKS FINE
2013 KIA SOUL – WORKS FINE
2013 KIA FORTE – WORKS FINE

2009 TOYOTA CAMRY – WORKS FINE, REMOTE + TRANSPONDER SEPERATE PROCEDURE BOTH WORKS
2012-2013 TOYOTA CAMRY – WORKS FINE, REMOTE + TRANSPONDER SEPERATE PROCEDURE BOTH WORKS
2013 TOYOTA HIGHLANDER – WORKS FINE, REMOTE + TRANSPONDER SEPERATE PROCEDURE BOTH WORKS

2002 VOLKSWAGEN GTI – WORKS FINE

2005 – NISSAN 350Z – WAS ABLE TO PULL BCM BUT COULD NOT PROGRAM KEY. I THINK JUST NEED TO PLAY WITH IT LONGER
2013 FORD FOCUS – DOES NOT WORK
2014 FORD FIESTA – DOES NOT WORK

How to Clear Land Rover Evoque Fault Codes via Foxwell GT80

I have successfully used Foxwell GT80 professional diagnostic tool to read and clear fault codes of Rover Evoque 2012, here I will share the process with more guys.

After many weeks of reading and finding sparse bits of information here and there, I finally ordered Foxwell GT80 as my Rover Evoque 2012 fault codes scan tool, it cost me €1070 with free shipping, the price is a little high, but I have used it to diagnostic my car and my friends’, no major problems have been found yet. My friends said that this product could make a lot of unemployed mechanic. Hummm…I think it is right.

All right, let’s go to the detailed procedures:

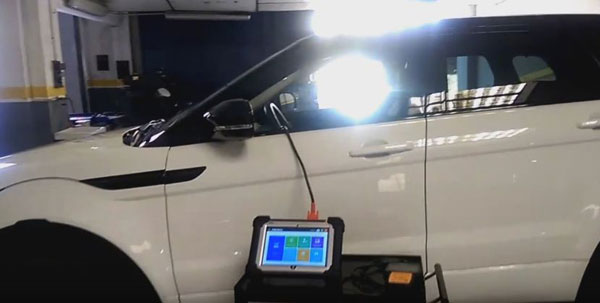
First of all, I connect Foxwell GT80 with my Evoque via diagnostic cable which comes with the GT80.

foxwell-gt80-blog-1
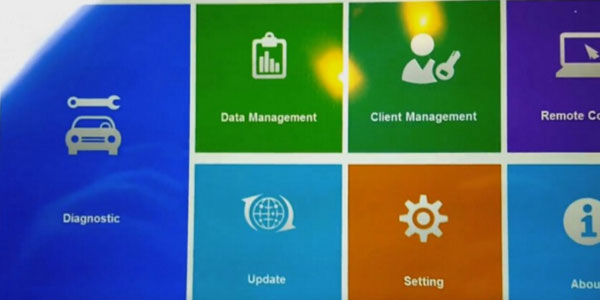
NEXT start the scanner, this is main menu

foxwell-gt80-blog-2

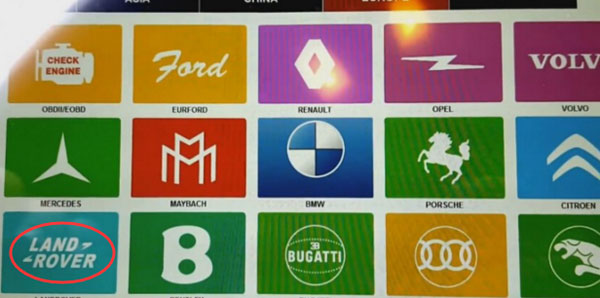
Then Go to Diagnostic -> Vehicle Selection ->EUROPE-> Land Rover

foxwell-gt80-blog-3

foxwell-gt80-blog-4
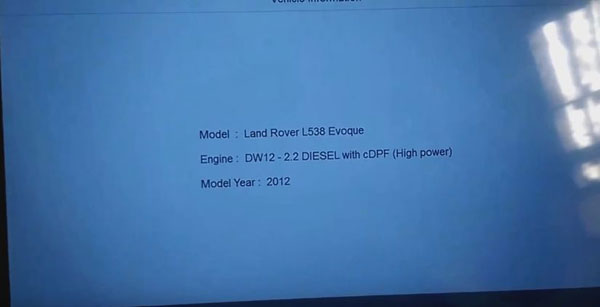
It is establishing vehicle communications. Waiting…

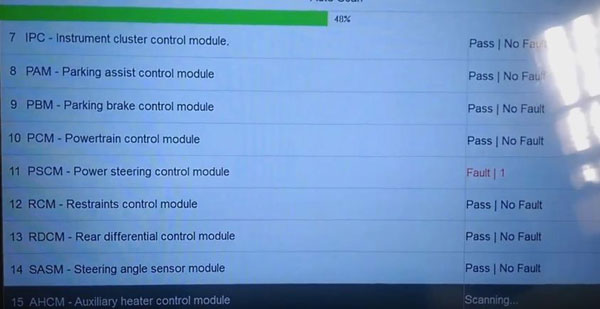
Well, Select Main Groups->Auto Scan

foxwell-gt80-blog-5

Next I Select ABS-ABS control module

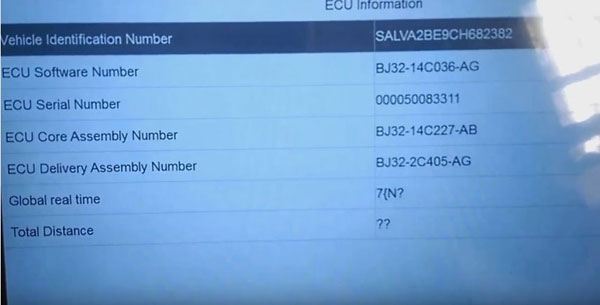
Select diagnostic function->ECU information

foxwell-gt80-blog-6

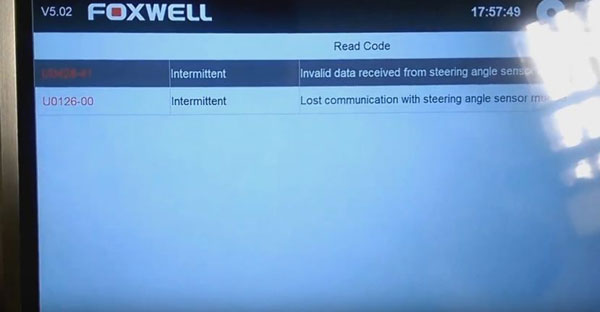
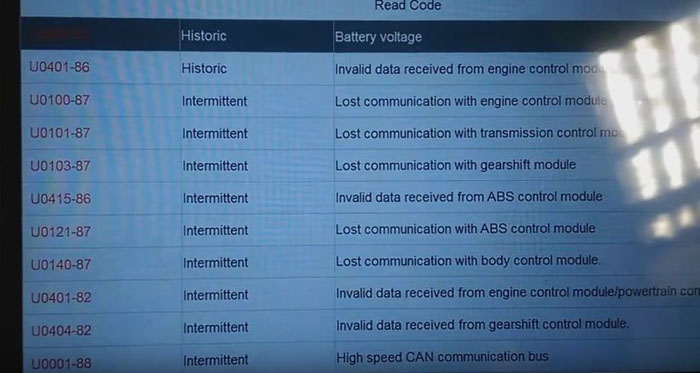
Select diagnostic function->Read Codes

foxwell-gt80-blog-7
And Back to Erase Codes

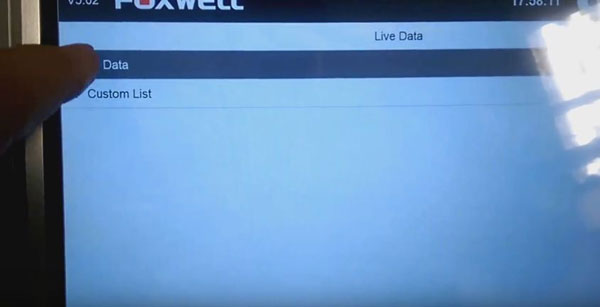
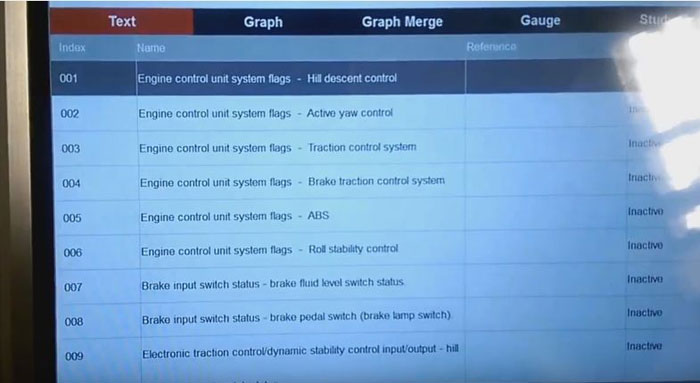
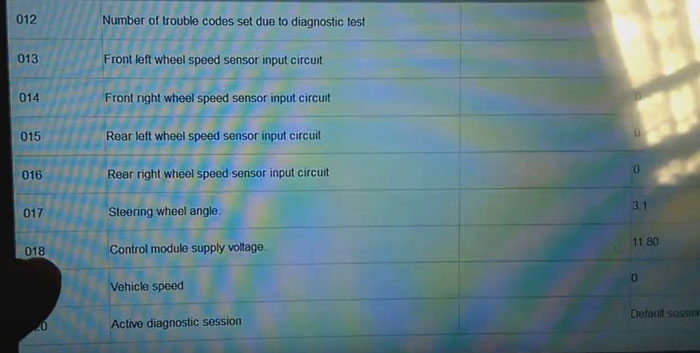
Then I select diagnostic function-> Live Data->All Data to know my car status

foxwell-gt80-blog-8

foxwell-gt80-blog-9

foxwell-gt80-blog-10


Next I Select GSMB-Gearshift module B

And select diagnostic function->Read Codes

foxwell-gt80-blog-11


After reading completely, back to Erase Codes

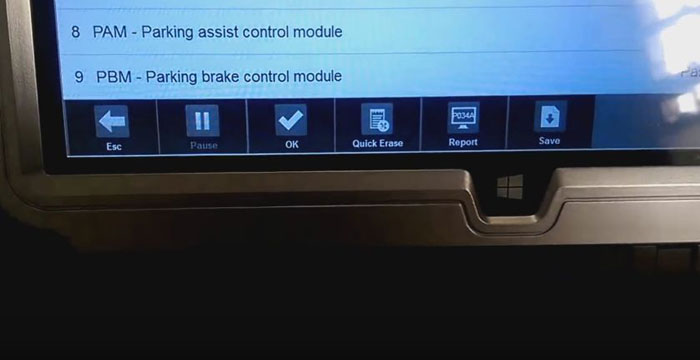
Select Quick Erase

foxwell-gt80-blog-12
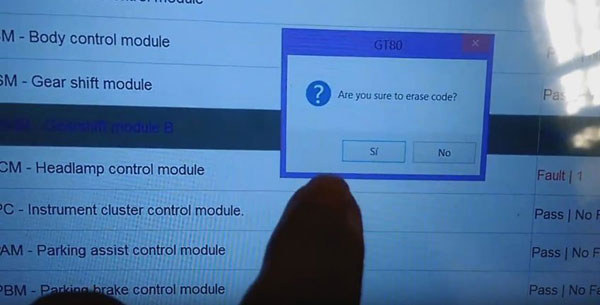
Are you sure to erase code? Yes

foxwell-gt80-blog-13


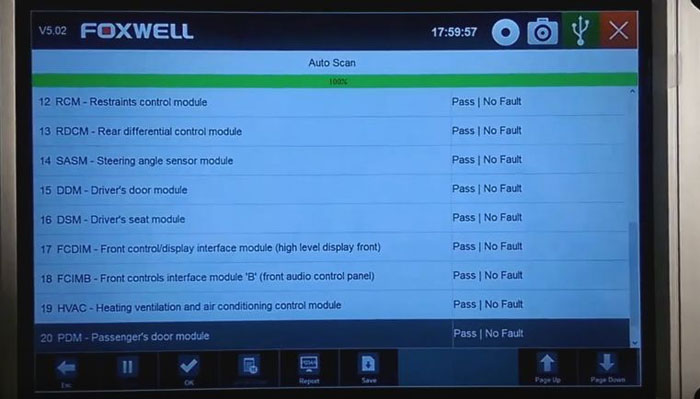
Finally, I select Main Groups->Auto Scan again to confirm the fault codes are erased.

foxwell-gt80-blog-14

Done! It is simple to operate.

Benz AK500 Key Programmer Smartkey.exe Problem Solutions

Here are the customer solutions to Mercedes Benz AK500 key programmer not running smartkey.exe problem. Hope it help if you are looking for the solution. YOU ARE AT YOUR RISK.

Problem:

When I install software everything was work properly. After some time, I try open and write key, but not starting smartkey.exe or which can’t write nec I.C, just in this moment I hear a beep windows error sound… any ideas?

I install ak500 software on Windows XP SP3 without any anti virus program.

Customer solutions:

Solution 1:

The first attempt:
Still have problems with smartkey.exe

i installed it on win7 ultimate 64 bit and everything works as it should, but cann’t get it to work on xp sp3 32bit, installed the xp fresh and the ak500+ software when it starts doesn’t even search for the hardware.. but smartkey.exe when started from installatin folder works now.. The main window pops right up and only firmware update is availible. Drivers are correctly installed and in device manager is also everything ok, tried com 1, 2 and 3.. same

Second attempt:

I struggleed with this issue for a quite of time. Ok you can make a few things here. A forum member helped me to solve that. I had to use win xp SP2, and he sent me the software for ak500, not ak500+ !! The installation is different and when you install the ak500 software it adds some files wicj the ak500+ install didn’t. So after that smartkey.exe did work and when i started ak500+ also. So it was something missing in the install that i got with my device. BUT i figure it out that i need smartkey.exe ONLY for writeing the nec in the zif socket. But what i did not try and what sure has to work also without smartkey.exe was soldering the virginised nec on the key pcb and write the key via IR port !

So try that mate but the install of the old ak500 software should solve your issue.

(If you need the old AK500 software, please contact your dealer)

Solution 2:

Install fresh xpsp3 black edition, apply all patches of this xp, install ak500 software, install drivers and smartkey will work.

Solution 3:

All Ak400 and Ak500 software work, but

1. SmartKey program start only on IDE hdd, no any other work!
2. have problem with comport some time not found, this come after clear driver installation
3. for ak500 ESL 203 use any drive (local, usb) but Volume must be AK500

FIY:

Program new key on MB w203 with AK500 key programmer

Step a) open eis if the mcu is hc07 familly then desolder the first one .
Step b) Put it in the ak500 holder , be carfull with the point of the chip .
Step c) Choose the correct mask in software for the mcu .
Step d) Read the mcu and save the file .
Step e) Open the skc and load the bin file that you read .
Step f) Choose the key number that you see free.
Step g) Solder the mcu back in eis .
Step i ) Write the key if is new by infarent holder .
Step k ) Put the key in eis and start the car

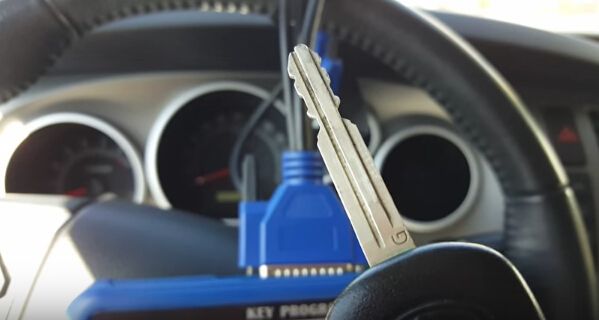
How SKP900 Key Programmer add Toyota G chip and H chip key?

This blog is going to show you how to use SuperOBD SKP900 Key Programmer program Toyota G chip key and Toyota H chip key. This guide is tested on 2015 Toyota Sequoia (G chip) and 2014 Toyota Corolla (H chip). Hope it helps you!

How SKP-900 Key Programmer program Toyota G chip key?

skp900-program-toyota-g-chip-h-chip-key-blog-1

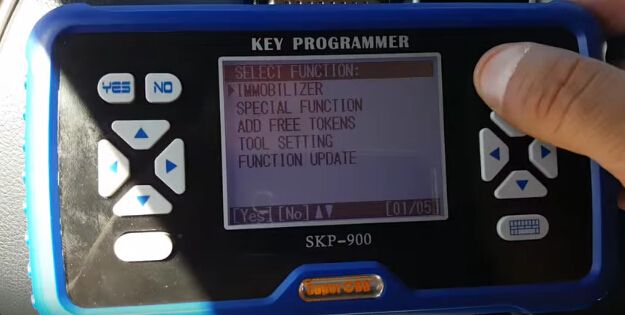
First, start SKP900 and select “Immobilizer” function

skp900-program-toyota-g-chip-h-chip-key-blog-2

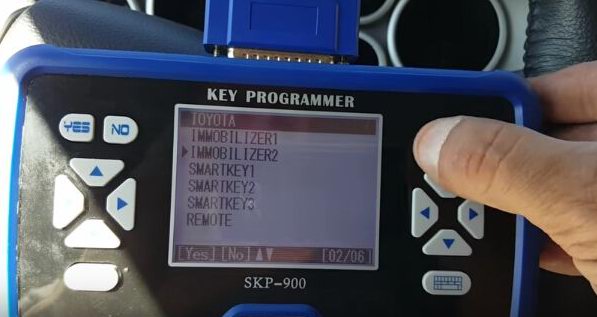
Choose “Toyota” then “Immobilizer 2”

skp900-program-toyota-g-chip-h-chip-key-blog-3
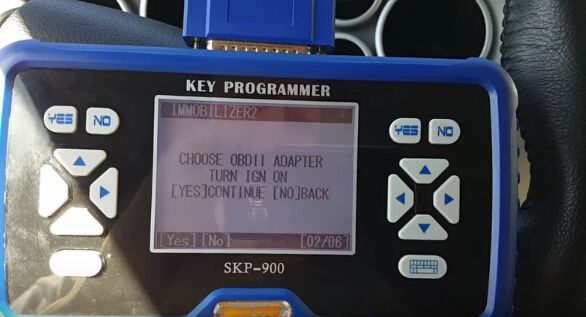
It will show “Choose OBD2 adapter, turn ignition on”, then turn ignition on with the original key. Press Enter button and wait for it is communicating.

skp900-program-toyota-g-chip-h-chip-key-blog-4
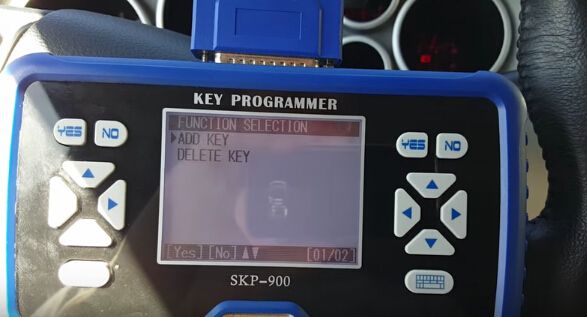
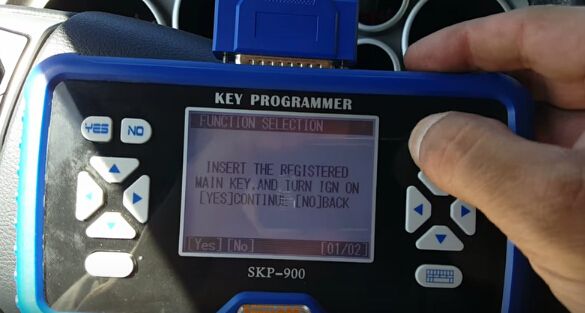
Next, select “Add Key” then it will show “Insert the registered key and turn ignition on”, press the Enter button to continue.

skp900-program-toyota-g-chip-h-chip-key-blog-5

skp900-program-toyota-g-chip-h-chip-key-blog-6
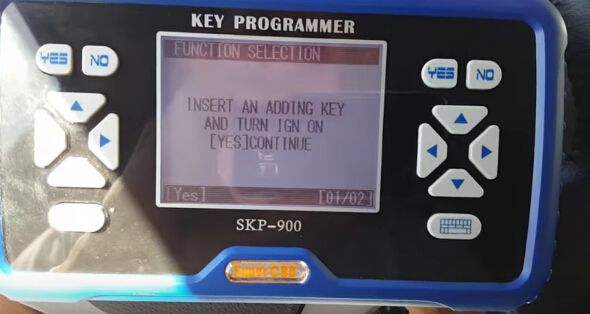
Then, it will ask you to “Insert an adding key and turn ignition on”, so insert the new Toyota G chip key and press Enter button.

skp900-program-toyota-g-chip-h-chip-key-blog-7
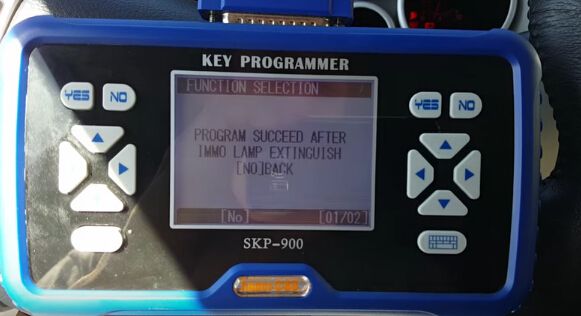
Now just wait the immobilizer light go off for about one minute. After the IMMO light is off, the new key is programmed successfully!

skp900-program-toyota-g-chip-h-chip-key-blog-8
How SKP900 Key Programmer program Toyota H chip key?

The procedure is same as SKP-900 programming G chip key. You can follow G chip key programming to add Toyota H chip key.

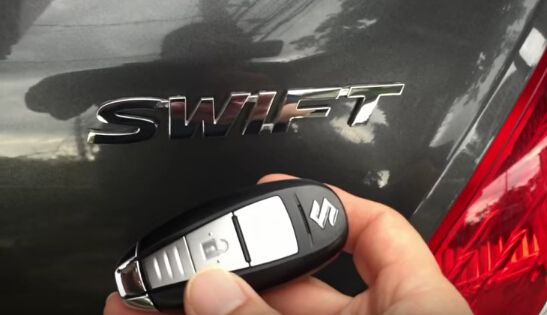
OBDSTAR X300 PRO3 program SUZUKI Swift 2013 key without pin code

This blog is guide for using OBDSTAR X300 PRO3 Key Master to program smart key for SUZUKI Swift 2013 without need pin code. Following step by step below will make you a successful key programming in 3 minutes!

obdstar-x300-pro3-make-suzuki-swift-key-without-pincode-blog-1

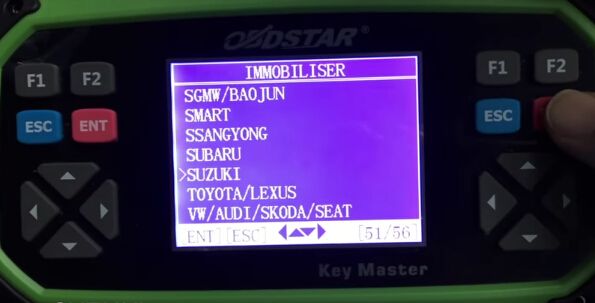
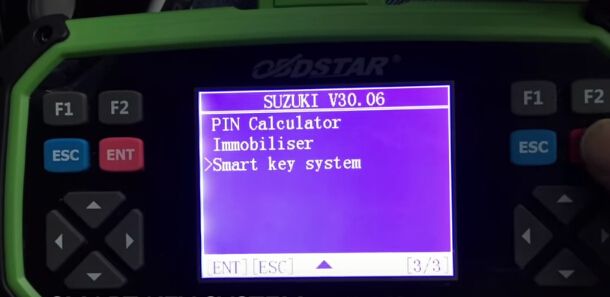
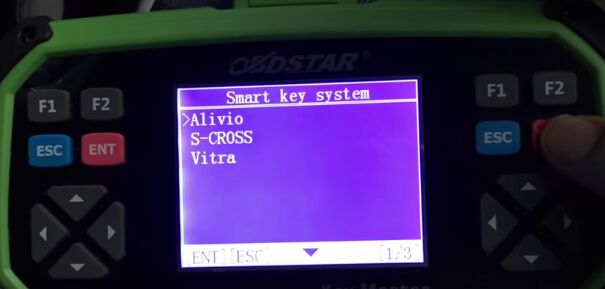
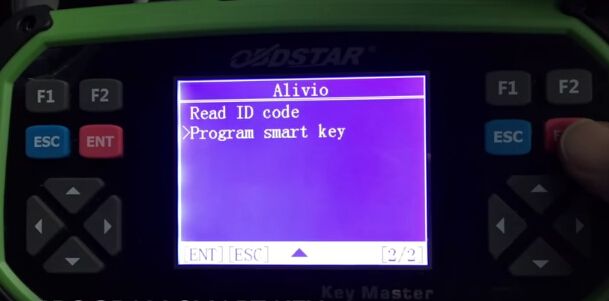
Step1. Let’s start from Immobilizer menu: Choose “SUZUKI” then “SUZUKI V30.06” then “Smart Key System” then “Alivio”.

obdstar-x300-pro3-make-suzuki-swift-key-without-pincode-blog-2

obdstar-x300-pro3-make-suzuki-swift-key-without-pincode-blog-3

obdstar-x300-pro3-make-suzuki-swift-key-without-pincode-blog-4

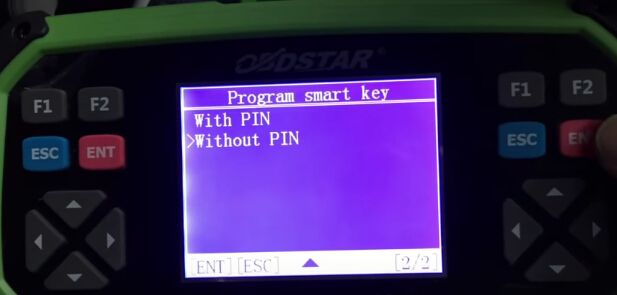
Step2. Select “Program smart key” function then choose “Without PIN”

obdstar-x300-pro3-make-suzuki-swift-key-without-pincode-blog-5

obdstar-x300-pro3-make-suzuki-swift-key-without-pincode-blog-6

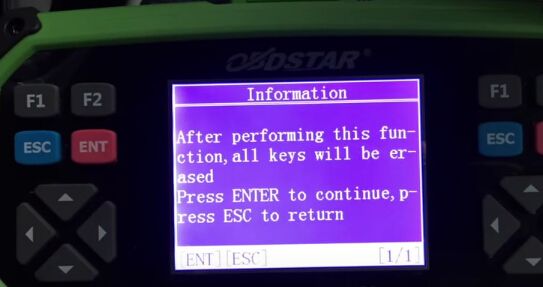
Now OBDSTAR Key Master will remind you all key will be erased. Press the Enter button to continue and wait.

obdstar-x300-pro3-make-suzuki-swift-key-without-pincode-blog-7

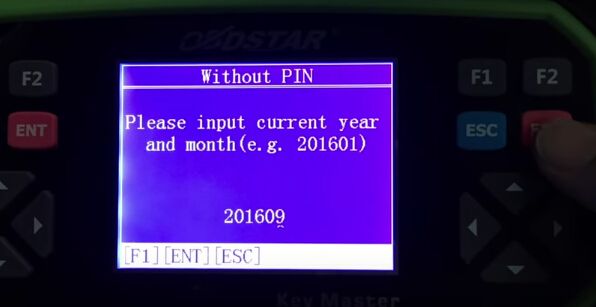
Step3. Now the security light will blink. Input the current year and month, for example 201609.

obdstar-x300-pro3-make-suzuki-swift-key-without-pincode-blog-8

Step3. Now the security light will blink. Input the current year and month, for example 201609.

obdstar-x300-pro3-make-suzuki-swift-key-without-pincode-blog-9
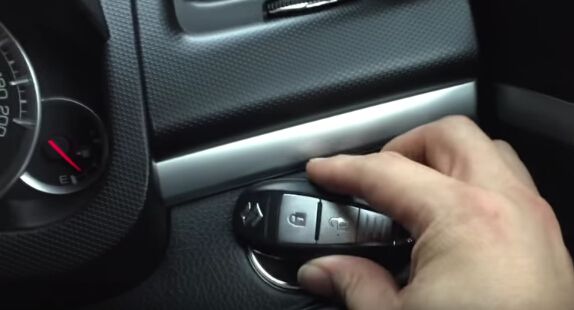
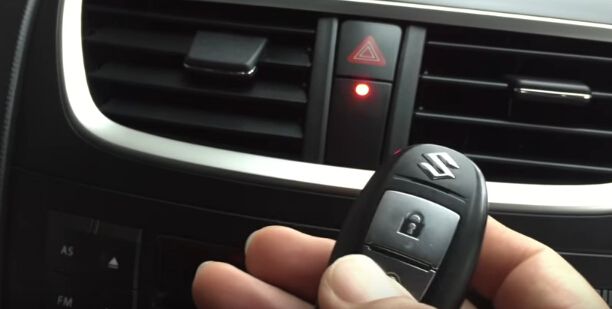
And put smart key close to car’s start button.

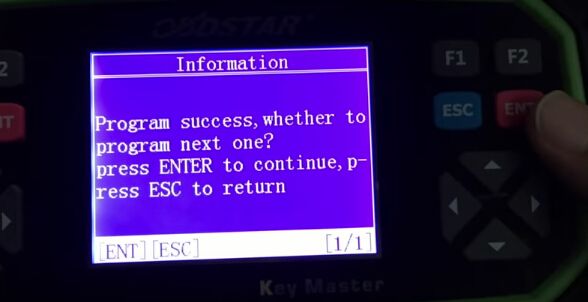
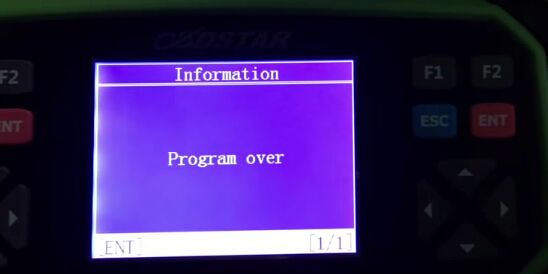
Press the Enter button. Now you should hear 2 beeps to registered key. Security light is also off. It will show “Program success, whether to program next one?” Press the ESC button to quit. Now it will show “Program over” that means OBDSTAR X300 PRO3 successfully make a smart key for SUZUKI Swift 2013!

obdstar-x300-pro3-make-suzuki-swift-key-without-pincode-blog-10

obdstar-x300-pro3-make-suzuki-swift-key-without-pincode-blog-11

obdstar-x300-pro3-make-suzuki-swift-key-without-pincode-blog-12

M100 Key Programmer Review & How-to

Here is the new customer feedback on TM100 key programmer (basic module 419.99EUR) after 3 months of use.

Part I: TM100 What worked and failed

Let’s get to the point, following car models I tested OK with TM100:
Nissan Tiida 2010-2012 x 6 (all OK)
2012 Nissan versa OK
Fiat Palio 2006 Delphi OK
Delphi Fiat Doblo 2007 OK
Chevrolet Sonic 2012 OK (use module Astra J)
Chevrolet Sail (x2) 2012, 2014 OK (use module Chevrolet Aveo 93C56) (work but leave a bug in the dump)
Mitsubishi L200 2008 and 2013 OK (pen drive and ETACS)
Great Wall Haval Delphi 2012 IMMOBOX OK
2014 Subaru Forester OK (same module Subaru XV)
Subaru Tribeca 2008 OK
Toyota corolla 2013, OK (programmed with original key)
Symbol Renault and Nissan Platina (X3) OK (remote program control OK)

Following car models I tested NOT OK with TM100:

Nissan QASHQAI 2010 unprogrammed
Do not unlock proximity Lexus Control
My personal review on this TM100:

In general I am happy with this TM100 transponder programmer, but I also found some problems:

Slowness chips reading
Lack of information for programming
Actually I have also seen some negative comments, which exaggerate and degrade the real value of this equipment. In my opinion, everybody knows TM100 is not Tango, and compare tm100 with Tango things is not fair, you always pay for what you get. And this TM100 did what it should do for me, so I share my experience here.
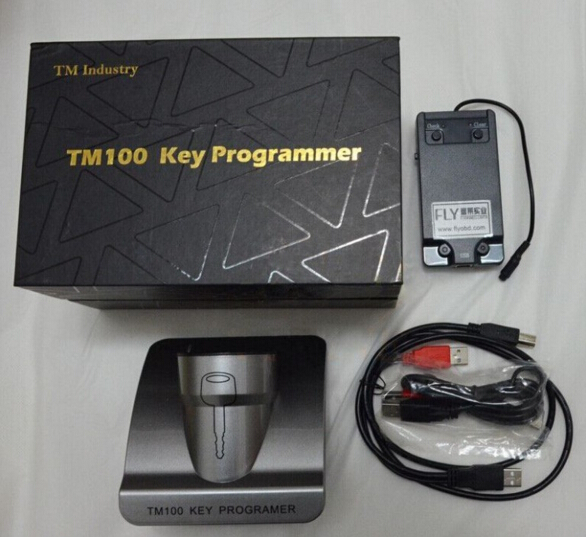
tm100-key-programmer-review

Part II: TM100 How-to guide:

How to edit odometer for BMW CAS4, CAS4+?
1.First, select Tools→ Dump Editor→ BMW→CAS4 odometer setting.

2.Open dump file, current odometer value is displayed, input new odometer value, and set new value.

3.Save new generated file and write it back to CAS4.

How to save ISN for BMW?
1.Select key maker for BMW CAS3+ adding key.

2.After original key decoded, TM100 will save 16-byte ISN for you.

3.If the same car lost all keys, you can use the saved ISN to do all key lost without reading ISN from DME.

How to save ISK for BMW?
1.Select key maker for BMW CAS4+ adding key.

2.After original key decoded, TM100 will save 16-byte ISK for you.

3.If the same car lost all keys, you can use the saved ISK to do all key lost without reading ISK from DME.

How to clone TIRIS 4D?
1.Select Tools→ Clone→ Tiris 4D.

2.Connect TM100 key cloner to PC.

3.Put original key into coil of TM100 key programmer to decode.

4.If decode success, put YS01/TPX2/EH2 transponder into coil of TM100 key programmer.

How to clone HITAG2?
1.Select Tools→Clone→PCF7936.

2.Collect signature data: put sniffer antenna of TM100 key cloner near ignition, turn ignition on by original key. If collect success, red LED will blink once. If not, collect data again.

3.Connect TM100 key cloner to PC.

4.Put original key into coil of TM100 key programmer to decode.

5.If decode success, put YS21/GMT46 transponder into coil of TM100 key programmer

How to copy MEGAMOS ID13?
1.Select TP Reader, click “MEGAMOS 13”.

2.Put original ID13 chip into coil, click Read.

3.Put T5 into coil, click Write.

How to copy TEMIC 8C?
1.Select TP Reader, click TEMIC 8C.

2.Put original 8C chip into coil, click Read.

3.Put TK5561 into coil, click Write.

How to make VAG dealer key by 7-byte CS?
1.Select TP Reader, click “MEGAMOS 48”, click button “Dealer key by 7-byte CS”.

2.Input 7-byte component security, select brand, put new key into TM100 coil.

3.Click button “Make dealer key”.

How to search the 7th byte for VAG?
1.Select TP Reader next click “MEGAMOS 48” then click button “Search 7th CS”.

2.Input 6-byte component security, select brand and put the working key into coil.

3.Click button “Search”.

How to edit ID46 transponder IDE?
1.Select TP Reader, click “PCF7936”.

2.Input 4-byte IDE at P0, click button “Write”.

How to unlock key for BMW?
1.Select Tools→ Unlocker→ BMW→ Unlock HITAG by CAS dump.

2.Open CAS dump file, put key to be unlocked into coil and click button “Unlocker”.

How to unlock key for VW, Passat B6?
1.Select Tools→ Unlocker→ VW→ Passat B6→ Comfort Module, Unlock HITAG by 95320.

2.Open 95320 dump file, put key to be unlocked into coil and click button “Unlocker”.

How to synchronize CEM and ECU of Volvo?
1.Open TM100 software, select “Tools”, select “Dump Editor”, select Volvo, CEM+ECU.

2.Open dialog, open CEM and ECU dump file, check and make synchronization.

How to calculate Nissan 20 digit Pin Code?
1.Open TM100 software, select “Tools” then select “Calculator”.

2.Open dialog, input 20-digit Pre-PIN, click “Calculate”.


How to solve JLR Mangoose SDD Problem “cannot read VIN”

jlr-mangoose-for-jaguar-and-land-rover-blog-1

Problem description:

When install JLR Mangoose SDD diagnostic software for Jaguar and Land rover on windows XP laptop, the program runs well, but unable to read Jaguar or Land rover vehicle VIN. SDD “Manual VIN read” failed either.
The Mangoose cable can be detected by computer because the green indicator light flashes. But when loaded SDD both green and red indicator flashed. Try to install on different clean (none-anti-virus software) XP laptop, all fail to read VIN.

Solution (offered by one of the JLR SDD users):

1.Uninstall the previous JLR SDD drivers on the computer.
2.Download the new drivers from the Drewtech website (only fits for 32bit system) and update the firmware on the Mangoose.
3.Install the new downloaded driver and connect the Mangoose cable with vehicle.
4.SDD will be able to recognize vehicle VIN
5.If the method fails, perhaps your vehicle model is not supported by JLR SDD diagnostic software.

ALLSCANNER CLOUD DIAGNOSTICS INSTALLATION STEP

ALLSCANNER Cloud diagnostics Installation Step

Note:Recommended using Microsoft WIN7 or more of the system. Computers are required to install the Microsoft IE11 browser or Google.
Android and IOS systems are not supported
for the time being。

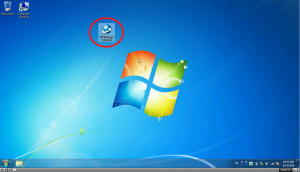
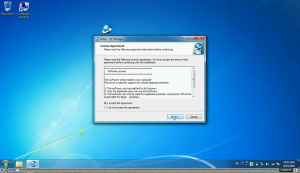
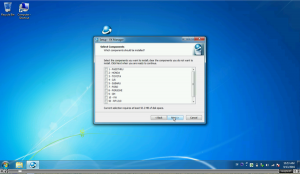
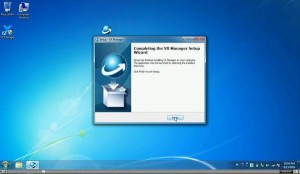
1.Installation of ALLSCANNER device driver
management“VX MANAGER”;

1

2

Here nothing to choose, directly point “NEXT”
go down

3

4

5
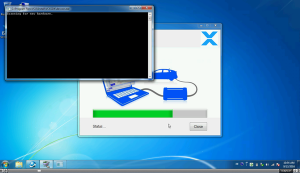
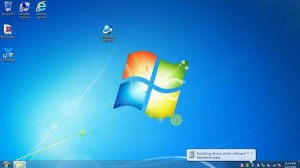
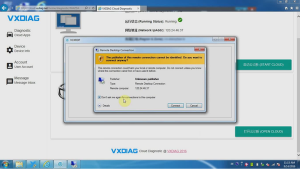
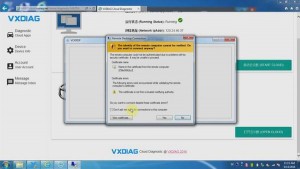
2.Connected to the diagnostic equipment, the
computer automatically install the driver

6

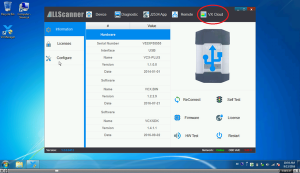
3.The driver installed after open the “VX MANAGER”,
select the top menu VX CLOUD”;

7
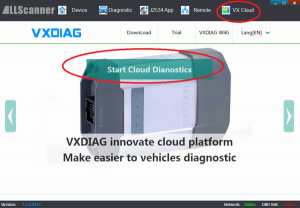
Point open “start cloud diagnostics” will automatically
open the default browser, enter the cloud diagnostics

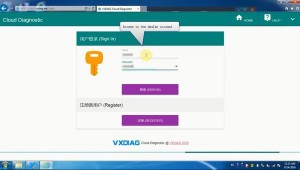
page, enter the dealer to the account and password;

8

9

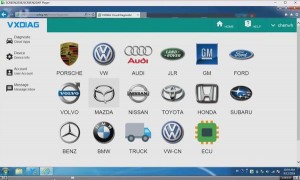
4.Select the required models in the main interface
Icon

10

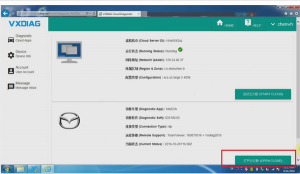
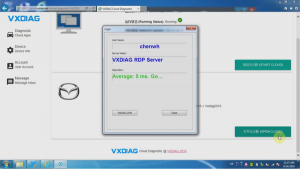
Select “Open Cloud diagnostics” and enter the cloud
server(Note: to enter the cloud server must be
connected to the device);

11

12

13

14

15
5.Open diagnostic software for vehicle diagnosis

16

17

18