OBDSTAR X300 PRO3 VS OBDSTAR DP in the term of function:
PS: Both OBDSTAR DP and OBDSTAR X300 PRO3 are available with standard package and full package.
Basic diagnostic system for Engine, Transmission ABS, airbag:
–OBDSTAR DP Standard Package is ok
Full system diagnosis:
-So far OBDSTAR DP Full Package can perform full system diagnosis on only Japanese and South Korea vehicles, other vehicles will be added in 2017.
OBDSTAR X300 PRO3 does not include diagnostic system yet.
Details on Multilanguage OBDSTAR X300 DP Android Tablet:
Full Package: Function incl. Immobilizer+ odometer adjustment+ EEPROM/PIC adapter+ OBDII+ ABS+ TPS+ SRS reset+ TPMS(low tire)reset+ Steering angle reset+ CVT learning/Value reset+ EPB+ Oil/service reset+ Battery matching+ full system Diagnosis(Japanese and Korean vehicles)
Standard package function incl.: Immobilizer+ odometer adjustment+ EEPROM/PIC adapter +OBDII
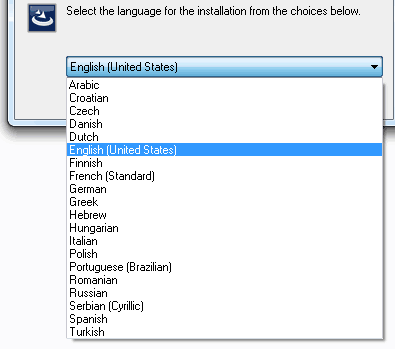
Language
English, simplified Chinese, traditional Chinese, language customization.
Update
One key upgrade; free update for one year
Features
Read and clear fault codes;
Clear key memory;
Program keys, proximity keys, smart key, flip keys;
Program after-market and OEM keys;
Display live data;
Component actuation;
Read keys from immobilizer memory
New ECU programming;
New mechanical key number programming;
Vehicle identification key programming;
Reset ECU& Reset immobilizer;
New remote controller programming;
Immo PINCODE reader;
Mileage adjustment via OBD;
With full and strong database for the most important vehicle makes;
VCI diagnose
One key upgrade via WIFI
Remote assistance
Built-in repair video
Report center
EEPROM chip read and immobilizer initialization;
EPB(Electric park brake);
Oil/Service reset;
Battery matching;
ABS
TPS
SRS reset
TPMS(low tire)reset
Steering angle reset
CVT learning/Value reset
EEPROM/PIC adapter
OBDII
Diagnosis
Vehicle coverage
BAIC, BENZ, BESTURN, BMW, BRILLIANE, BYD, CHANGAN, CHANGHE, CHERY, CHRYSLER(CHRYSLER/DODGE/JEEP), DFFENGSHEN, DFPV, FAW, FIAT, FORD/LINCOLN, GEELY/HUAPU/SQYL, GM(BUICK/CADILLAC/CHEVROLET/GMC/HUMMER), GREATWALL, HAFEI, HAWTAI, HIMIKO, HNMAZDA, HONDA/ACURA, HONGQI, HYUNDAI, ISUZU, JAC, JAGUAR, KIA, LANDROVER, LIEBAO, LIFAN, LUFENG, LUXGEN, MASERATI, MAZDA, MITSUBISHI, NISSAN/INFINITI, OPEL, PEUGEOT/CITROEN, PORSCHE, PROTON, QQROS, RENAULT, ROEWE/MG, SGMW, SMART, SSANGYONG, SUBARU, SUZUKI, TJFAW, TOYOTA/LEXUS, VW/AUDI/SKODA/SEAT, YOUNGLOTUS, ZZMAZDA, ZZNISSAN, ZOTYE;
Note: There would be some difference to software in different countries. If need more specific information, pls feel free to contact us or our distributors in your area.