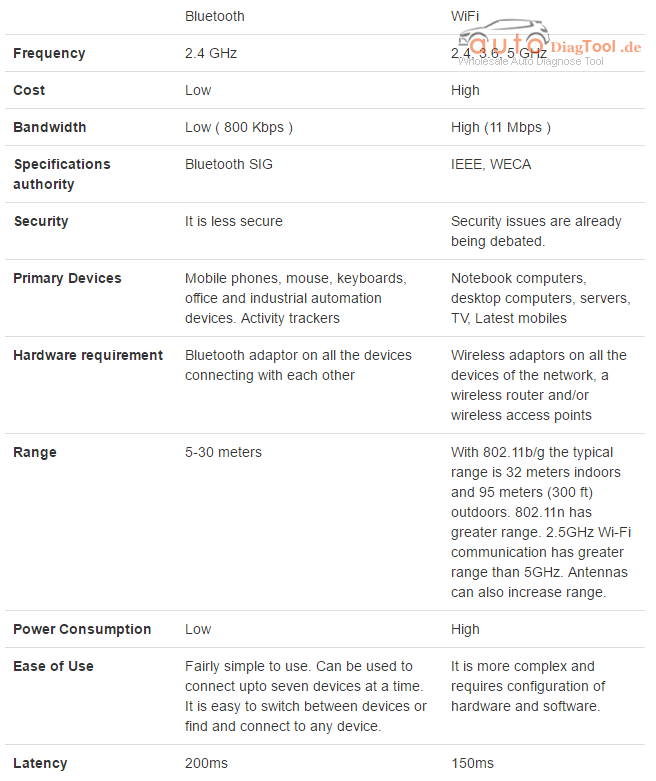
Wi-Fi version VS Bluetooth version
Bluetooth and WiFi are different standards for wireless communication.
Bluetooth technology is useful when transferring information between two or more devices that are near each other when
speed is not an issue,such as telephones,printers,modems and headsets.It is best suited to low-bandwidth applications
like transferring sound data with telephones(i.e. with a Bluetooth headset)or byte data with hand-held computers(transferring files)
or keyboard and mice.
WiFi is better suited for operating full-scale networks because it enables a faster connection,better range from the base station,
and better wireless security(if configured properly)than Bluetooth.
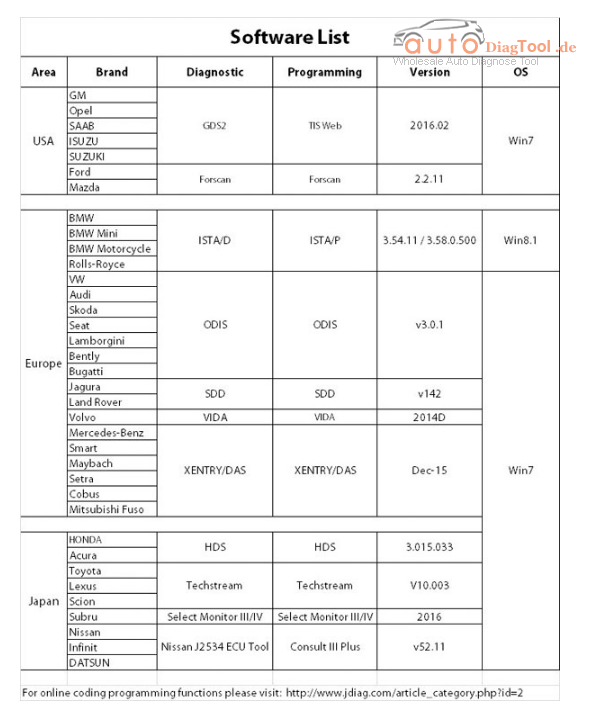
Vpecker Easydiag V8.1,which version better for diagnosis? Please refer the chart below for more specification to make a decision.