Tag Archive | x431 pro5

Connection Methods for Launch X431 Diagnostic Tools

Connection Methods for Launch X431 Diagnostic Tools

Method 1: Connection for Launch X431 Pro5

Connection-Methods-for-Launch-X431-Diagnostic-Tools-1

Device: Launch X431 Pro5
Connection: Micro USB to tablet
Details: For older X431 Pro5 models using the Smartlink VCI, connect via a USB cable (Type A to Type B).
Note: An additional DoIP cable is required for this method.
Method 2: Connection for Launch X431 Pro3 LINK

Connection-Methods-for-Launch-X431-Diagnostic-Tools-2

Device: Launch X431 Pro3 LINK
Connection: Standard Link connection
Details: Uses the default connection setup provided with the device. Ensure all necessary cables are present.

Method 3: Connection for Launch PAD VIII V2 LINK

Connection-Methods-for-Launch-X431-Diagnostic-Tools-3

Device: Launch PAD VIII V2
Connection: Standard Link connection
Details: For models like the PAD VIII V2, no extra DoIP cable is required. The device supports built-in communication protocols.

Method 4: Connection for Launch X431 Pro3, ACE, and Pro3 APEX

Connection-Methods-for-Launch-X431-Diagnostic-Tools-4

Device: Launch X431 Pro3, ACE, Pro3 APEX
Connection: DBScar VII+ adapter cable
Details: This method applies to newer tablets equipped with the DBScar VII adapter.
Method 5: Connection for Launch X431 PAD III/PAD VIII V2
Device: Launch X431 PAD III, PAD VIII V2
Connection: Y-splitter cable to RJ45
Details: This method integrates the DoIP protocol using the PCS 4 system. No additional DoIP cable is required.
General Information:
DoIP (Diagnostics over Internet Protocol) uses Ethernet as the communication medium, offering high-speed vehicle diagnostics.
Supported by manufacturers like BMW, Jaguar, and Volvo.

How to configure the online programming function for Launch X431 PAD VII/X431 Pro5

How to configure the online programming function for Launch X431 PAD VII/X431 Pro5

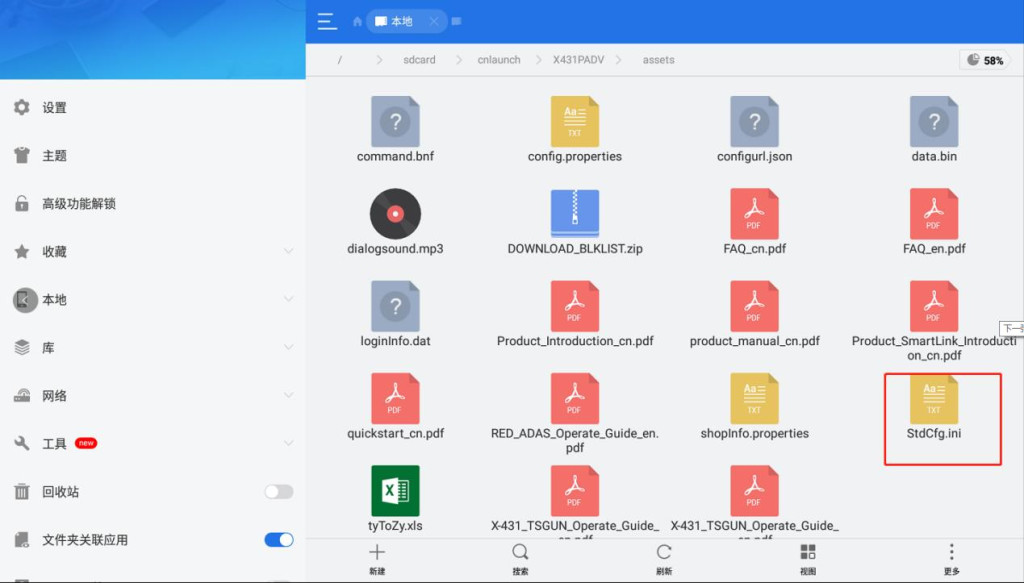
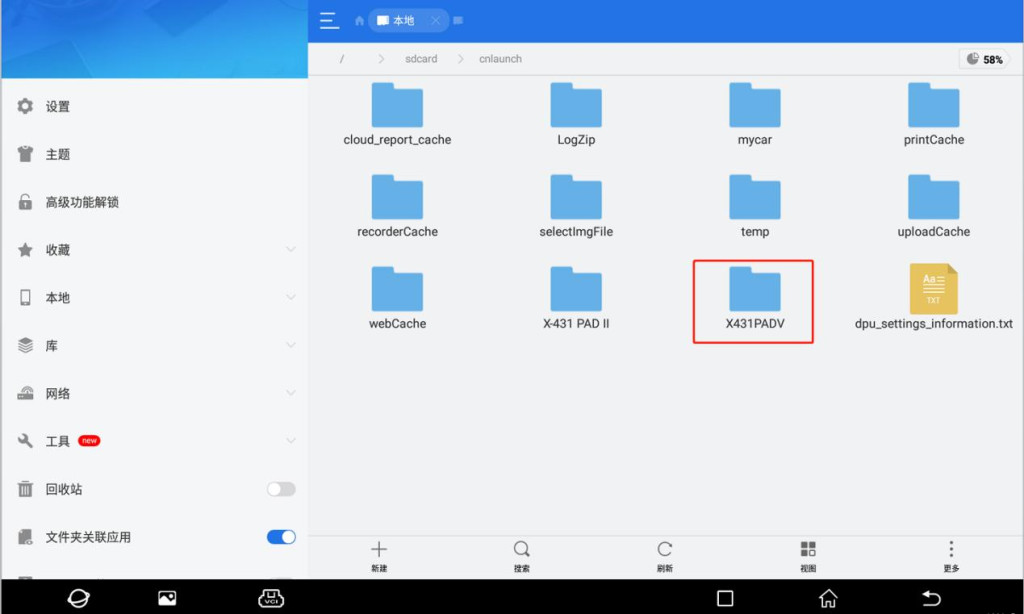
Firstly,Go to Other – Device – File Management – cnlaunch folder – X431PADV – assets directory and find the file named StdCfg.ini.

online-programming-configuration-1

online-programming-configuration-2

online-programming-configuration-3

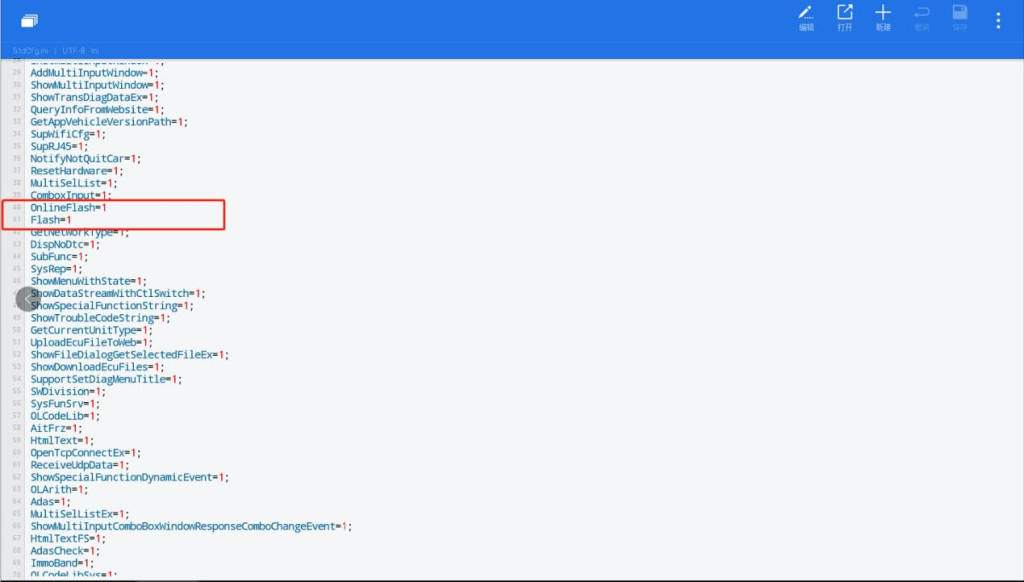
Open StdCfg.ini with a text editor, click the edit button on the upper right to put the file in editing mode, find the fields OnlineFlash and Flash, the default value is 0, which means the diagnostic software does not support online programming, click the corresponding field, and change the value to 1, then save. After successful saving, the corresponding value will change to 1, as circled in the figure below, indicating that the diagnostic software can support online programming function.
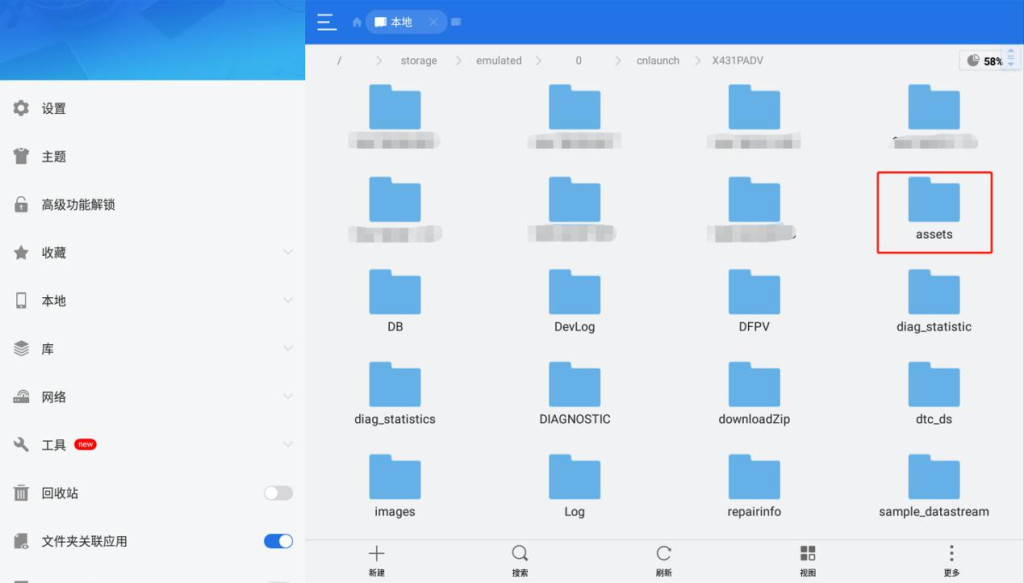
online-programming-configuration-4