BMW M4 FEM 433MHZ key program with CGDI Programmer

A brief instruction on how to program BMW M4 FEM 433MHZ key with CGDI BMW Programmer.

This is BMW M4 with FEM system.

bmw-m4-fem-433mhz-key-program-with-cgdi-programmer-pic-1

Remove the FEM module from the BMW.

bmw-m4-fem-433mhz-key-program-with-cgdi-programmer-pic-2

Prepare 433MHZ blade key

bmw-m4-fem-433mhz-key-program-with-cgdi-programmer-pic-3

Open “CGDI Start” then click on “FEM/BDC Key Match”, if you are the first time to use CGDI Pro, you will receive a message “unauthorized”, follow this user manual to get authorization.

http://www.carobd.de/upload/pro/201709/cgdi-prog-bwm-fem-bdc-authorization-guide.pdf

bmw-m4-fem-433mhz-key-program-with-cgdi-programmer-pic-4

Read key info.incl. ECU type, 433MHZ, VIN, etc.

bmw-m4-fem-433mhz-key-program-with-cgdi-programmer-pic-5

CGDI BMW Pro green indicator flashes, it is working fine.

bmw-m4-fem-433mhz-key-program-with-cgdi-programmer-pic-6

This is BMW FEM module removed from the car.

bmw-m4-fem-433mhz-key-program-with-cgdi-programmer-pic-7

Get message: Please remove the FEM/BDC, then use CGDI Programmer to read out the original EEPROM and write it to the 95XXX EEPROM chip, and install

the FEM/BDC back to the car, then click on “Next”.

bmw-m4-fem-433mhz-key-program-with-cgdi-programmer-pic-8

Done.

Scania SDP3 2.31.1 download & how to install on Win 7/8/10

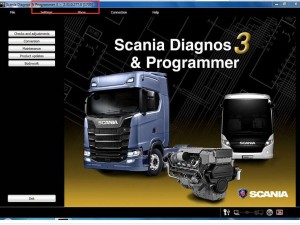
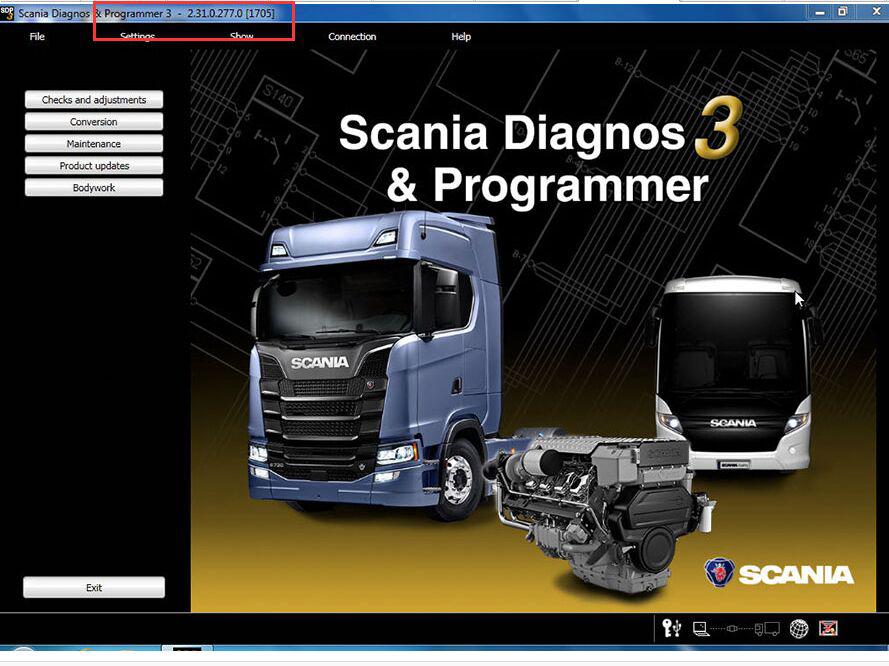
Free download Scania VCI 2 VCI 3 software SDP3 2.31.1 on Mega: (tested)

https://mega.nz/#!Dd1gTbKT!oY2Z4uNUtneIRf5DGZdPWhZAQR3rfNaN0LsEFl9HZww

Scania SDP3 2.31 download: (Win7 64 bit,WIN 10 32/64 bit)

https://mega.nz/#!DYExVD7Y!Z7vVu-KB6hwABJ8LOyYeyd4VyhuI7w6nAqsVDYUzbrw

Password: cimi

Scania SDP3 2.30 download free:

https://mega.nz/#!dcU3WLJL!iNjRAo_zKbkEoI0ArlBoXfcBvRvrLlKlB7IJnqN6SLo

No pass!

Scania SDP3 2.31 test report: successful, safe to use

scania-sdp3-2-31-1-download-how-to-install-on-win-7810-pic-1

Note 1: without USB dongles

Note 2: SDP3 2.31 activation help with professionals at carobd.de

Test result: Scania SDP3 latest version 2.31.1 is verified to work no issues and is released on 09/07/2017: (works perfect)

http://www.carobd.de/wholesale/newest-scania-vci-2-sdp3-for-trucks-buses.html

Scania SDP3 2.31.1 system requirements:

Windows 7 32 bit, Windows 8/8.1 32 bit, Windows 10 32 bit.

■Microsoft .Net Framework 4.6.2 must be installed.
• There is no longer support for Windows 7 32 bit. For more information, see Ti 00-17 01 25.
Scania SDP3 2.31.1 features:
Function view
By using the search box at the top of the window you can now search directly in the function view. You can choose to search in the Adjustment, Check or Calibration tab.

Troubleshooting
The procedure for defect reporting in SDP3 has been improved to make it simpler to follow.
Instead of a guide in several steps, there is now a simple dialogue box. In the dialogue box you can select if you want to save the defect report locally or if you want to send it via e-mail. To be able to send the defect report via e-mail you must have Microsoft Outlook. You can choose to create a defect report for a specific individual product or to make a general defect report.
The dialogue box for defect reports you find in the Help menu.

Note: As from SDP3 2.31, the dialogue box is no longer available for use if you are connected to a job type.  Scania CV AB 2017
Communication troubleshooting
• The instructions& solution for communication errors has been updated. You access the document via the Help menu.
System specifications

CUI –Infotainment system
• Support resume an interrupted download of software has been introduced.

COO – Coordinator
• The new guide verify and check switch modules in the steering wheel according to the version and the vehicle’s SOPS file.
EMS – Engine Management System
• Vehicles with the S8 engine control unit have previously lacked support for Default setting of power take-off adaptation. This has now been rectified.
• The Spark check guide has been removed for vehicles of the P, G, R and S series with Euro 6 gas engine. As the support in SDP3 has been improved, the guide tool is no longer required. Instead, use the Electrical system view for troubleshooting.

RES – Rechargeable energy storage system
• For the sake of clarity and uniformity, the hybrid battery has been changed to propulsion battery in all instances in SDP3.

TMS – Transmission management system
• New parameters have be added to TMS2:
o Clutch monitoring
o Downhill speed control with active prediction
o Reduced use of the clutch (new values)  Scania CV AB 2017
• After a product update of the transmission management system, the Accelerometer adaptation must always be run. It now starts automatically after an update of the control unit.

GMS – Gearbox management system
• A function guide which shows how the power is transferred in the gearbox for different gears in real time has been added. You can also see how the gear shift forks move and which sleeves are affected.
The guide applies to the following gearboxes:
o GRS905
o GRS905R
o GRSO905
o GRSO905R
o GRSO925
o GRSO925R
o GRSO935
o GRSO936R
The guide also applies to the following transmission management systems:
o OPC4,
o OPC5
o TMS1
o TMS2

CMS – Chassis management system
• A guide for bleeding control circuit 2 has been implemented.
• Circuits, I/Os and the functional description of differential locks has been improved.

TSS/TSA – Tag axle steering system
• Function guides for activating and deactivating service mode have been implemented.  Scania CV AB 2017
• A function guide for checking EST and ESTA has been implemented.
• A new parameter for the centring function has been implemented.

Scania SDP3 2.31.1 car list:

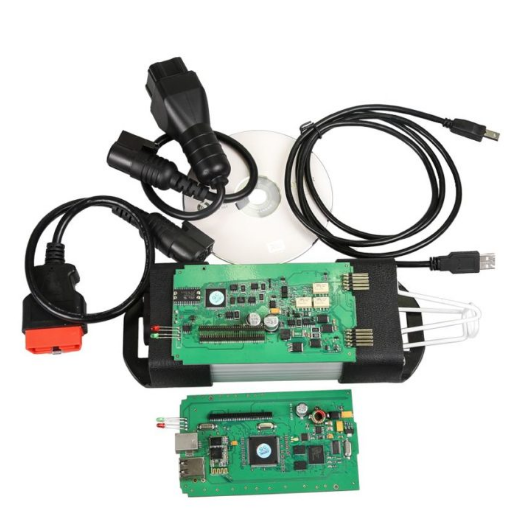
To work with Scania VCI2: can support vehicles after the year 1995:

Scania P, G, R, T, buses Scania series K, N, and other vehicles using engines Scania

To work with Scania VCI3: support vehicles after the year 2004:

trucks, buses and other heavy vehicles, which produces the corporation Scania

In short, Only hardware difference, they can use the same software
Scania vci 3 diagnostic tool highlights its high-speed WI-FI connection

Scania diagnostic codes:

000 00 No Fault

01 001 less than the rated voltage – heater works

02 002 higher than the rated voltage – heater works

004 03 Short circuit fan (D2I)

005 05 Short-circuiting the wires from alarm (D2I)

009 09 Heater off system TRS (D2I / D9W)

010 0A higher than the nominal voltage (heater stopped)

011 0B voltage less than the nominal (heater stopped)

012 0C overheat – fuel pump is turned off

013 0D temperature sensor recorded a high temperature

014 0E big difference values of t. sensor. overheating sensor. regulation. t (D3W / D9W)

015 0F heater overheated many times – the heater is turned off (D2I / D9W)

017 11 Reusable overheating (t exceeds the second threshold) (D3W)

020 14 Candle / rod defective bulbs

021 15 Short candle / bar bulbs

022 16 Faulty relays candle / bar bulbs (D2W)

023 17 Internal defect relay control R2 candle / bar bulbs

024 18 Short-circuit switch controller candle / bar bulbs

025 19 Short-circuit diagnostic socket

029 1D fan air gap 5 does not operate R3

030 1E air fan does not work in all positions (R3-D3W)

031 1F air fan does not work in all positions (R3-D3W)

032 20 Air fan does not work in all positions (R3-D3W)

033 21 Air fan does not work in all positions (R4-D2I / D9W)

034 22 there is no contact with the solenoid valve of the cooling system. (D2W / D9W)

035 23 No contact with the relay average performance

036 24 Short-circuit relay average performance

037 25 Do not rotate water pump (D2W / D9W)

038 26 No contact with the fan relay cab heating (D2W / D9W)

039 27 Short cab heating fan relay (D2W / D9W)

040 28 Short circuit solenoid. valve cooling system. (D2W / D9W)

042 2A Short circuit water pump (D9W)

043 2B Short cable from the computer to the heater fuel pump (D9W)

047 2F Short circuit of the fuel pump

048 30 No contact with the fuel pump

050 32 Heater run many times but have not worked (relay R3)

051 33 Flames emerged immediately after pressing the start button heater

052 34 No start (restart purge)

053 35 Stop flame during startup

36 054 Stop flame position max. productivity

055 37 Stop the flame in a position average performance

056 38 Stop the flame in the position of poor performance

057 39 Flame sensor short circuit (photoresist)

058 3A heater is turned off, but the flame in the combustion chamber (D2W)

059 3B Water temperature rising too quickly (D9W)

060 3C No contact with the sensor temperature control

061 3D sensor short circuit temperature control

062 3E No contact with the potentiometer (D2H / D2I)

3F 063 Short potentiometer (D2H / D2I)

064 40 No contact with flame sensor

065 41 Flame sensor short circuit

071 47 No contact with the sensor overheating (D3W / D9W)

072 48 Short-circuit overheating sensor (D3W / D9W)

073 49 Overheating sensor recorded the fastest increase in temperature (D9W)

090 5A Spontaneous error

091 5B high surge (high-voltage wires, CB-radio, etc.)

092 5C Faulty heater control unit – fault ROM

093 5D Faulty heater control unit – faulty RAM

094 5E Faulty heater control unit – fault EEPROM

096 60 Temperature sensor faulty heater ECU (D2I)

097 61 Faulty heater ECU (D2I / D2W / D9W)

255 FF cleared but faulty memory EEPROM

Renault CAN clip V170 free download and Setup on Win7 (works & no virus)

Topic: Renault CAN clip V170 free download, bugs fix and setup installation.

Renault CAN clip V170 free download on Mega:

https://mega.nz/#!VDxFRAZQ.

key: !a94JfYiSSSwL4HGwmCfpmK4u5_l377wEJKQVczCdiZ8

PS: Not confirm if it is available forever

Renault CAN clip V170 on sale:

http://www.carobd.de/wholesale/renault-can-clip-update-software-cd.html

9.9 EUR free shipping, tested 100% works, safe without virus.

Renault CAN clip V170:

No new vehicles but fix some bugs, details shown as below picture.

renault-can-clip-v170-free-download-and-setup-on-win7-works-no-virus-pic-1

Renault CAN clip V170 software compatible interfaces:
Most popular can clip interface 99 EUR

Best quality can clip interface with AN2135SC AN2136SC 129EUR
Best quality can clip interface with AN2131QC Chip 117 EUR

renault-can-clip-v170-free-download-and-setup-on-win7-works-no-virus-pic-2

Other interfaces try at your own luck.

Can CLIP V170 Test Report:

■OBDII diagnostics…(OK)
Cover Renault car from 1998-2016, accessible to ENGINE, automatic gear shifting, Air conditioning system, SRS, ABS, ASR, MPL, GM, IMMO, KEYZESS GO system, OBD-I I and so on.

■Renault can clip reprogramming (OK)

Clip will tell you if there is a new version to install, depending on what version of Renault reprog you have… if you do not have reprog, the only way to find out if there is a new version, is to with a diagnostics machine read the actual version installed. As for the benefits, new versions are usually released to resolve glitches that have been in the mean time discovered, to improve drivability, fuel consumption etc… also as the engines get worn and old, new software can adjust things to make is drivability a bit better… most of the times you will not see any difference after a software update, unless a real obviously glitch has been identified and a new version has been released to resolve it. I hope all the above makes some sense, and somehow answers your question…

■Renault can clip key programming & ECU programming (No luck with can clip V170)
The Renault-COM diagnostic programming tool is verified ok to perform key programming and ECU programming.

renault-can-clip-v170-free-download-and-setup-on-win7-works-no-virus-pic-3

Renault Can CLIP V170 setup on WIN7 32bit:

https://youtu.be/33Q8-ko4QeY

Important Notes:

Operating System: Win7 32bit

Step 1: run Crack Renault CLIP

Insert CAN CLIP 170 disk E: and open it

Copy the folder Activation(Patch V3) to Desktop, then open it

Open Crack Renault CLIP registration entries: Merge

Register Editor: click Yes.

Click OK.

Step 2: install Renault CLIP 170

Run setup.exe

CLIP V170 is running automatically

Click the laptop icon (FIRST INSTALLATION) in CLIP V170 interface.

Click on “I accept…agreement” and click Next.

Select country. (here, select OTHER COUNTRY). and click on Next.

Select a setup language and click Next.

Manufacturer: Renault. click Next.

Click Next to begin copying files.

Installing clip…

Updating your system…

Next to install Windows Resource Kit Tools

Click on “I agree” then Next

User information: Next

Install now

Installing progress…

Finish to install Windows Resource Kit Tools

RESTART your computer

Installing/extracting…

Extracting 100%

RESTART your computer

Finish installation of CLIP 170

Renault can clip installation success

Step 3: setup CLIP properties

Open CLIP properties on Desktop

Open file location:

Cut RSRWin application in local disk C:/ CLIP_X91/ Lib/ Application

Paste it on Desktop

Copy RSRWin application on Desktop/Activation (Patch V3)

And paste the RSRWin (from Desktop) in local disk C:/ CLIP_X91/ Lib/ Application

Close CLIP properties

Step 4: register CLIP

Run RSRWin application in local disk C:/ CLIP_X91/ Lib/ Application

Accept the license and register CLIP

Are you part of the Renault Network? Select No.

Enter the unlocking code with the picture guide Renault Clip Registeration Step 4 in the folder Activation(Patch V3)

then click Confirm.

Registration successful: click OK.

Replace “RSRWin” in C:\CLIP_X91\Lib\Application with”RSRWin” on Desktop

Step 5: install Renault can clip 170 driver software

Wizard helps install software for 1B-Alliance Vehicle Communication Interface

Select: Install…automatically

Next

Finish installation of software for 18B-Alliance Vehicle Communication Interface

Open Computer management

Select 1B-Alliance Vehicle Communication Interface

Step 6: open Renault CLIP v170 to begin diagnosis

Run CLIP Renault software

There will be a computer security alert. Just click Unlock.

Done


Emgrand 9s12 mileage correction using CG100 PROG III

To have Emgrand 9s12 mileage correction, I use CG100 PROG III. The old value is 30097KM, and the new value is 130193KM.

Here we go.

Attach pictures:

Connect CG100 PROG III main unit to BDM+4 adapter and then to the dashboard of Emgrand 9s12.

emgrand-9s12-mileage-correction-using-cg100-prog-iii-pic-1

emgrand-9s12-mileage-correction-using-cg100-prog-iii-pic-2

Backup the data

emgrand-9s12-mileage-correction-using-cg100-prog-iii-pic-3

Old value

emgrand-9s12-mileage-correction-using-cg100-prog-iii-pic-5

emgrand-9s12-mileage-correction-using-cg100-prog-iii-pic-6

New value

emgrand-9s12-mileage-correction-using-cg100-prog-iii-pic-7

This is just a general procedure on Emgrand 9s12 mileage correction using CG100 PROG III.

Have one CG100 PROG III, you may understand it more clearly.

How does SKP1000 program 2015 Buick Excelle remote key?

This post is on how to use SKP1000 tablet key pro to program 2015 Buick Excelle remote key.

Buick Excelle after 2013 comes with 70 big capacity chip which needs security code to program key.

The way to get security code is on the frame which is as the same as new Lacrosse and new Regal.

Step by step procedure:

Please be informed: the pictures comes from the Chinese version Lonsdor CI600 plus, and the words on the pictures are Chinese. Acutally the SKP1000 engineer ensure SKP1000 can perform the same as CI600, and the instructions on the screen are translated as the title.

Tap “program key on Buick Excelle after 2013”

how-does-skp1000-program-2015-buick-excelle-remote-key-pic-1

Tap ” Immobilizer”

how-does-skp1000-program-2015-buick-excelle-remote-key-pic-2

There are 3 options : delete key (to disable the lost key), add key and program remote controller

how-does-skp1000-program-2015-buick-excelle-remote-key-pic-3

Tap “add key”, the original car has 2 working keys

how-does-skp1000-program-2015-buick-excelle-remote-key-pic-4

Turn off ignition for 5 seconds then turn on, press “Yes” to continue.

how-does-skp1000-program-2015-buick-excelle-remote-key-pic-5

The security code is: 8352

how-does-skp1000-program-2015-buick-excelle-remote-key-pic-6

Indentifying the security code, 5 minutes left.

how-does-skp1000-program-2015-buick-excelle-remote-key-pic-7

Configuring system, please wait 10 minutes.

how-does-skp1000-program-2015-buick-excelle-remote-key-pic-8

Turn off ignition, press “Yes” to continue.

how-does-skp1000-program-2015-buick-excelle-remote-key-pic-9

Turn on ignition

how-does-skp1000-program-2015-buick-excelle-remote-key-pic-10

Please pull off the key, press “Yes” to continue.

how-does-skp1000-program-2015-buick-excelle-remote-key-pic-11

Configuring system, please wait 45 seconds.

how-does-skp1000-program-2015-buick-excelle-remote-key-pic-12

Add key on 2015 Buick Excelle successfully with SKP1000 tablet key pro.

how-does-skp1000-program-2015-buick-excelle-remote-key-pic-13

After the chip program successfully, back to tap “program remote controller”, it also needs the security code and the procedure is as the same as to program the chip.

V4.6.1 Xhorse VVDI PROG Programmer-bugs fix & add types/models

Download V4.6.1 VVDI PROG with bugs fix & add types/models
https://mega.nz/#!jxBFTCwb!jsFwimypcOIkrKhEheg8H3xmYutUspvtAxtK37exgy4

password:123456

this .zip file includes:

If you bought one Original Xhorse VVDI PROG Programmer from

www.carobd.de, now go to update by yourself and add below types / models. Feedback if any question.
v4.6.1 VVDI PROG update content (2017-08-30)

v4.6.1 (2017-08-30)
* This version DON’t need update firmware
* Fix some bugs
+ Add VVDI PROG USER MUNUAL 4.6.1version in Doc folder
* Fix MC9S12XS/MC9S12XHY series PFLASH write error problem
* Fix SRS-VW52-V1 diagram
+ Add AT24C01(CLIP),AT24C02(CLIP), AT24C04(CLIP), AT24C08(CLIP), AT24C16(CLIP), AT24C32(CLIP),
AT24C64(CLIP), AT24C128(CLIP), AT24C256(CLIP),
AT24C512(CLIP), AT24C1024(CLIP), AT25010(CLIP), AT25020(CLIP), AT25040(CLIP), AT25080(CLIP),
AT25160(CLIP), AT25320(CLIP), AT25640(CLIP), AT25128(CLIP),
AT25256(CLIP), AT25512(CLIP), AT93C06[A](CLIP), AT93C46[A](CLIP), AT93C56[A](CLIP), AT93C57[A](CLIP),
AT93C66[A](CLIP), AT93C76[A](CLIP),
AT93C86[A](CLIP) options in <1-EEPROM&FLASH>-><ATMEL(CLIP)> (Need EEPROM CLIP ADAPTER)
+ Add CAT24C/W01(CLIP), CAT24C/W02(CLIP), CAT24C/W04(CLIP), CAT24C/W08(CLIP), CAT24C/W16(CLIP),
 CAT24C/W32(CLIP), CAT24C/W64(CLIP), CAT25C128(CLIP),
CAT25C256(CLIP), CAT93C46[A](CLIP), CAT93C56[A](CLIP), CAT93C57[A](CLIP), CAT93C66[A](CLIP),
 CAT93C76[A](CLIP), CAT93C86[A](CLIP) options in
<1-EEPROM&FLASH>-><CATALYST(CLIP)> (Need EEPROM CLIP ADAPTER)
+ Add XL[S]24C01(CLIP), XL[S]24C02(CLIP), XL[S]24C04(CLIP), XL[S]24C08(CLIP), XL[S]24C16(CLIP),
XL[S]93C/LC06(CLIP), XL[S]93C/LC46(CLIP), XL[S]93C/LC56(CLIP),
XL[S]93C/LC66(CLIP) options in <1-EEPROM&FLASH>-><EXEL(CLIP)> (Need EEPROM CLIP ADAPTER)
+ Add FM24C02(CLIP), FM24C03(CLIP), FM24C04(CLIP), FM24C08(CLIP), FM24C09(CLIP), FM24C16(CLIP),
FM24C17(CLIP), FM93CS06(CLIP), FM93CS46(CLIP), FM93CS56(CLIP),
FM93CS66(CLIP), NM24C02(CLIP), NM24C03(CLIP), NM24C04(CLIP), NM24C05(CLIP), NM24C08(CLIP),
NM24C09(CLIP), NM24C16(CLIP), NM24C17(CLIP), NM24U17(CLIP),
NM24C32(CLIP), NM24C65(CLIP), NM93C06(CLIP), NM93C46(CLIP), NM93C56(CLIP), NM93C66(CLIP),
NM93C86(CLIP), NM93CS06(CLIP), NM93CS46(CLIP), NM93CS56(CLIP),
NM93CS66(CLIP) options in <1-EEPROM&FLASH>-><FAIRCHILD(CLIP)> (Need EEPROM CLIP ADAPTER)
+ Add 24AA02(CLIP), 24AA04(CLIP), 24AA08(CLIP), 24AA16(CLIP), 24AA164(CLIP), 24AA32(CLIP), 24AA128(CLIP),
24AA256(CLIP), 24C02(CLIP), 24C04(CLIP), 24C32(CLIP),
24LC02(CLIP), 24LC04(CLIP), 24LC08(CLIP), 24LC16(CLIP), 24LC164(CLIP), 24LC32(CLIP), 24LC64(CLIP),
24LC65(CLIP), 24LC128(CLIP), 24LC256(CLIP),
93C/LC/AA46A(CLIP), 93C/LC/AA56A(CLIP), 93C/LC/AA66A(CLIP), 93C/LC/AA76A(CLIP),
93C/LC/AA86A(CLIP), 93C/LC/AA46B(CLIP), 93C/LC/AA56B(CLIP), 93C/LC/AA66B(CLIP),
93C/LC/AA76B(CLIP), 93C/LC/AA86B(CLIP), 93C/LC/AA46C(CLIP), 93C/LC/AA56C(CLIP),
93C/LC/AA66C(CLIP), 93C/LC/AA76C(CLIP), 93C/LC/AA86C(CLIP) options in
<1-EEPROM&FLASH>-><MICROCHIP(CLIP)> (Need EEPROM CLIP ADAPTER)
+ Add M24C01(CLIP), M24C02(CLIP), M24C04(CLIP), M24C08(CLIP), M24C16(CLIP), M24C32(CLIP),
M24C64(CLIP), M24C128(CLIP), M24C256(CLIP), M24C512(CLIP),M93C06(CLIP),
M93C46(CLIP), M93C56(CLIP), M93C66(CLIP), M93C76(CLIP), M93C86(CLIP), M95010(CLIP),
M95020(CLIP), M95040(CLIP), M95080(CLIP), M95160(CLIP), M95320(CLIP), M95640(CLIP),
M95128(CLIP), M95256(CLIP), M95512(CLIP), ST24C01(CLIP), ST24C02(CLIP), ST24C04(CLIP),
ST24C08(CLIP), ST24C16(CLIP), ST24E16(CLIP), ST24E32(CLIP), ST24W02(CLIP),
ST24W04(CLIP), ST24W08(CLIP), ST24W16(CLIP), ST25C01(CLIP), ST25C02(CLIP), ST25C04(CLIP),
ST25C08(CLIP), ST25C16(CLIP), ST25E16(CLIP), ST25E32(CLIP), ST93CS56(CLIP),
ST93CS57(CLIP), ST93CS66(CLIP), ST93CS67(CLIP), ST93CS47(CLIP), ST93CS46(CLIP)
options in <1-EEPROM&FLASH>-><ST(CLIP)> (Need EEPROM CLIP ADAPTER)
+ Add X24C01(CLIP), X5043(CLIP), X5045(CLIP) options in <1-EEPROM&FLASH>->
<ST(CLIP)>(Need EEPROM CLIP ADAPTER)
+ Add ME7.4.5-FLASH-ST10F275, ME7.4.5-EEPROM-95320 options in <3-ECU>-><BOSCH>
+ Add BCM2(D70F3380) option in <4-IMMOBILIZER>-><AUDI>
+ Add EWS3-KLINE(0D46J) option in <4-IMMOBILIZER>-><BMW> (Need EWS3 ADAPTER)
+ Add BCM-XEP100(2009–) option in <4-IMMOBILIZER>-><LANDROVER>
+ Add LAGUNA-UCT(2006) option in <4-IMMOBILIZER>-><RENAULT>
+ Add BCM2(D70F3380) option in <4-IMMOBILIZER>-><VOLKSWAGEN>
+ Add BJ40-DASHBORAD, E150-DASHBORAD(2014), EX200-BCM(2016) options in
<5-DASHBORAD>-><BAICMOTOR>
+ Add EQ-DASHBOARD(2017) option in <5-DASHBORAD>-><CHERY>
+ Add AUTOPLEAD-DASHBOARD(2017) option in <5-DASHBORAD>-><DAYUN>
+ Add IEV-DASHBOARD(2017) option in <5-DASHBORAD>-><JAC>
+ Add BEETLE-DASHBOARD(2005), BEETLE-DASHBOARD(2010) options in <5-DASHBORAD>-><VOLKSWAGEN>
+ Add REGAL-SRS(2014) option in <7-ARIBAG>-><BUICK>
+ Add GOLF7-SRS option in <7-ARIBAG>-><VOLKSWAGEN>
+ Add A6L-C7-EPB-MODULE option in <8-OTHER>-><AUDI>
+ Add 300C-PDC-MODULE(2007–) option in <8-OTHER>-><CHRYSLER>
+ Add MAGOTAN-LEW-MODULE, POLO-J393-EEPROM, TIGUAN-EPB-MODULE options in <8-OTHER>-><VOLKSWAGEN>
Notes: about eeprom clip adapter(NO need soldering) or EWS 3 adapter,please contact dealer for help.
v4-6-1-xhorse-vvdi-prog-programmer-bugs-fix-add-typesmodels-pic-2
v4-6-1-xhorse-vvdi-prog-programmer-bugs-fix-add-typesmodels-pic-3
v4-6-1-xhorse-vvdi-prog-programmer-bugs-fix-add-typesmodels-pic-4

How to add VVDI2 BMW FEM/BDC Authorization?

V4.3.0 VVDI2 newly add BMW FEM/BDC system key learning, erase key; Add BMW FEM/BDC system reset KM; Add FEM/BDC system backup coding, restore coding.If you have VVDI2 Full or VVDI2 BMW,how can you get VVDI2 BMW FEM/BDC authorization?

There are two ways to get VVDI2 BMW FEM/BDC function:

1.Purchase from us.This is what we will introduce in our blog.

2.Remote points exchange.If you have condor key cutting machine,6000 points.If without,8000 points.F

How to add VVDI2 BMW FEM/BDC Authorization?

If you have condor key cutting machine,please check VVDI2 BMW FEM/BDC Function Authorization Service For Condor Cutter Only

If do not have,please check:VVDI2 BMW FEM/BDC Function Authorization Service

After you purchase,please provide the following information:

VVDI2 Serial number,if you have some other Xhorse tool,please also provide us their serial number.

How to check VVDI2,VVDI PROG,VVDI MB Tool serial number?

Back of main unit,it shows the serial number,send them to us is OK.

How to check VVDI Key Tool serial number?

VVDI Key Tool back does not tag the serial number,you can check from the carton box.

Or if you can not find the carton box,please download VVDI Key Tool update tool software,connect VVDI Key Tool with computer,click device info,it will display serial number,format is :VK********.

When authorization is OK,we will send email to inform you.Then wait more than 30 minutes,update vvdi2 firmware.P;lase confirm you use newest VVDI2 software,update vvdi2 firmware.

How to use VVDI2 V4.3.0 BMW FEM/BDC Key Programming Function?

Xhorse VVDI2 key programmer V4.3.1 software released BMW FEM/BDC system key programming function.

VVDI2 latest software V4.3.1 update
************************************************ ********************
*** 2017-08-18
*** Require firmware V4.3.0
************************************************ ********************
===== VAG V4.3.1 =====
1. Copy 48 function: Support Passat B6/CC with 48 transponder
2. Bugfix
===== BMW V4.3.1 =====
1. Improvement for BMW FEM/BDC key learn
2. Bugfix
===== Porsche V4.3.0 =====
1. Bugfix
===== PSA V4.3.0 =====
1. Bugfix
===== Transponder Programmer V4.3.0 =====
1. Bugfix
===== J2534 V4.3.0 =====
1. Bugfix
===== Online Upate Tool V4.3.0 =====
1. Bugfix
===== Quick Start V4.3.0 =====
1. Bugfix

Notes: for 4.3.0 software users just download 4.3.1 can use directly,no need update firmware again.https://mega.nz/#!SoYC1Q6a!hcskAhiMXQdGV1Bc-1I-tMTSRZubodozGkY_bUsKzUc 

FAQ:
Q: After activation the fem bdc it will work without tokens?
A: Yes.
VVDI2 – BMW FEM/BDC system(function released and available, just no user manual)
Users can refer to following information (3 steps for make keys:get key info->programming FEM/BDC system->make keys)

1.support make new key with ignition switch(support add spare key and all key lost, all key lost require ISN)
2.support reset FEM/BDC KM(cluster require reset manually)
3.support erase key(after erase the key position become blank position)
4.support backup coding
5.support restore coding

Notes:
1.backup coding and restore coding can direct operation generally.
2.add keys, reset KM, erase key must programming FEM/BDC system first
3.in FEM/BDC interface, if ‘get key info’ the type not support, it will show:customer should use “BMW E-sys software” program FEM/BDC system.then programming FEM/BDC system with VVDI2 BMW
4.when operation on ‘programming FEM/BDC system’interface,please don’t close this software window until all procedures completed.
5.programming FEM/BDC system, require soldering and get eeprom.(FEM 95128 chip, BDC 95256 chip)usually there are 2 same chips on the module, please refer to the software diagram, select the correct one.
6.programming FEM/BDC system,must restore the original eeprom, restore coding.if cannot restore coding or after restore coding assemble FEM/BDC module back to car,but with problem(such as the remote control cannot start the car
or the car with window problem)please use “BMW E-sys software” coding for FEM/BDC system
7.if connect power to FEM/BDC module, but the relay keep ringing,please contact technical support for help.usually operation on FEM/BDC should be ok,just need to programming.


If your vvdi2 already bind to condor,then BMW FEM/BDC =510 EUR
without condor: BMW FEM/BDC = 680 EUR  Pls note:

1.Your vvdi2 must already has BMW OBD functions
2.After payment, pls give us serial number of VVDI2 and condor(if you have)

BMW FEM/BDC Authorization for VVDI2 (With Condor)

BMW FEM/BDC Authorization for VVDI2 (Without Condor)