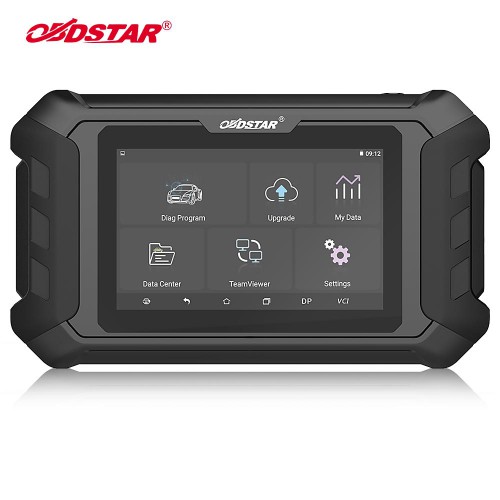
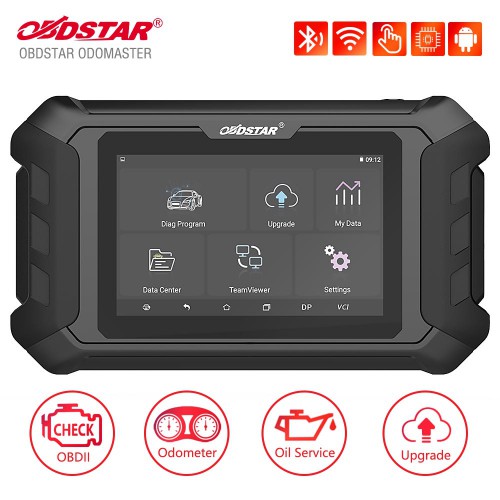
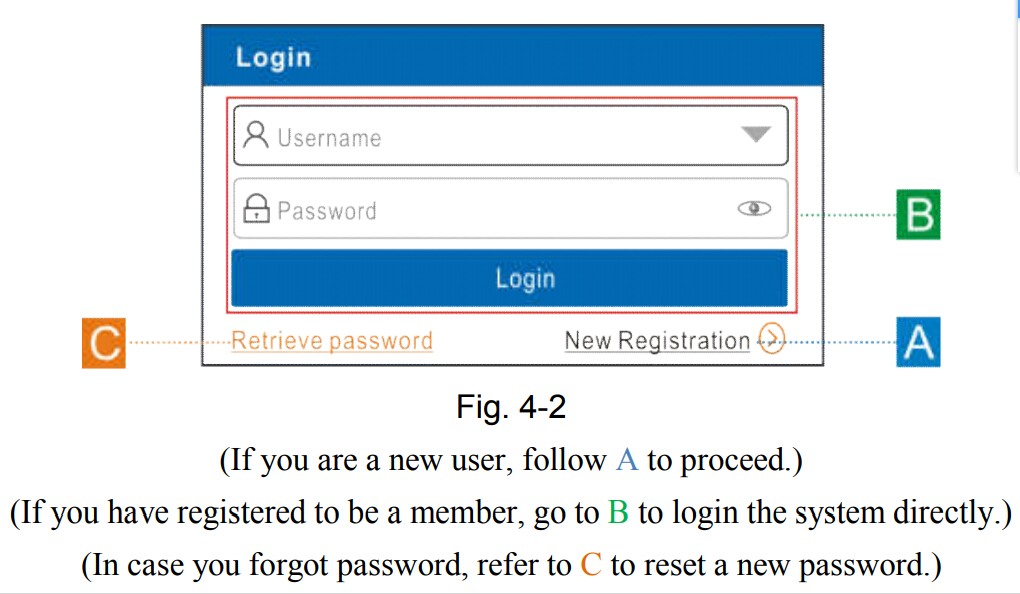
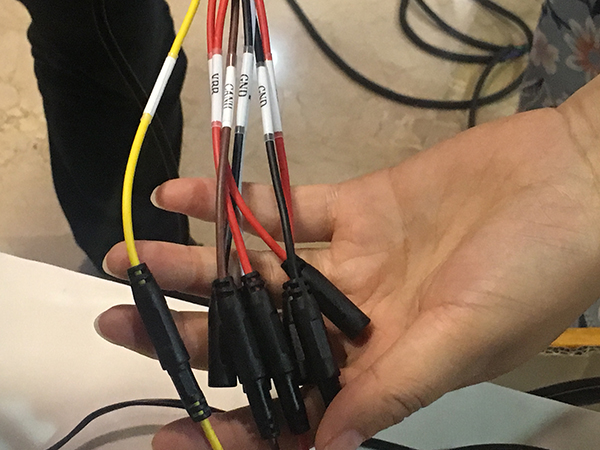
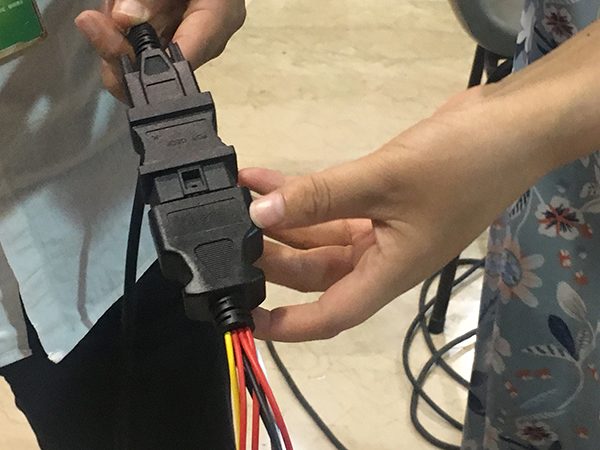
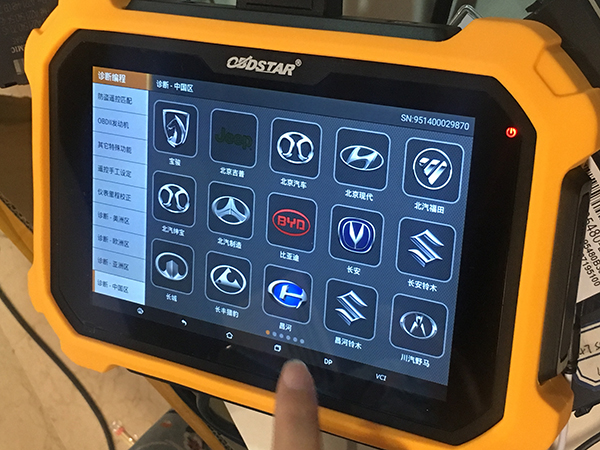
Archives

Autel MaxiCOM MK908P is better than MaxiSYS MS908P?

Question: Should I buy an Autel MK908P instead of MS908P Autel?

Answer: Autel MK908P is much better in hardware. Will run faster and much more stable.

Pls read the chart for details


1

2

3

4

Conclusion:

Autel MK908P wins!

What is Autel MK908P:

The MaxiCOM MK908P Diagnostic Platform is an evolutionary smart solution for specialized automotive diagnosis. Utilizing the powerful A7 quad-core 1.30GHz processor, and a 10.1-inch capacitive touch screen, combined with the best possible coverage of OE-level diagnostics, and based on the revolutionary multitask-capable Android Operating system, the MaxiCOM organizes information with test instrumentation to help you diagnose symptoms, codes, and customer complaints easily, quickly and efficiently.

Autel MK908P software language:

English, French, German, Italian, Spanish, Portuguese, Russian, Dutch, Polish, Japanese.

Autel MK908P Functions:

1. J2534 ECU Programming
The diagnostic tool comes with a J2534 ECU programming tool (also used as a VCI box) that is a SAE J2534-1 & -2 compliant pass-thru reprogramming interface device. Using the updated OEM software, it is capable of helping B-M-W and B-e-n-z users replace the existing software/firmware in the Electronic Control Units (ECU), program new ECUs and fix software-controlled drivability issues and emission issues. It supports BT and USB communications and can transmit vehicle data to the MaxiCOM display tablet with or without a physical connection.

2. There are 3 indicators on the J2534 ECU programming device
1) Vehicle LED – Flashes green when communicating with the vehicle’s system
2) Connection LED – Illuminates solid green when properly connected with the display tablet via the USB cable; Illuminates solid blue when connected with the display tablet via wireless (BT) connection
3) Power LED – Illuminates solid green when powered on: Flashes red when system failure occurs:
Illuminates amber automatically at power up when the device is performing self-test procedure

3. System Diagnostics
Simply accessing the diagnostic modes via AutoVin or Control Unit, and you’ re able to perform diagnosis over all the systems on the vehicle’ s ECU in order to locate fault systems and retrieve DTCs.
1) ECU Information – provides the retrieved ECU information in detail.
2) Read Codes – displays detailed information of DTC records retrieved from the vehicle control module.
3) Erase Codes – erases DTC records and other data from the ECM.
4) Live Data – retrieves and displays live data and parameters from the vehicle’ s ECU.
5) Active Test – provides specific subsystem and component tests.

5

4.Accesses the Special Functions
The diagnostic tool is specially designed with the Service section to provide you with quick access to the vehicle systems for various scheduled service and maintenance performances. It provides component adaptation or variant coding functions for custom configurations and also allows you to reprogram adaptive values for certain components after making repairs. The most commonly performed service functions include:
1) Oil Reset Service: Allows you to perform reset for the Engine Oil Life system, which calculates an optimal oil life change interval depend on the vehicle driving conditions and climate.
2) EPB Service: Helps maintain the electronic braking system safely and effectively, deactivating and activating the brake control system, assisting with brake fluid control, opening and closing brake pads, and setting brakes after disc or pad replacement, etc.
3) SAS Service: Allows you to perform calibration for the Steering Angle Sensor, which permanently stores the current steering wheel position as the straight-ahead position in the steering angle sensor EEPROM.
4) DPF Service: Allows you to carry out numerous functions to the Diesel Particulate Filter system.
5) TPMS Service: Allows you to quickly look up the tire sensor IDs from the vehicle’ s ECU, as well as to perform TPMS programming and reset procedures after tire sensors are replaced.
6) IMMO Service: Programs a new anti-theft key, and performs key matching when the ignition switch, the combined instrument panel, ECU, BCM, or the remote control battery is replaced.

5. Coding
The Coding function is used to re-flash the vehicle control modules, it allows you to update the computer software on the vehicle to the latest version, as well as to reprogram adaptive data for certain components after making repairs or replacements, providing ways for the issues of Drivability, Fuel Efficiency, Power Loss, Fault Codes, Durability of Mechanical Parts.

6

7

Autel MK908P vehicle list:

Chrysler, Dodge, Ford, GM, Jeep, Abarth, Alfa, Citroen, Fiat, Lancia, Opel, Peugeot, Porsche, Renault, Saab, Vauxhall, Volvo, Aston Martin, Audi, Bentley, Benz, Sprinter, BMW, Bugatti, Ferrari, Jaguar, Lamborghini, Land Rover, Maserati, Maybach, Mini, Rolls-Royce, Seat, Skoda, Smart, VW, VW CV, Dacia, Ford EU, LT3, Acura, Daewoo, Daihatsu, Honda, Hyundai, Hyundai CV, Infiniti, Kia, Lexus, Maruti Suzuki, Mazda, Mitsubishi, Nissan, Nissan GTR, Samsung, Scion, Ssang Yong, Subaru, Suzuki, Toyota, Isuzu, Mahindra, Perodua, Proton, TATA, HINO,UD, Fuso

8

Vxdiag Subaru SSM3: Diagnosis & Remote Programming – Confirmed!

Look here: Allscanner Vxdiag Subaru SSM3 reviews from different users: diagnostic, key/remote programming and customized settings, etc. are confirmed to work perfectly!

wifi-version-vxdiag-subaru-ssm-iii-11

Vxdiag SSM software O.S.: Windows 7 works!

It is *extremely* picky about OS. I wound up having to buy a new(ish) laptop running win7 to get it going. Wouldn’t work with XP or 10.

Vxdiag Device Manager: handy!

I have the device manager installed and find it kind of handy as it makes sure you have comms with the box. device manager does not have to be running in order to use SSM3 software but I usually fire it up first just to make sure the box is talking to the computer and car. USB ports are dumb sometimes.

Vxdiag Subaru diagnostics: works!

Complete access to everything with the ability to read and clear codes and manipulate other features. More or less everything that the dealership can do.

It just depends on if you think having complete access to all the systems in the car is worth it. It’s nice to have when I need it. I had a VDC code that was for the steering angle sensor. Rather than go to the dealer, I just busted out the knock off SSM and calibrated it in the driveway.

Vxdiag FreeSSM on ECU & TCU: works!

FreeSSM gives you access to the ECU and TCU. It can do everything the dealer SSM can do to those two modules only.

Vxdiag and new remotes: works!

It should perform “learning control” of TCM after clearing memory2 was done. So, it might be able to program a new remote. if you already know how to use SSM and you know it well enough to tell if this pirate copy is acting up vs. the real thing. It’s not like they give you a license or support, so you’d better already know exactly what you’re doing with it.

Vxdiag Subaru key programming: a bit different!

It is a bit different from most. I make and program keys for a living and for a while the SSM was the only thing that would program the prox fobs. Not true anymore but I still paid less for the VXdiag with software than I would for a single piece of software for my T-code pro. . and there are 3 for Subaru. I have one which only covers the earliest models.

btw, you have to have a NASTF LSID or be very good friends with a Subaru parts manager.

You need an immobilizer code (which is VIN specific) to program keys/fobs. It does not change so once you have it for your car you can go nuts. Odds are your dealer would probably give you YOUR immobilizer code if you shop there somewhat regularly. They may charge you for it as I know they have to pay a couple of bucks to mama subie for them.

There’s also an ‘enabling password’ which is also static and I suppose is a very flimsy extra layer of security to protect the immobilizer features of the SSM. It’s 3781.

Vxdiag and customized settings: handy!

It’s handy for doing stuff like turning off the passenger seat belt warning (my dog rides over there sometimes and doesn’t like wearing his belt) or setting the wiper de-icer to work for as long as I tell it to instead of a 12 minute cycle. Or make the door locks unlock with one press of the remote. All of this is stuff you won’t be able to do (AFAIK) with any other scanner.

I also rebuild wrecks and it’s the only thing that will talk to the airbag systems so I can figure out WTF is making the light stay on after cobbling together a car from 2 or 3 others.

Expiry date and additional software: worthy!

Someone says it will stop working after expiry date. Actually, don’t know and don’t care. mine says 2026, that’s like 9 years from now. If I have it that long and nothing better comes along, I got my money’s worth. I will say licenses for additional software titles (toyota, etc.) are only like $20 extra so I’d speculate renewing the license will be cheap if it becomes an issue.

VIDENT iLink400 Software Installation & Registration & Update

VIDENT iLink400 Full System Single Make Scan tool is the most cost-effective professional multi-system scan tool that delivers OE-level diagnosis for all electronic systems of different car brands.Here comes guide on how to register and update Vident iLink400 software,hope it helps!

Note: iLink400 comes with no software installed. You can select any of the car make software below to update on your scan tool. The first software is free of charge with your purchase. Any additional software costs $60 each.
One hardware can have 5 car makes at most.

Vident iLink400 support more vehicle models than Foxwell NT510,it more powerful than iCarsoft 2.

Procedures:

Step 1:Install the Update Client

Visit www.videnttech.com to download the update client from http://www.videnttech.com/support/

1


The file downloaded will be a compressed zip file. Open that file and run the installer inside it.

Alternatively, you can install the update client from the CD that comes in the product package.

Step 2:Create Your Vident Account.

Firstly you need to create an account with Vident.

Once installed, boots up the iScanzilla software, click the Register button.

vident-ilink400-scan-tool-single-maker-2

Fill out the registration form and submit.

vident-ilink400-scan-tool-single-maker-3

Alternatively, you can click the Sign Up button on the right upper side of our website to create an user account.

vident-ilink400-scan-tool-single-maker-4

Step 3:Register Your product

When logged in iScanzilla, click the ‘Register Products’ icon.

vident-ilink400-scan-tool-single-maker-5

On the ‘S/N Registration’ tab, put a tick in the box marked ‘001’ then enter the product’s serial

number & password, and click Submit.

Please connect the scan tool with computer through the USB cable, select Setup > About to check the Serial Number and ‘Register Password”.

vident-ilink400-scan-tool-single-maker-6

A confirmation box should be shown confirming successful registration.

Alternatively, you can register the product in the member center when logged in on our website.

vident-ilink400-scan-tool-single-maker-7

Step 4:Download and Install Diagnostic Software

Now close the iScanzilla software, remove the TF card from your tool (making sure the tool is turned off first!) and connect it to the PC via a TF card reader.

Once Windows has detected the TF card, run the iScanzilla software and login again. After a few seconds, a list of the available software updates will appear.

vident-ilink400-scan-tool-single-maker-10

Please select only one software you want to update, as you can ONLY have access to the update of this manufacturer in the future once it’s been selected initially. In case you want to install any other vehicle software, please contact us or sign in your member center to purchase. Please refer to next chapter to buy extra software.

vident-ilink400-scan-tool-single-maker-11

Click the Update button to download and install the software.

Once the software installed, you can go to Software Management to review the installed software.


Shop link:http://www.carobd.de/wholesale/vident-ilink400-scan-tool-single-maker.html

vident-ilink400-scan-tool-single-maker-9

How to Register and Update TOPDON ArtiPad I Programming Diagnostic Scanner

TOPDON ArtiPad I a comprehensive diagnostic tool with smart and exact solutions for automotive repair and maintenance. Based on Android operating system, equipped with 12-inch touchscreen, Artipad I supports Benz, BMW, VW, GM, Audi and Ford programming ecu coding, all system diagnosis and 11 special reset functions. Here’s guide to register and update Artipad I scanner.

topdon-artipad-i-diagnostic-tool-for-bmw-vw-audi-ford-pic-4

topdon-artipad-i-diagnostic-tool-for-bmw-vw-audi-ford-pic-5

topdon-artipad-i-diagnostic-tool-for-bmw-vw-audi-ford-2

topdon-artipad-i-diagnostic-tool-for-bmw-vw-audi-ford-pic-9

Topdon-ArtiPad-I-User-Manual.pdf

How to register ArtiPad I or new VCI connector?

Note: Before registration, please make sure the network is properly connected.

ArtiPad I has built-in Wi-Fi that can be used to get online. Once you’re online, you can register your ArtiPad I, browse the Internet, get and update apps and send email on your network.
Note: Once WLAN is set as ON, ArtiPad I will consume more power. While WLAN keeps unused, please turn it off to conserve battery power.

1

2. Tap or slide the Wi-Fi switch to ON, ArtiPad I starts searching all available
wireless LANs.
3. Choose the desired Wi-Fi access point / network,

 If the network you chose is open, you can connect directly;
 If the selected network is encrypted, you have to enter the right security key (network password).
When this tool is in range, it will connect to the previously linked network automatically

A. If this is the first time using the handset, follow steps below to register Topdon ArtiPad:

On the home screen, tap the application icon to run it, and then tap “Login” to enter the login interface of diagnosis software.

topdon-artipad-i-diagnostic-tool-for-bmw-vw-audi-ford-9


1)If you are a new user, tap “New Registration” to enter registration page.

10

Fill in the information in each field (Items with * must be filled). After inputting, tap “Register”, a screen similar to the following will appear:

topdon-artipad-i-diagnostic-tool-for-bmw-vw-audi-ford-11

Input the Serial Number and Activation Code, which can be found in the password envelope.

topdon-artipad-i-diagnostic-tool-for-bmw-vw-audi-ford-12

Note: To exit and activate it later, tap “Skip”. In this case, you can activate your connector by tapping “Activate Connector” in “Personal Center”.
Tap “Activate” to finish your registration.

12

To download the diagnostic software, tap “Yes” to enter the download page. Tap “No” to download and install it later.
On download page, tap “Update” to start downloading. To pause downloading, tap “Stop”. To resume it, tap “Continue”. Once download is complete, the system will install the software package automatically.

Notes:
 In process of download, please make sure the tablet has a strong Wi-Fi signal. It may take several minutes to finish it, please be patient to wait.
 To use the VINScan function, you have to download the corresponding diagnostic software.

2) If you have registered to be a member, input your name and password, and then tap the “Login” button to enter the main menu screen directly.
Note: The ArtiPad I has an auto-save function. Once the username and password are correctly entered, the system will automatically store it. Next time you login the system, you will not be asked to input the account manually.
3) If you forgot the password, tap “Retrieve password” and then follow on-screen instructions to set a new password.

How to retrieve the login password?
Please follow below steps to proceed in case you forgot the login password:
1. Tap the application icon on the home screen to run it.
2. Tap [Login] button on the upper right corner of the screen

13

Tap “Retrieve password”.

14

Input product S/N and follow the on-screen prompts to retrieve the password.

B. If you have activated a VCI connector before, but bought a new VCI connector due to the loss or other reasons, please follow the below steps to activate:
1. Tap the application icon on the home screen to run it.
2. Tap “Personal Center” -> “Activate Connector”.

15
3. Input product S/N and activation code, which can be found from the included password envelope, then tap “Activate”.
4. After activation completed, tap “Personal Center ” -> “My Connector” to check if the activated VCI connector is displayed in the connector list or not. Multiple VCI connectors can be bound to one tool. If you intend to use one of the VCI connectors to diagnose or test a vehicle, just switch to the corresponding VCI connector.

How to Update TOPDON ArtiPad I Scanner?
Update the APK and diagnostic software:

 One-click Update: Lets you update your diagnostic software online.

If you did not download the software in process of product registration or a pop-up message prompting you that some new software can be updated, you may use this option to download it or keep it synchronized with the latest
version.
Tap “Software Upgrade” on the Job menu to enter the update center.
By default, all diagnostic software is selected. To deselect certain software, tap “Unselect”, and then check the box next to vehicle model. Tap “Update” to start downloading. It may take several minutes to finish it, please be patient to wait.
To pause downloading, tap “Stop”. To resume it, tap “Continue”. If network connection failure occurs, tap “Retry” to try again.
Once download is finished, the software packages will be installed automatically.

1. Tap the application icon on the home screen to run it.
2. Tap “Software Upgrade”.
3. Tap “Select all” if all the software needs to be downloaded. To cancel the selection of certain software, just click the check box before it. Tap “Update” on the bottom of the screen to start the download.

During the upgrade, please make sure the handset has a stable network connection.

Reference:

Autel MaxiSys Pro MS908P vs. MaxiSys Elite vs. Launch X431 Pad III vs. TopDon ArtiPad I

topdon-artipad-i-diagnostic-tool-for-bmw-vw-audi-ford-pic-17

If need check more scanner information, please visit:

http://www.carobd.de/wholesale/topdon-artipad-i-diagnostic-tool-for-bmw-vw-audi-ford.html


2018 Obdstar X300 DP Plus vs. 2017 Obdstar X300 DP

Obdstar X300 DP Plus (X300 DP PAD 2) is coming soon. So, what’s new and different, compared with X300DP?

Obdstar X300 DP Plus:

obdstar-x300-dp-pad2-plus-key-master-full-configuration-1


 Obdstar X300 DP:

obdstar-x300-dp-full-system-package-001


Obdstar X300 DP Plus vs. X300 DP:

Hardware:
– X300DP Plus main unit and vci adapter 2 in 1:

Obdstar makes X300 DP Plus and the VCI adapter in one machine. No need worry you forget to take the VCI if you’re out. And the built-in VCI box offers more stable communication.

– larger screen:

X300 DP Plus comes with 8-inch touch screen, which offers better visual experience than X300DP (7 inch).
– no buttons on the main unit:

X300 DP has four buttons on the left, while X300 DP Plus is a real pad without buttons.
– with a back bracket/support on the back:

You cant put the unit on the steel wheel or on the table when you are testing with a car.
– reduce production cost:

Obdstar adopts high-tech but spends a lot on it’s firmware design. But the pad works as a real diagnostic tool in fact, so it’s unnecessary to do so. X300 DP Plus cut the cost in firmware design but make sure of the performance as good as X300DP.

– new adapters:

3 adapters are integrated into the X300 PAD Plus: EEPROM /PIC 2-in-1 adapter, RFID adapter (VW Audi 4th / 5th IMMO programming and other cars e.g Porsche, BMW, Fiat etc.) and Renew Key PCF79XX adapter.

Functions:
– Toyota smart key card!!!!!!!!!
– read 8-pin chip data!!!!!!!!!!!!

– ECU Programming/Cloning

ECU cloning means copy ECU, that is the OBDSTAR X300 DP Plus copies the data from the original car ECU, then write it into another same ECU hardware, so that it can achieve the same function as the original ECU.

When you want to change the new ECU or the second ECU, if you use X300 DP Plus to clone via OBD, you won’t need to go to the 4s store to do the online programming or dismantle ECU to weld, read & write.

ECU clone Pros :

No need to go to 4S shop, convenient, fast and save money.

Simplify the operating steps, even the amateur can also operate.

No need to dismantle and weld the ECU to read & write, it is zero risk to clone ECU via OBD with the X300 DP Plus.

– Switch activation function

Nowadays, many car models’ accessory power supply of the dashboard or audio equipment needs to be activated to enter the boot status through the related module CAN.

However, when the car technician maintains the dashboard / audio equipment, the main unit is out of the CANBUS network so it maybe won’t boot. X300 DP Plus ” switch activation function” can emulate the CANBUS communication to active the power supply of dashboard / Audio so that it can enter the boot status, then it will test and verify the dashboard and the Audio, also the technician can save money avoiding to purchase many the boot platform and cables of kinds of car models.

– New “Help” function including the testable car models, update notice, special features, help instruction, wiring diagram etc.

Testable car models: The user can read the testable car models and year.

Update notice: The user can read all of the update content.

Features: The user can read all of the special features and the functions that only X300 DP Plus supports.

Help instruction: Built-in the guide and instruction for each car model or function.

Wiring diagram: Built-in ECU wiring diagram, more intuitive and convenient.

Obdstar X300 DP Plus Testing:

obdstar-x300-dp-android-tablet-1

obdstar-x300-dp-android-tablet-2

obdstar-x300-dp-android-tablet-3

obdstar-x300-dp-android-tablet-4

obdstar-x300-dp-android-tablet-5

obdstar-x300-dp-android-tablet-6

obdstar-x300-dp-android-tablet-7

obdstar-x300-dp-android-tablet-8

obdstar-x300-dp-android-tablet-9

obdstar-x300-dp-android-tablet-10

obdstar-x300-dp-android-tablet-11

obdstar-x300-dp-android-tablet-12

obdstar-x300-dp-android-tablet-13

obdstar-x300-dp-android-tablet-14

obdstar-x300-dp-android-tablet-15


Autel MaxiDiag MD808 Pro Wins Autel MaxiDiag MD802

Compared with Autel MD802, 2018 Autel MaxiDiag MD808 Pro wins in hardware (display, memory, operating system), performance and special functions/service functions)

Check the details in the following comparison table:

MD808 (Four system) VS MD808 Pro (All system) VS MD802 (Four system) VS MD802 (all system)

autel-maxidiag-md808-pro-diagnostic-tool-1

autel-maxidiag-md808-pro-diagnostic-tool-2

autel-maxidiag-md808-pro-diagnostic-tool-3

To sum up:

In functions:

Autel MaxiDiag MD802 is an OBD2 fault code scan tool;

Autel MaxiDiag MD808 Pro is an OBD2 fault code scan tool and service reset tool (Steering angle Learning, DPF functions, Battery registration and reset).

In hardware:

Autel MaxiDiag MD808 Pro offers bigger and smart display, and big memory up to 16G.

Autel MaxiDiag MD808 Pro user manual

autel-maxidiag-md808-pro-diagnostic-tool-1


Autel MaxiCom MK906 vs. MaxiSYS MS906 vs. MaxiSYS Pro MS908P

The article aims to introduce new diagnostic pad Autel made – Autel MaxiCom MK906. so, how much do you know it? Is it worth you  euros? Look here.

autel-maxicom-mk906-programmer-diagnostic-tool-1

What’s Autel MaxiCom MK906:

Q: Is this a fake Chinese copy of the ms906?

A: No, this is 100 % totally AUTEL original product. Here is the link on AUTEL official website: https://www.auteltech.com/autelcms/Online%20Products/576.jhtml

Q: How much are the updates after the free year to get updates? Is it  same with the ms906.

A: Yes, same with MS906, one year free update, then 495USD/year.

Q: Does it support coding and programming?

A: MK906 works for coding but no luck with programming. For programming with Autel, MS908P is the only option.

Autel MK906 vs Autel MS906 vs Autel MS908P:

Functions comparison:

Autel MS906 is used for auto diagnostic test only, while MK906 and MS908P can work for not only diagnosis but also ECU programming.

It depends on what you need.

For diagnosis only, have a Autel MS906.

For diagnosis and coding, have Autel MK906

For diagnosis and coding, programming, have Autel MK906 and MS908P

Product                  Autel MK906                        Autel MS906                            Autel MS908P

Diagnosis                             Yes                                   Yes                                                Yes
Coding                                  Yes                                   No                                                 Yes
Programming                      No                                   No                                                  Yes

Hardware specifications comparison:

Autel MK906 and MS906 almost share the same hardware features. Both hardware is improved a lot, compared with MS908P. But MK906 will be better than MS906 because it’s lighter – good to take it anywhere.

That is, the new Autel MaxiCom MK906 wins, in terms of hardware design.

Product    Autel MaxiCom MK906    Autel MaxiSYS MS906            Autel MaxiSYS Pro MS908P

Price          979EUR                                           917EUR                                     1884EUR


autel-maxicom-mk906-programmer-diagnostic-tool-pic-1

autel-maxicom-mk906-programmer-diagnostic-tool-pic-2

autel-maxicom-mk906-programmer-diagnostic-tool-pic-3

2018 Launch X431 V+ VS 2014 Version, any difference?

The big difference between 2018 Launch X431 V+ and  2014 Version is  the outlook design i.e package box color, front camera, rear camera, DBSCARII outlook, etc.

Here we go for details.

2018 Launch X431 V+full package looks like this:

launch-x431-v-wifi-bluetooth-global-version-full-system-scanner-1

2018 Launch X431 V+package color is white not Black.

launch-x431-v-wifi-bluetooth-global-version-full-system-scanner-2

launch-x431-v-wifi-bluetooth-global-version-full-system-scanner-3

2018 Launch X431 V+Mux has no front camera

launch-x431-v-wifi-bluetooth-global-version-full-system-scanner-4

launch-x431-v-wifi-bluetooth-global-version-full-system-scanner-5

2018 Launch X431 V+Mux back comes without rear camera.

launch-x431-v-wifi-bluetooth-global-version-full-system-scanner-6

launch-x431-v-wifi-bluetooth-global-version-full-system-scanner-7

2018 Launch X431 V+DBSCAR5 and 2014Launch X431 V+ DBSCARII

launch-x431-v-wifi-bluetooth-global-version-full-system-scanner-8

launch-x431-v-wifi-bluetooth-global-version-full-system-scanner-9

For more 2018 Launch X431 V+ update, browse:

http://www.carobd.de/wholesale/launch-x431-v-wifi-bluetooth-global-version-full-system-scanner.html

How to install john deere service advisor 4.2.005 on win 10 64bit

How to install john deere service advisor 4.2.005 with the February 2016 data base disks on a machine with win 10 64bit.

1/you must have enough disk space to download the full set of February 2016 data base (52Gb); it comes with seven iso images and the SA4.0 image and a February 2015 update which you don’t need and of course the activator.

2/use an iso mounter software to mount the SA4.0 image to a virtual drive.

3/browse to the setup file in your virtual drive and run it as administrator

follow the steps (it will prompt for a username and password use those of your windows user account if you’re under 7-8 or 10 windows version)

it will take a while! don’t turn off the computer and don’t worry about the incompatibility messages that windows will show you during the installation process specially for the SQL 2005 server installation.

4/after completing the installation of the SA4.0 reboot the computer and set back the system time to mars 2016.

5/mount the first iso image of the data discs to a virtual drive, browse the sauce folder and run setup file as administrator; wait for it to complete the installation it will launch the SA 4.2.005 at this step you may have a message that the SA 4.2.005 is not capable of launching the search engine don’t worry close it and go to task manager (ctr+alt+sup)

click on services and look for the LightweightIDOL service if it’s stopped than run it.

6/run the activator as administrator and activate the service advisor; don’t use the prolongation tool at this step!.

7/now go to the task manager again and look for the SAupdater service and disable it.

8/re-open the service advisor, click the accept button for the license agreement, and configure the path for the data access you can use the mapping for a virtual drive choice to map each data disc image to a virtual drive it will take more than an hour to load all the data disk.

it will ask you for scheduling the update choose the end of the week and create the task.

9/Now close the SA, use the activator again but this time just use the prolongation tool choose 9000 days or whatever you want.

10/Look for the task scheduler and run it, choose the SAupdate task and modify the time for the task to begin to 2030 or whatever you want.

11/reboot the computer and set back the time machine to the actual time, launch SA and everything must work ok.

if you have any trouble than you messed something just clean up and reinstall.

-Thanks to @sami.zaltni (MH forum)

Where to buy john deere service advisor 4.2.005?

You could get it on www.carobd.de.

Contact email at Sales@CarOBD.deto order john deere service advisor 4.2.005, this version is already tried on WIN7 32bit successfully, try Win10 64bit at your own luck.

john-deere-service-advisor-edl-v2-diagnostic-kit-1

Here you could own john deere service advisor 4.0 CCE 2.8 CF at best price:

john-deere-service-advisor-edl-v2-diagnostic-kit-2

http://www.carobd.de/wholesale/john-deere-service-advisor-edl-v2-diagnostic-kit.html

Which Tata Mahindra Maruti diagnostic scanner, Vpecker EasyDiag, Autel 908P or X431 V?

All of Vpecker EasyDiag Indian version, Autel MaxiSys Pro 908P, Launch X431 V can fully work with Indian cars Tata, Mahindra and Maruti, read details as below.

1.TATA Function List, all of the above tools can work on.
Note: “X” means fully supported

which-tata-mahindra-maruti-diagnostic-scanner-vpecker-easydiag-autel-908p-or-x431-v-1

2.Maruti Function List, seems only Vpecker EasyDiagand Launch X431 Vcan work on.
Note: “X” means fully supported

which-tata-mahindra-maruti-diagnostic-scanner-vpecker-easydiag-autel-908p-or-x431-v-2

which-tata-mahindra-maruti-diagnostic-scanner-vpecker-easydiag-autel-908p-or-x431-v-3

which-tata-mahindra-maruti-diagnostic-scanner-vpecker-easydiag-autel-908p-or-x431-v-4

which-tata-mahindra-maruti-diagnostic-scanner-vpecker-easydiag-autel-908p-or-x431-v-5

which-tata-mahindra-maruti-diagnostic-scanner-vpecker-easydiag-autel-908p-or-x431-v-6

which-tata-mahindra-maruti-diagnostic-scanner-vpecker-easydiag-autel-908p-or-x431-v-7


3.Mahindra Function List: seems Vpecker EasyDiag andAutel MaxiSys Pro 908Phas a wide range of Mahindra, Launch X431 V is limited to work on Mahindra.
Note: “X” means fully supported

which-tata-mahindra-maruti-diagnostic-scanner-vpecker-easydiag-autel-908p-or-x431-v-8

which-tata-mahindra-maruti-diagnostic-scanner-vpecker-easydiag-autel-908p-or-x431-v-9

which-tata-mahindra-maruti-diagnostic-scanner-vpecker-easydiag-autel-908p-or-x431-v-10

Conclusion:

Vpecker EasyDiag India adapter:

-> fully works on all Indian cars (TATA, Maruti and Mahindra)

-> Wins in Price, $199 free shipping on http://www.carobd.de/wholesale/vepcker-easydiag-indian-cars-scanner.html

-> no area limit, that means users can order in any country.

-> built-in wifi allows Vpecker to communicate with the vehicles via WIFI.

Launch X431 V:

-> Woks on all TATA and Maruti cars, limited to work on Mahindra.

-> Wins in famous brand Launch Company

-> Has a wide range of vehicle coverage about 100 brands at reasonable price

Autel MaxiSys Pro 908P

-> Woks on all TATA and Mahindra cars, limited to work on Mahindra.

-> Better for those professionals who have a wide range of vehicles to repair and maintenance.