Archives

Scania vci3 2.48.2 Installation Tutorial

When we got the scanner “Scania VCI3”,how to install the software is a problem for some of  our customers.

Here we share some steps on installing.

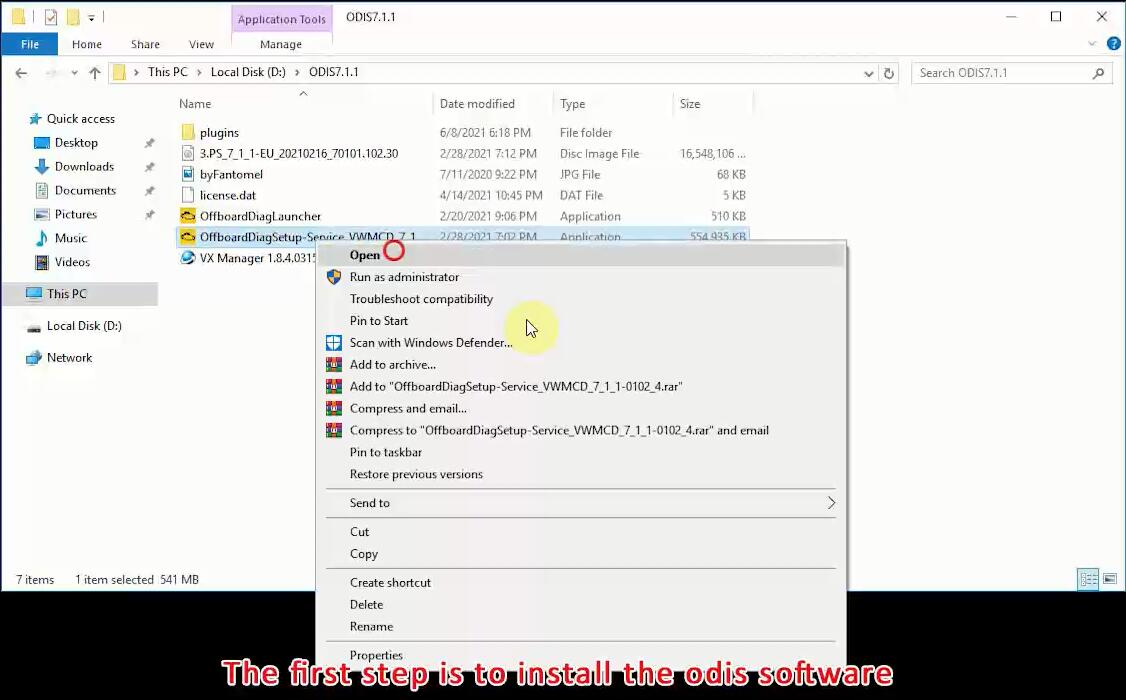
1.open the scania vci 32.48.2 foler

scania vci3 installation step 1

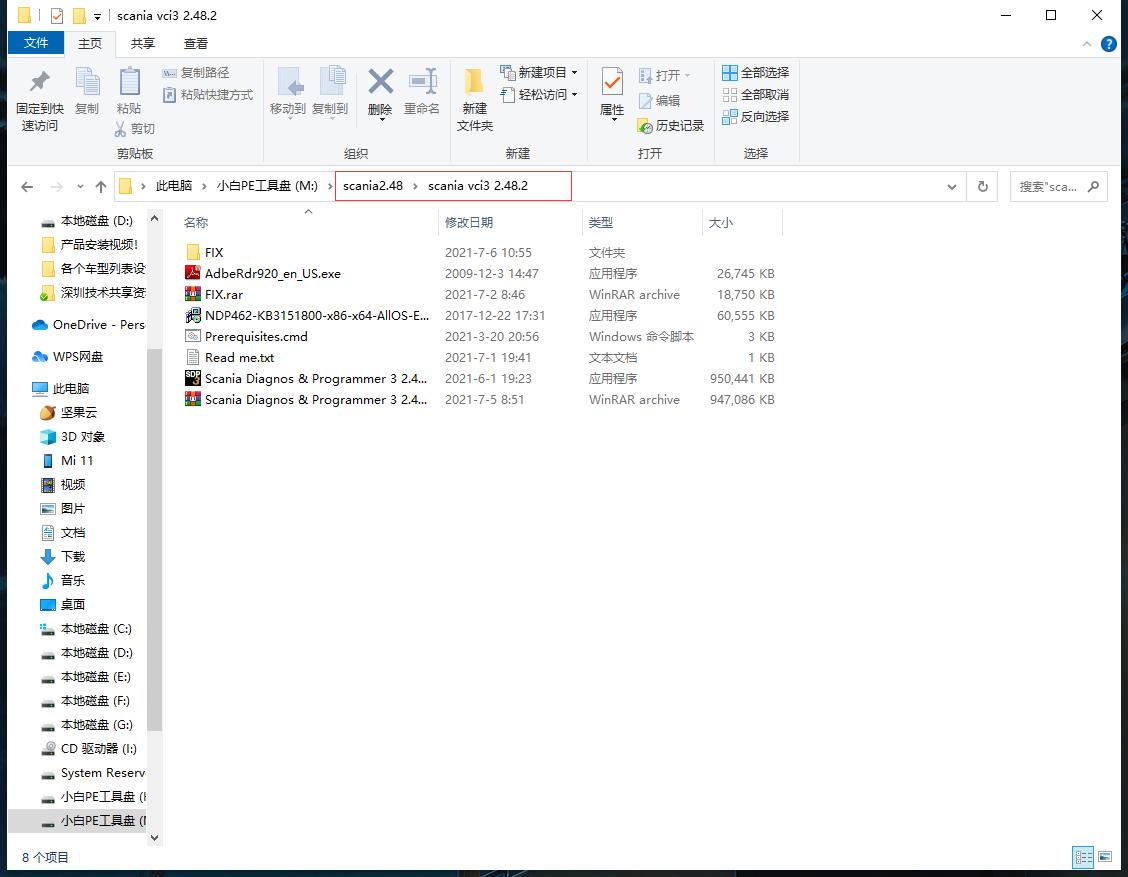
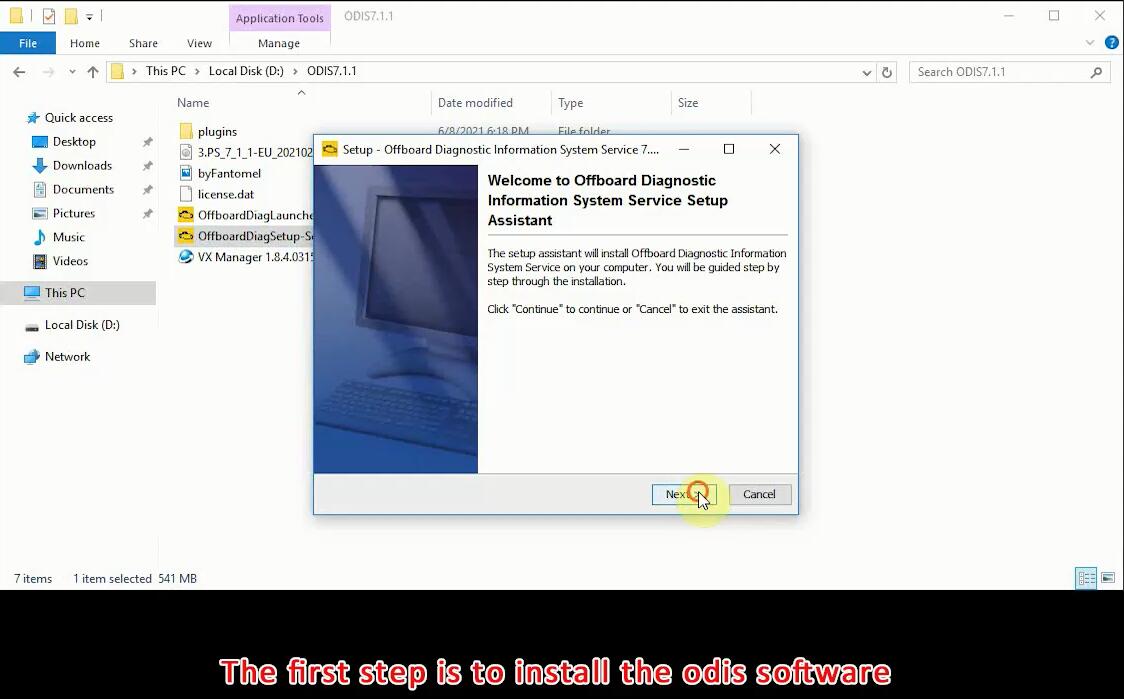
2.Install in the order of the pictures below, the order cannot be wrong! (The installation software is all run as an administrator)

scania vci3 installation step 2

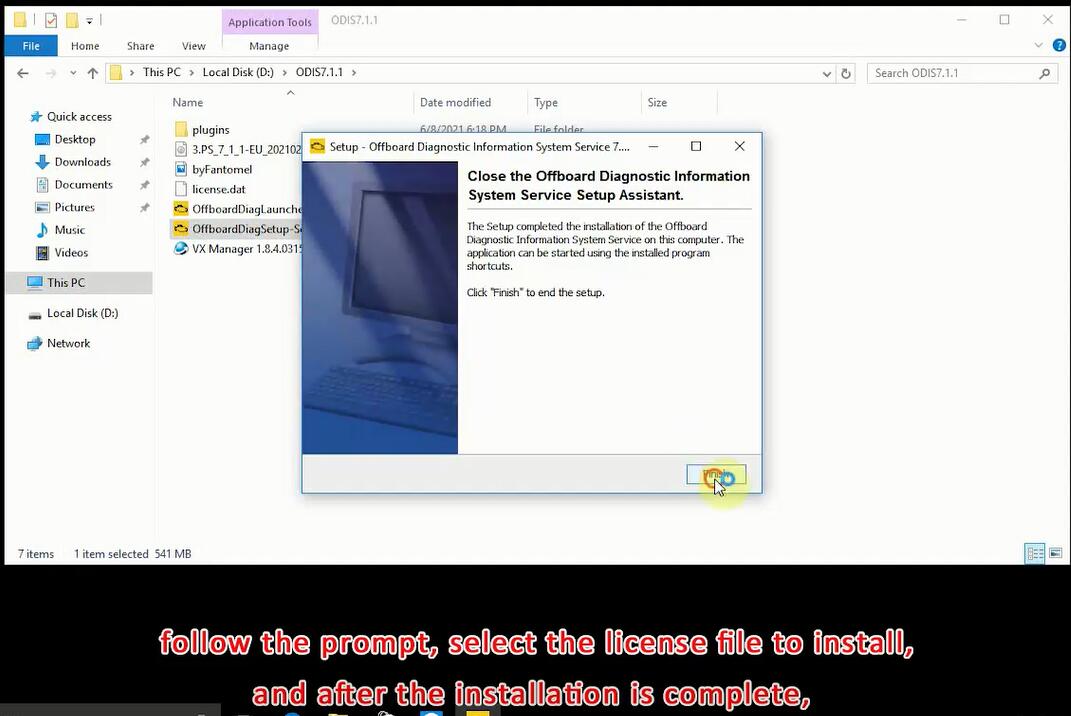
Note: After the installation of the fourth software (Prerequisites.cmd) is complete, the computer needs to be restarted once! ! ! If the computer does not restart, continue to install the software, the software will not be available! ! !

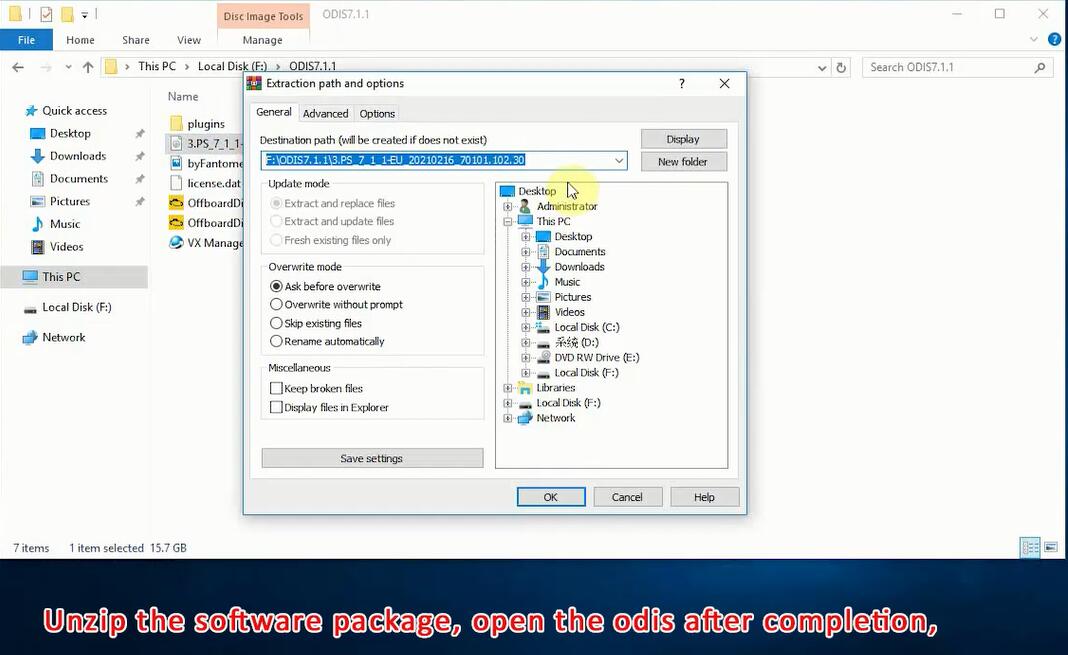
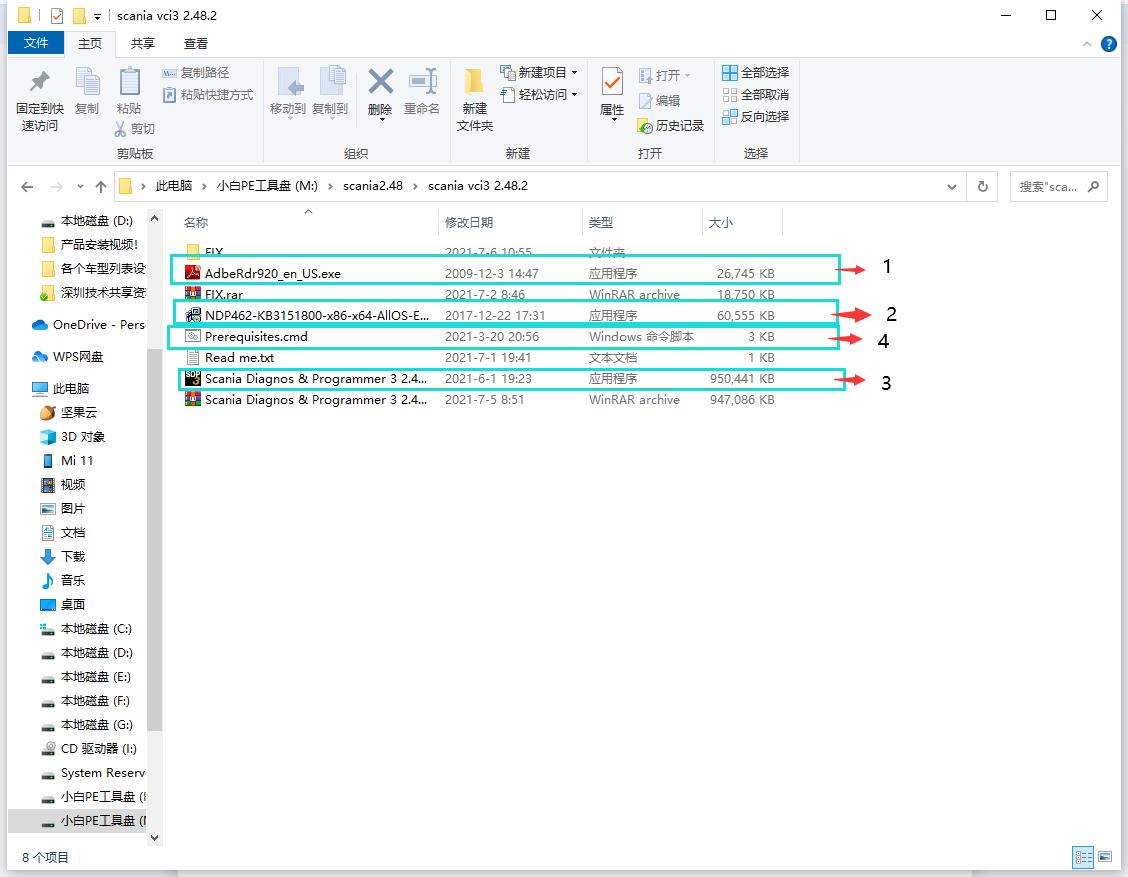
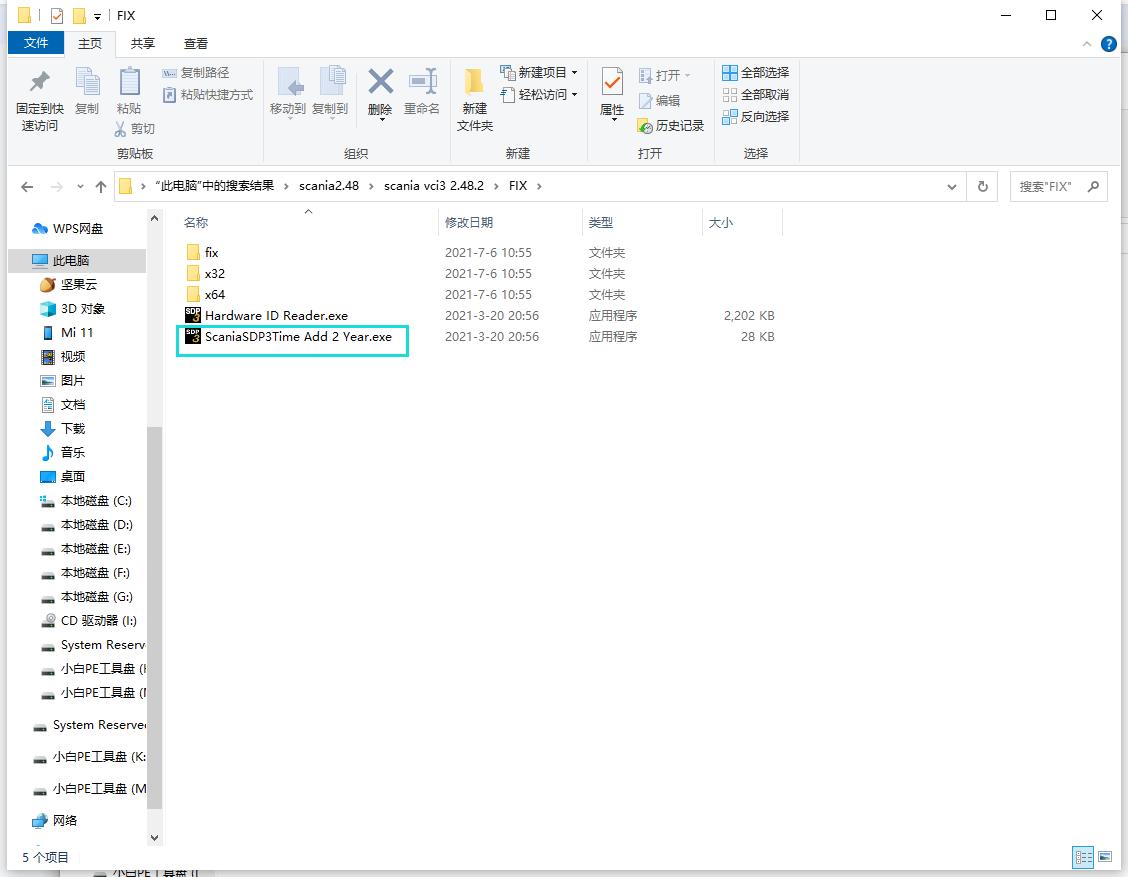
3.After opening the scania vci3 2.48.2 folder, enter the Fix folder directory, and select the following files according to the system of the computer. If the computer is a 32-bit system, choose X32, and if the computer system is a 64-bit system, choose X64. (Choose the wrong computer system installation will cause the installation to fail!!!)

scania vci3 installation step 3

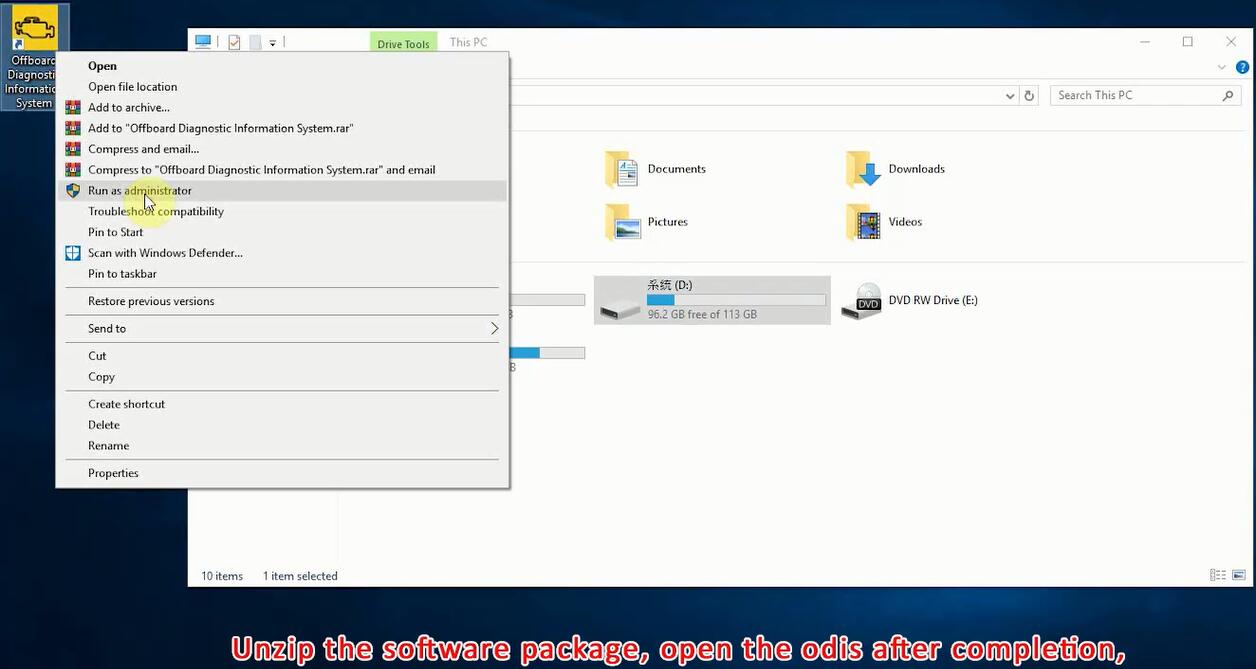
4.After opening the folder, select the first file to run (run as administrator!!!)

scania vci3 installation step 4

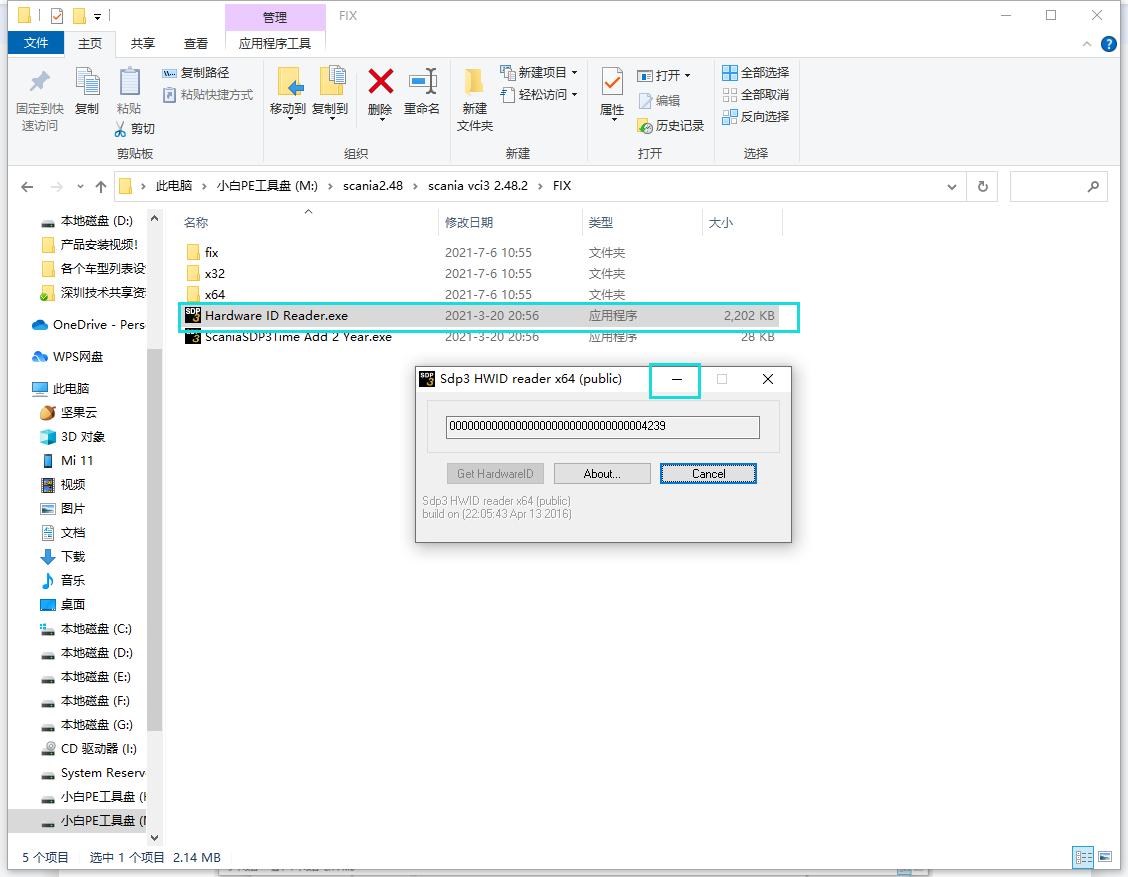
5.Return to the Fix folder, run the Hardware ID Reader file (run as an administrator!!!), after opening it will prompt a string of digital codes, if your numbers are the same as the picture demo, the installation will fail. The software needs to be uninstalled and reinstalled! ! ! The correct numeric code should look something like this :78113F059337D68A39C9F422271CF8AB42FA
Give the correct digital code to the engineer for activation, the engineer will send you an activation file like this

图片5

Just put the activation file on the desktop and run it. (It should be noted that when running the Hardware ID Reader software to generate an ID, the Hardware ID Reader software cannot be closed, because closing the Hardware ID Reader software will invalidate the ID file registered by the engineer. So minimize the Hardware ID Reader software and let it run in the background just fine)

scania vci3 installation step 5-1

6.Enter the fix folder of Fix and select all the files in the fix

scania vci3 installation step 6

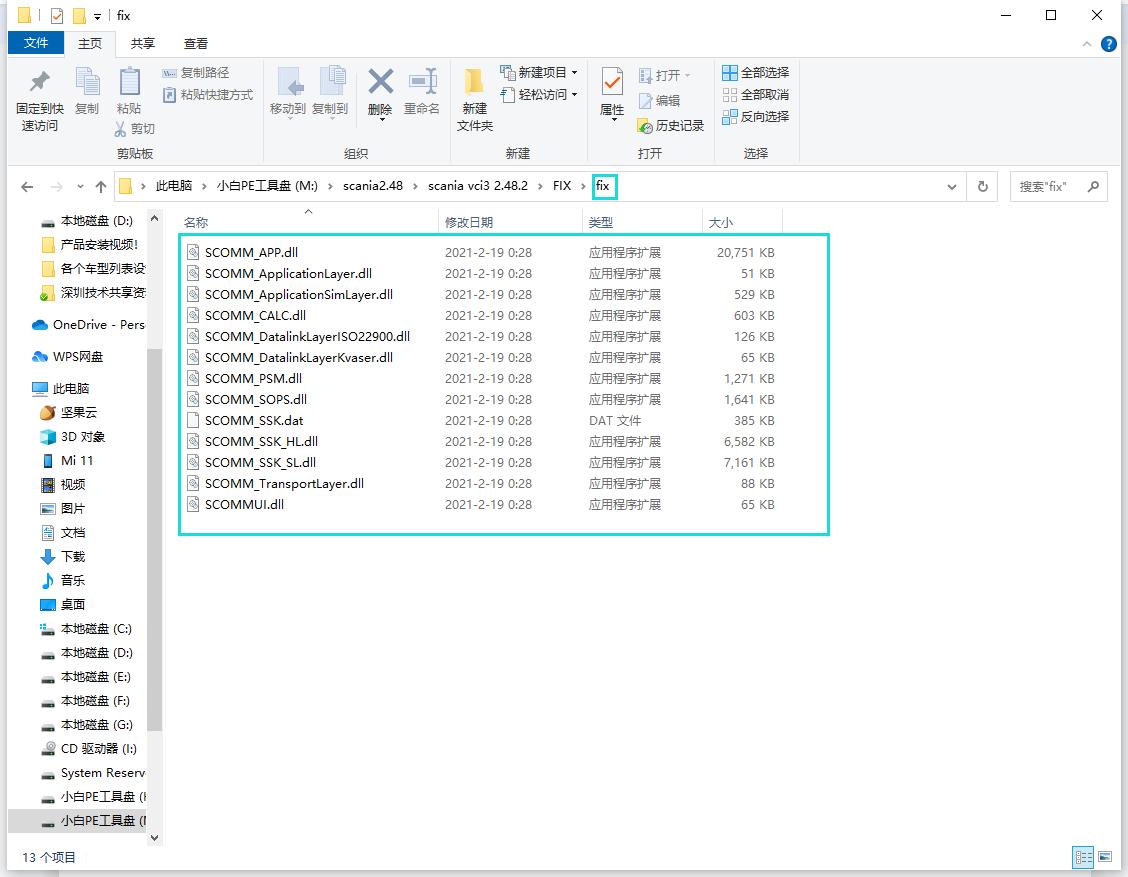
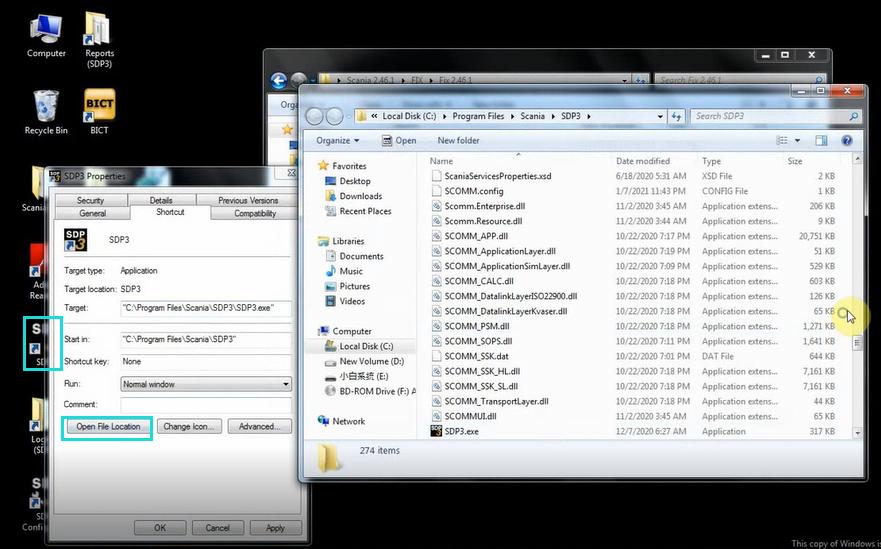
Copy all the files in the selected fix to the location of the desktop SDP3 files. (Prompt whether to replace the current file, select yes to all)
Right-click to open the SDP3 software on the desktop, select Properties, and then select the location of the open file

scania vci3 installation step 6-1

7.Then go back to the Fix file and run the Scania SDP3 Time file (run as administrator!!!)
After the software prompts success, do not close the Scania SDP3 Time software. (Be sure to restart the computer immediately!!! Otherwise the installation will fail)

scania vci3 installation step 7

8.After restarting the computer, open the SDP3 software, there is a menu bar on the left, indicating that the software has been installed successfully.

scania vci3 installation step 8


How to Install Vxdiag VCX SE 6154 ?

Steps on Installing Vxdiag VCX SE 6154

VXDIAG VCX SE 6154 is an OEM diagnostic interface for the vehicles of the Volkswagen Group and Audi. It can be compatible with OEM software of ODIS.

But how to install it ?What’s the steps ?

vxdiag-vcx-se-nano-6154-installation-step-1 vxdiag-vcx-se-nano-6154-installation-step-1-1 vxdiag-vcx-se-nano-6154-installation-step-1-2 vxdiag-vcx-se-nano-6154-installation-step-1-3 vxdiag-vcx-se-nano-6154-installation-step-2 vxdiag-vcx-se-nano-6154-installation-step-3 vxdiag-vcx-se-nano-6154-installation-step-4 vxdiag-vcx-se-nano-6154-installation-step-4-1 vxdiag-vcx-se-nano-6154-installation-step-5 vxdiag-vcx-se-nano-6154-installation-step-5-1 vxdiag-vcx-se-nano-6154-installation-step-5-2 vxdiag-vcx-se-nano-6154-installation-step-5-3 vxdiag-vcx-se-nano-6154-installation-step-6 vxdiag-vcx-se-nano-6154-installation-step-6-1 vxdiag-vcx-se-nano-6154-installation-step-7 vxdiag-vcx-se-nano-6154-installation-step-7-1 vxdiag-vcx-se-nano-6154-installation-step-8

For more product information,please click here

For more information about the installation steps,please check Youtube Video

How to Solve HTT-WIN Problem on Mercedes Benz Software ?

How to Solve HTT-WIN Problem on Mercedes Benz Software ?

Mercedes-Benz detects that there is a problem with the connection

Here is the error picture

htt win problem

But how to solve this ? We will provide solutions

Step1;In the system file, find Hyper-V manger in windows administrative tools ,then click it.
benz software htt win

Step 2;Click the  Virtual Switch Manger

benz htt win problem

Step3;click the Ether

benz software htt win

Step4;Select your computer network card in here

htt win problem

Step5;Right click on the network,Open network&internet settings

htt win problem

Step6;After entering this interface, select Ethernet, Then select the place marked by the arrow
图片6
Step7;Double click here

图片7

Step8;Right click vEtherent  Then  select the place marked by the arrow

图片8

Step9;Please select the  place marked by the arrow,Enter the following IP address.

htt win problem

How to do MB SD C4 SelfTest ??

How to do MB SD C4 Selftest ?

Usually we need to make a selftest for MB SD C4 to check if the interface is normal or not ?

But how to do it ? Here is the steps

MB SD C4 Selftest

MB SD C4 Selftest

MB SD C4 Selftest

Once finishing the test, need to send the report to us to analyze

For more informations,please visit following link

https://www.carobd.de/producttags/mb-sd-c4-c5.html

GODIAG GT101 PIRT Power Probe DC 6-40V Vehicles Electrical System Diagnosis/ Fuel Injector Cleaning and Testing/ Current Detection/Relay Test

GODIAG GT101 PIRT Power Probe DC 6-40V Vehicles Electrical System Diagnosis/ Fuel Injector Cleaning and Testing/ Current Detection/Relay Testing

Top Reasons Why You Need GODIAG GT101 PIRT Power Probe:

1. Its function also covers the detection of relays and fuel injectors as well as the cleaning of fuel injectors
2. It is a special circuit maintenance testing tool which is developed for automobile maintenance workers and engineers
3. It can be used to diagnose an open circuit, short circuit, detect positive and negative circuit and pulse current of power lines
4. It can detect all 0-80v electronic systems, greatly shortening the detection time. The connection with the car battery is simple and easy to use.

5. It support the testing of lighting lamp,window lift motor, horn, ECU control Unit power supply and other individual component, vehicle component circuit.
6. The output current can be reversed to form a loop power, and when the current exceeds 20A, it automatically trip to protect the device and extend the service life.

Product Introduction:

It is a multi-use circuit-tester with built-in diagnostic power. It is the best electrical tester for reducing diagnostic time in all 6- to 40-volt vehicle electrical systems. Undoubtedly it is the most versatile and practical tool ever for its users.

This tool simplifies the testing of fuse boxes, verifies the correct operation of motors, lights, relays, sensors, wires, and communication-circuits. The large digital color display makes for easy viewing in direct sunlight or complete darkness.

godiag-gt101-pirt-power-probe-1

godiag-gt101-pirt-power-probe-2


More Information click:https://www.carobd.de/wholesale/godiag-gt101-pirt-power-probe.html

How To Register Autel MaxiDiag MD806 Pro?

How To Register Autel MaxiDiag MD806 Pro?

19122315771547399583

User would update the scan tool ONLY after you had registered the tool on our website: www.autel.com. Then you could download software, update online, retrieve information and get warranty service.

Note: Prior to registration, please confirm your network is working properly.

1. Visit the website http://pro.autel.com.
2. If you already have an Autel account, Sign In with your account ID and password.
3. If you are a new member to Autel, click on the Create Autel ID button on the left side to create an ID.
4. Enter the required information in the input fields, and click the Get Verification Code button to get a verification code for email validation.
5. The online system will automatically send a verification code to the registered email address. Input the code in the Verification Code field and complete other required fields. Read through Autel’s Terms and Conditions and click on Agree, and then click Create Autel ID at the bottom. A product registration screen will display.
6. The device’s serial number and password is located in the About section of the System Setup application on the tool.
7. Select your product model, enter the product serial number and password on the Product Registration screen, and click Submit to complete the registration procedure.

Original Launch PAD VII with Smartlink C VCI Automotive Diagnostic Tool Support Online Coding and Programming

launch-x-431-pad-vii


LAUNCH X431 PAD Ⅶ Multi-language High-end Diagnostic Tool
X-431 PAD VII is an unexpected high-end diagnostic tool from LAUNCH, comes with the ADAS calibration function, 26 service functions, TPMS service and 8 extended modules functions. New Smartlink C VCI powers technician a new diagnostic level without the limitation of diagnostic functions, tools and vehicle types.X-431 PAD VII is an unexpected high-end diagnostic tool from LAUNCH, comes with the ADAS calibration function, 26 service functions, TPMS service and 8 extended modules functions. New Smartlink C VCI powers technician a new diagnostic level without the limitation of diagnostic functions, tools and vehicle types.

Highlights:

1. With 1 Years Free Update Online
2. This is Global Version Without IP Limitation
3. Realtime Remote Diagnosis Function via WiFi
4. Support Commercial Vehicle and Passenger Car Diagnose, Support J2534, CAN FD, DoIP.
5. Free Multi-Language Supported: 
English, French, Spanish, German, Russian, Korean, Japanese, Portuguese, Italian, Polish, Dutch, Swedish, Chinese
6. New Module “MALL” is Now Available for All Users to Expand and Upgrade Their X-431 PAD VII with More Diagnosis Software.

obdstar x300 pro4 vs.X300 dp plus: x300 pro4 is a dedicated key programmer

obdstar x300 pro4 is a dedicated key programmer for all makes except several super luxury car makes incl. Lamborghini, Maserati, Ferrari, Bentley, Alfa Romeo, Abarth. Now buy it send free Multifunctional Jumper

obdstar x300 pro4 will be a top choice of Locksmith comparing to X300 dp plus.

This is obdstar x300 pro4 package list:

1pc x  X300 Pro 4 Unit
1pc x  Main cable
1pc x  Charger
1pc x  OBDII-16
1pc x  HYUNDA-10
1pc x  KIA-20
1pc x  HONDA-3
1pc x  P001 programmer
1pc x C001 board
1pc x  C002 board
1pc x  W001
1pc x  Tool Box
1pc x  OBDSTAR Certificate
1pc x  X300 Pro 4 fast guide manual
1pc x  packing list

2019103007349446

obdstar x300 pro4 vs.X300 dp plus in the aspects of IMMO function, specification and accessories:

1

2

3


To sum up:

obdstar x300 pro4 is only for locksmith, it can do:

– Program keys for all makes, except Lamborghini/Maserati/Ferrari/Bentley/Alfa Romeo/Abarth.

– Erase keys

– Program remote

– Read Key Number

– Read pincode

– Read EEPROM Chip

obdstar x300 pro4 IMMO coverage inquiry: www.obdstar.com

obdstar x300 pro4 doesn’t support:

OBDII diagnosis

Mileage programming

ECU clone and ECU programming

Special functions

Besides, from the outlook / specification, obdstar x300 pro4 is the lite version of obdstar DP Plus.

obdstar x300 pro4 comes with smaller LCD, owns the same Android5.1.1 operation system and Wifi function etc.

19110115725991328862

OBDSTAR OdoMaster vs. X300M OBD Odometer Correction Tool

As titled, what’s the difference between the new 5 inch OBDSTAR OdoMaster and the X300M OBD mileage programmer?

Check the table comparison below:

Hardware Comparison:

obdstar-x300m-odometer-tool.html-1

Software Comparison:

FORD FIESTA 2017- 2013-
FOCUS 2019 2013-
TRANSIT ×
KA 2018- 2015-
GM COLORADO 2018- 2005-
CRUZE 2017- 2010-
ESCALADE 2018- 2015-
XT6 2019 /
YUKON 2017- 2014-
CHRYSLER CHEROKEE 2018- 2015
RAM 2018- 2011-
DURANGO 2018- 2014-
LANDROVER DISSCOVERY 4 2015- /
RANGE ROVER SPORT 2017- 2014
VW MQB  2012-2014.06 ×
MQB  2014.06-
RENAULT CAPTUR 2017- /
TRAFIC IV 2017- /
KIA CEED 24C16
D70F3423
D70F3XXX ×
D70F3421 ×
D70F35XX ×
NEC ×
NEC+24C16 ×
KIA Optima 24C16
D70F3536
D70F3421 ×
D70F352X ×
D70F35XX ×
NEC ×
NEC+24C16 ×
NISSAN ALTIMA  2013
KICKS  2017- ×
MITSUBISHI OUTLANDER ×
TRITON 2015- ×

 
Another biggest difference is that OdoMaster will release continuously software upgrade in the near feature (1 year free update online) while X300m with no update available.

19102415719011767350