Archives

Original OBDSTAR VAG-PRO Key Programmer for VW Group vehicles

obdstar-vag-pro-blog-1

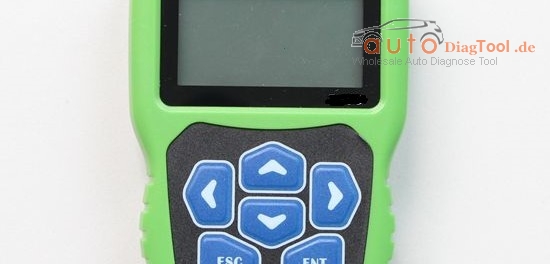
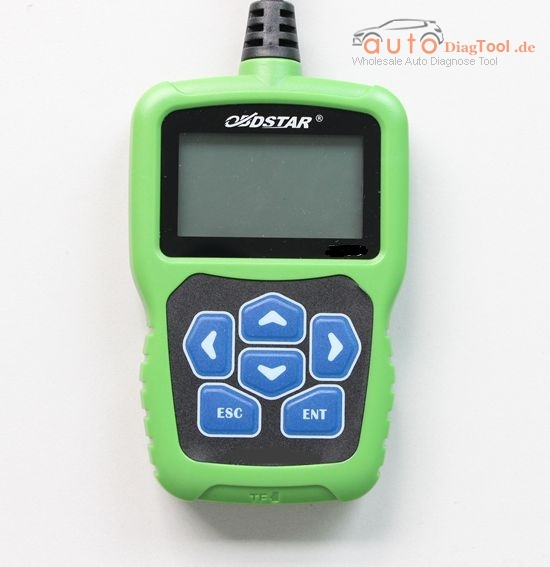
Brand-new OBDSTAR original tool for VW Group vehicles key programming has been released. OBDSTAR VAG-PRO is professional hand-held car key programmer for VW, AUDI, SKODA, SEAT vehicles, no need pin code. OBDSTAR VAG-PRO Key Programmer for VW Group vehicles almost shares the same function with OBDSTRA F100 for Ford/Mazda and OBDSTAR F108 for Peugeot /Citroen.

obdstar-vag-pro-blog-2

OBDSTAR VAG-PRO main functions:

Basic diagnosis for all VW Group car models.
Car key programming, immobilizer programming
Mileage adjustment
Read Security code
Maintenance Reset ;
EPB(Electronic Park Brake);
TPS(Throttle Position Matching);
Oil / Service light reset
Storage Battery replacing
Airbag reset
Steering Angle learning;
OBDSTAR VAG-PRO hardware configuration:

The main unit adopts ARM high-speed chip, the speed is faster;
Support multi-language condition, it can be used in different countries.
Integrated structure design, anti-throw, anti-shake, durable and long lasting;
Industrialization design, it can work stably under the bad environment, such as hot and cold temperature etc.
Large capacity TF card, on-line update;
Offer 1 year free update for the opened software.
OBDSTAR VAG-PRO specific Features:

Support basic diagnosis for all series car models;
Support mileage adjustment for Audi A3, A4 (RB4/RB5), A4L, A5, A6, A6L, A8L, Q5, Q7, S5, R8, TT; VW Bora, Beetle, Caddy, CC, EOS, Lavida, Magotan, Golf, GTI, Jetta, Passat, Phaeton, POLO, Scirocco, Sharan, T5, Tiguan, Touareg, Touran, Tansporter; Fabia, Octavia, Superb, Altea、Ibiza、Leon;
Support read security code for the 3.5 generation immobilizer Bora, Golf, Passat, Lingyu, Jetta, Polo, Sharan; Lavida, Sagitar, Caddy, Touran, Octavia; Audi 03-05 A4(RB4), 06-07 A4(RB8);
One click maintenance reset, no need any channel number, support small and big maintenance auto reset for the latest models till 2014 A8L, A7, A6L, A5, A4L, A3, A1, Q5, Q7,Q3, TT, Magotan, CC, Lavida, Satigar, Passat, Superb, Fabia, Tiguan, Tiguan, Scirocco, EOS, Touareg, Gran Lavida etc.
Support replaces brake pads for the cars with EPB, support brake pad thickness input directly, intelligent operation, and no need channel number;
Support throttle position matching, auto-identification vehicles, intelligent operation;
Before the 4th generation immobilizer, support intelligently program keys and remote, no need channel number;
Replace storage battery for the vehicles with automatic start-stop device;
Repair airbags collision data for old VW5, VW51 etc.
Steering angle learning for G85;
VW, AUDI the 4/5th generation adapter is being developed, support optional.
What models can OBDSTAR VAG-PRO do?

OBDSTAR VAG-PRO EPB (PBM)

Audi (EPB)

A8

A8 (D3)

A8 (D4)

Other model

Seat (EPB)

Skoda (EPB)

VW (EPB)

OBDSTAR VAG-PRO immobilizer:

—AUDI V30.13

—SEAT V30.13

—SKODA V30.13

—VW V30.33

(Solved) SDConnect C4 WIFI has no connection in 05.2016 Xentry

sd-connect-compact-4for-benz-1-1-blog-1

When I run my SDConnect C4 with cable in Xentry 05.2016 everything works well. I made configuration the WIFI of PC with the normal procedure with 26xa ec. but when i tried to connect my Wifi of pc with the C4 I got error that there is no connection. i tried different times but nothing happened. The sdconnect is on standby but my PC doesn’t see the Road24h. After a little bit of time in my network connection i can see the Road24h but when I try to connect it gives me error and than the Road24h is not anymore in my network connections.

Finally, I solved by following this step-by-step instruction:

Try this

It worked for me

To save an ad-hoc network and its network key on the guest computer (running Windows 7)

Note down the SSID, security type, encryption type and the key of the ad-hoc network.

Disconnect your connection to any wireless network and switch off/disable your wireless device. Turn on/enable your wireless device but don’t connect to any network. (Thanks GK.)

Click on the network icon in the taskbar.

Click Open Network and Sharing Center > Manage Wireless Networks > Add.

Click “Manually create a network profile”. (This may look silly but we really are going to create an infrastructure network now.)

Enter the network name (SSID), security type, encryption type (if any) and the key that you noted in step 1.

Uncheck both checkboxes (“Start this connection automatically” and “Connect even if the network is not broadcasting”.) [Note that you cannot have the connection start automatically. If you try to have it checked, step 10 will fail. A different way to start it automatically during system boot is described below.]

Click Next > Close. Your connection must appear in the list with the icon suggesting infrastructure (two big screens connected to a tube). Don’t worry about it.

Click Start, type in “cmd” in the search box, press Enter.

In the Command Prompt, type in “netsh wlan set profileparameter name=NetworkName ConnectionType=IBSS”, exactly as shown, without quotes, except you must substitute NetworkName with the SSID (network name) of your ad-hoc network.

If everything went well, you’ll see that the icon has now changed to an ad-hoc icon (three small screens connected to each other) in the Manage Wireless Networks window.

Turn on/enable your wireless device, and try connecting to the Ad-hoc network. You will notice that you no longer need to enter the network key.

To automatically connect to a saved ad-hoc network during Windows boot (can be applied to both guest and host computers running Windows 7)

Click Start > point to All Programs > right-click Startup > click Open. (You may choose Open All Users instead if you prefer).

Right-click an empty space and click New > Shortcut.

Type in “netsh wlan connect NetworkName”. Once again, NetworkName must be substituted with the SSID of your ad-hoc network.

Click Next and enter a fancy name such as “Connect to NetworkName” or something like that.

Click Finish and you’re done. This shortcut will run when Windows starts up, giving you a very brief flash of the black command window, followed by your computer connecting to the ad-hoc network if it is available. Tip: You can also pin the shortcut in your taskbar or copy it to the desktop to easily connect to the network any time you want.

Note: You will probably need Administrator access to complete some of the steps above (in both procedures).

Autodiagtool.de SKP900 Key Programmer Up 7% OFF(till 08/25/2016)

Promotion SuperOBD SKP-900 V4.2 Hand-held OBD2 Auto Key Programmer No Tokens Limitation On Big Sales

superobd-skp-900-ke-programmer-main-blog-1

Sales: 7% OFF
Time: 07/27/2016-08/25/2016

Original Super SKP-900 SKP900 Key Programmer:
1. Hand-held tool,supports almost all cars in the world till year 2016.
2. No need pin code.
3. Provide lifetime free update online.


Higliths to Get SKP-900 Programmer

Version:V4.2
Update Online
Support XP system
Support Toyota G chip
SKP900 is good for American cars after 2006, especially Good for Landrover,not so good for Japanese cars, for Japanese cars, you can choose our Original X-100+ X100 Plus Auto Key Programmer

Kindly Note

1.SKP-9000 no tokens limitation, and updated freely permanent.
(it is with 50 tokens, after you use up, you can go to the SKP-900 official website to get more. It is for free. Just need Registration.)

2.This version superobd skp-900 key programmer only support English, if you want Portuguese version, please check there.

New Arrival Launch X431 PAD II 2 Full System WiFi Diagnostic Tool

Launch X431 PAD II is the new high-end diagnosis solution. Using the open source Android OS for deep car analysis and work with its large number of special functions. X431 PAD 2 covers more than 70 brands, access to all available vehicle systems; coding, programming (key, immobilizer system) and service reset.

launch-x431-pad-2-blog-1

X431 PAD II Features:

Professional and systematic DTC scan
Read & clear DTCs and use the integrated DTC one-click search
Record and playback Live Data
Display various graph streams simultaneously (up to 15 graph streams)
Remote diagnosis via golo
Easy and quick update via Wi-Fi
More powerful hardware configuration
Cortex-A7 4 core processor, 1.2GHZ; 2G memory, solid state memory 32G; 10.1 inch IPS high definition capacitive screen; machine passed the IP65 test
Comprehensive diagnosis for all functions
Full system diagnostic device, supporting: Read data streams, storage, playback, read DTCs, clear DTCs, actuation test, special functions
Large car model diagnosis coverage
DTC intelligent search
With the car model name prefix to quickly search for DTCs on Internet.
Maintenance database
Provide a large amount of vehicle maintenance information
Upgrade center
Support one-click upgrade for firmware and car model software and release updates in real time.

This is Original tool of Launch Pad II.with good quality and power for function,you can have a try.


How to do Digimaster 3 Self-Check ?

How to do c selfcheck (equipment check) ?

When the software prompts “please connect the self-test adaper to the DB15 interface to the equipment!”, please connect the self-test adapter to the DB15 interface of the equipment and click the “ok” button.
DB15 is normal when 5V LED and 12V LED on the self-test adapter are lighting but 9V LED.
If not the state, it may have been damaged. The testing situation of the internal module will be detected in the message after the testing.

digimaster-iii-blog-1
If you do not have the self-test adapter, when the software prompts “please connect the self-test adapter to the DB25 interface of the equipment,” please follow the below the wiring operation, it’s the same color points which are rang up,
and connect them together (except which has a voltage identifies), then use a multimeter to measure the voltage of the corresponding point.

digimaster-iii-blog-2

How to Program Peugeot 408 New Key with Launch X431 V

Hereby the carobd.de engineer share how to do key programming for Peugeot 408 2013 with original Launch X431 V (X431 pro) and program immobilizer key to Peugeot requesting for pin code.

launch-x431-v-hksp183-blog-1

Model:

Peugeot 408 2013, VIN= *****3X48C13*****

Note:

– Prepare security code/pin code (usually under the spare key card, the last 4 letters after C9000000; if lost, ask the 4S store for help)

– No need a diagnostic tool when the high-frequency remote control synchronizes (key emission frequency is not the same), just press the scan tool and follow the screen instruction.

Step by step to add new keys with Launch X431 V Pro:

1 select Peugeot v42.92 or newer versions

2 select car-> 408-> 408(2010.01-2014.09)

3 select Diagnosis

4 select a system

5 select Embedded Systems Interface (BSI), then communicate with ECU for about 15s

6 the system prompt the menu will be different on different models

7 select Special Function

8 select Repair Kit

9 select Learning

10 Select Key Programming

11 enter the security codes to continue

(wrong security codes will stop the process)

Note: all keys should be programmed together

12 click OK and enter the pin code twice

13 Confirm pin code. Ready to program keys.

14 enter keys number (maxi:5)

Here, keys number: 2

15 turn ignition off

16 turn ignition on within 15 seconds

17 key programming success, and prompt that key programming complete, turn ignition off and take out the key

18 quickly insert the second key to program

19 turn ignition on within 15 seconds

20 key programming success, and prompt that key programming complete, turn ignition off and take out the key

21 click OK, and now programmed keys number: 2

22 Check handbarke Is applied and gear shift in position “P” (automotive transmission)/

gear shift in neutral position (manual transmission) before start the engine

23 remote control programming, follow menu instruction step by step strictly

24 remote control matching complete

25 test the remote control and use the key to start the engine

remote control and new keys are verified working…Done!

How to find the Lan-ID for MB SD C4?

V2016.05 MB SD Connect Compact 4 Star Diagnosis

MB SD Connect Compact 4 support reading out & erasing trouble code,reading the real-time data of sensor and actuator, coding and programming.
Also support wireless diagnose, support K line,CAN BUS and UDS protocol, with multi-language.

All of us know that when you receive the C4 device,it need provide the information to activate,so you need provide the ID to the sales,so they can activate for you.

the ID of information is below”

Hardware ID:

Lan-ID:

HW-ID:

APP-ID:

and the version of the software.

But so many customers send the Lan-ID is wrong,now i will show you the right way to find the Lan-ID:

Step one:

step-1

Step two:

step-2

Then you will find the right one Lan-ID.

If you don’t want activate by yourself,you can check this one,that we have already install the software for you,and you can used it immediately after receive the device.

pp03

Renault Can Clip V159 Newest Update and Installation

Renault CAN Clip V159 is designed to diagnose Renault car models including automatically test all Renault models’ computers, reporgramming, airbag test and other functions.Renault CAN Clip V153 Diagnostic Interface works on Renault cars 1996 to 2013, Engine automatic gear shifting, Air conditioning system, SRS, ABS, ASR, MPL, GM, IMMO, Keyzess GO system, OBD-I I and so on.


Renault CAN Clip V158 Update Features:

1 Software version: V159

2 Multi-language:English,German,Brazil,Danish,Spanish,Finnish,French,Italian,Norwegian,Dutch,Portuguese,Romania,Swedish

3 Best tool for renault
Renault can clip is best tool for Renault car from 1998-2015.It mainly do scan and diagnose.
It can do ENGINE, automatic gear shifting, Air conditioning system, SRS, ABS, ASR, MPL, GM, IMMO, KEYZESS GO system, OBD-I I and so on.

4 Free update in one year by link.

5 V146 software only can install on XP system,with no anti-virus software in.
If you don’t have XP system,please tell us,we can send you system cd with your order.


How to Install Renault Can Clip Newest Software V159?

Step 1 – install DAEMON Tools Lite

Insert CAN CLIP V159 disk E: and open it
Run DTLite application to instal
Accept the agreement
Select Free License
Then follow the screen instruction
DAEMON Tools Lite installtion success and runs automatically
Minimize it for later use

Step 2 – run Crack Renault Clip

Copy clip 159_0_2_0 in Clip 158 disk E: to local disk D:
Open folder Activation (Patch V3) in Clip 158 disk
Open Crack Renault Clip
Register Editor: click Yes
Click OK
Click OK
Open DAEMON Tools Lite
Add image: clip 159_0_2_0 in local disk D:
Click it for Mount
Minimize DAEMON Tools Lite
Close folder Activation (Patch V3)

Step 3 – install Clip 159

Open computer clip 159 disk F:
Run setup application
Click the lapto icon (First installation) in Clip V158 interface
Click “I accept … agreement” and click Next
Select country (if no, select OTHER COUNTRY) and click Next
Select language and click Next

Manufacturer: Renault. Click Next
Click Next to begin copying files
Then computer will rebot automatically
Finish Clip installation

Step 4 – Clip properties setup

Open clip properties on Desktop
Open file location
Cut RSRWin appliation in local disk C:/CLIP_X97/Lib/Application
Paste RSRWin appliation on Desktop
Replace RSRWin appliation in local disk C:/CLIP_X97/Lib/Application with RSRWin on CLIP 159 disk E:/Activation (Patch V3)

Close CLIP properties

Step 5 – register CLIP

Run RSRWin application in disk C:/
Accept the license and register Clip

Are you part of Renault Network? Select No
Enter the unlocking code with the picture guide Renault Clip Registeration Step 4 in the folder Activation (Patch V3)
then click Confirm
Registration successful: Click OK
Replace “RSRWin” in C:\CLIP_X91\Lib\Application with “RSRWin” on Desktop

Step 6 – Computer management

Automatically install driver software
Open computer management
Select Device manager->Bosch automotive service solution device-> 18-alliance vehicle communication interface
Close Computer management

Step 7 – open Renault can clip v159 software to start diagnosis

Disclaimer:
The new clip v159 only works with the following one pcb we sells.

renault-can-clip-pcb-1renault-can-clip-pcb-2

How to renew Benz EIS and replace Benz ESL with VVDI MB BGA Tool ?

In general, Benz electric steering locks (ESL) are used with EIS W204/ W207/ W212. ESL is damaged in high frequency. In this case, there are two possible reasons and solutions:

If the ESL motor is damaged, replace a new motor.
If the NEC chip of ESL is locked, renew EIS then replace ESL.
How to tell if the ESL motor is damaged or NEC chip is locked?

Open VVDI MB tool software. Click “Check ESL damage status”.

If it shows ESL works normally, generally it means the EIS motor is damaged and you need a new one.
Replace a new motor, what need to buy?

—OEM MB ESL motor+ MB ESL dowel pin+ MB EIS removal tool

This full kit of MB ESL motor is available at:

esl-elv-and-oem-motor-steering-lock-plus-removal-tool-1
If it shows that ESL is damaged, then replace ESL.
This new ESL/ ELV emulator is recommended for your replacement:
How to replace ESL with VVDI MB Tool?

Step1.

To replace ESL, you need renew EIS at first, then re-write EIS and personalize ESL, in this way ESL is synchronized. To renew EIS, both key password and erase password are required.

Note: if you do not renew ESL first, but only personalize ESL, the ESL won’t be synchronized.

Get key password. You can increase key to get it.
Use VVDI MB NEC Key Adaptor to work with VVDI MB Tool to get key password.

Get erase password. In general, we can get the password directly with VVDI MB tool online calculation from server.
After input the two passwords choose “Infrared” as EIS communication way, then click “save EIS data”, Click “Renew EIS”.

Step2.

Now the EIS is full new, click “load EIS data”, click “Infrared” as communication way to enter new EIS data.
Click “OBD” as communication way to enter VIN.
VVDI-enter-new-EIS-data-3

Step3. Click “Personalize W204 ESL”

Step4.

After above steps, all EIS and ESL status checkboxes will be tick except the “Activated” checkbox. Insert the original car key hen EIS and ESL is activated. Now you use VVDI MB Tool to renew ESL successfully.

Note:

It’s hard to buy Mercedes W204/207 EIS and they are expensive.

If you have W204/ 207 all key lost, you can use W212 EIS for replacement.

VXDIAG JLR SDD V145 Offline Engineering Software Free Download

Jaguar and Land Rover 2 in 1 diagnose programming newest software has been updated to V145, which supports offline engineer programming. JLR SDD V145 can work with Vxdiag vcx nano for Jaguar and Land Rover diagnostic interface.

vxdiag-vcx-nano-for-landrover-blog-1

JLR SDD Multi-languages:

English, French,Finnish,German,Swedish,Dutch,Polish,Turkish,Portuguese,Spanish,Italian,Croatian,Danish,Slovenian,Czech,Russian,Greek, Romanian,Korean,Japanese.

JLR SDD Supported Car Models: Diesel and gasoline cars
JLR SDD Update: via CD, without firmware locked

JLR SDD Software Install Computer Requirements:

OS WIN7 32bit,
CPU I3 I5 and above,
RAM 1G and more,
HDD 200G and more
You’d better use the SSD disk

Free Download JLR SDD V145 Offline Version
https://mega.nz/#F!IVEjkJIJ!GVtIQMcqKFpqQHFkt_lLEA

Jaguar Land Rover SDD Interface Features:

1. Data Lists
2. Active Tests
3. Monitor
4. Utility tests
5. Reprogramming
6. Diagnostics Trouble Codes

Vxdiag JLR SDD Vcx Nano for Jaguar Land Rover Vehicles List:

Support 2005 to 2014 year vehicles of Jaguar and Land Rover
Support L316, L319, L320, L322, L359, L405,L494, L550, L538 Land Rover Vehicle Lines
Support X100, X150, X152, X202, X250, X350, X351, X400 Jaguar Vehicle Lines