How to Add VAG MQB49 5C 5D Key with KEYDIY KD-X4 Step by Step ?
Tutorial: add VAG VW Audi MQB49/5C and 5D key using KD-x4 key programmer step by step
Tools Used:
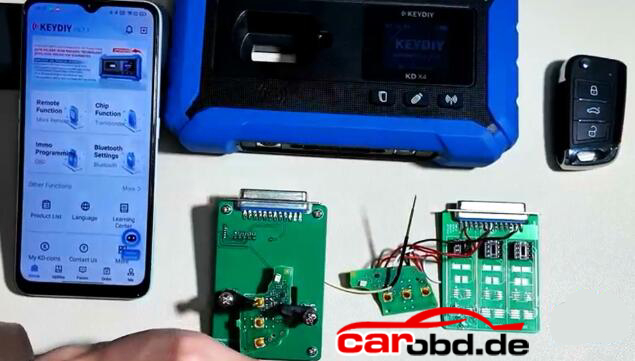
KEYDIY KD-X4 Programmer
Original Car Key
5C 5D dedecated cable or KD circuit board to read key data.
New Key to be programmed (5C: original key or KD ZB MQB smart remote; 5D: Must use original key)
Requirement:
Update Keydiy APP version to V8.7.1 and KD-X4 firmware version 1.53 and higher.
Procedure:
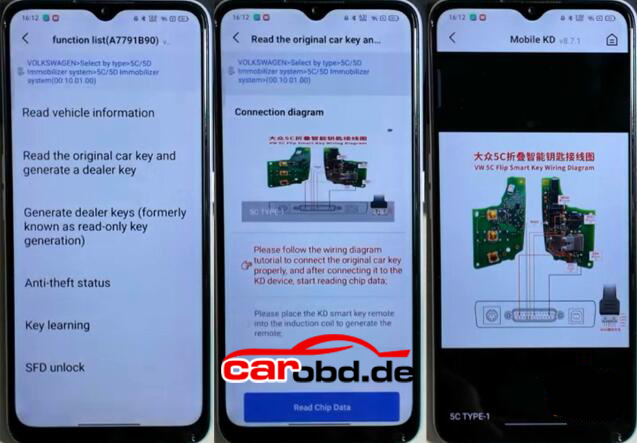
Step 1: Read original key data
Select IMMO Programming-VW-5C/5D Immobilizer System-Start execution
Select Read original car key and generate a dealer key.
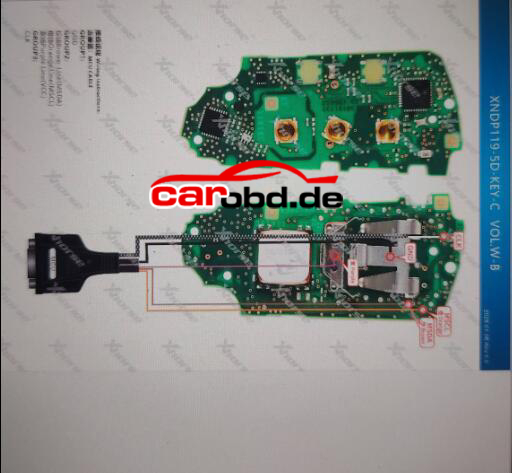
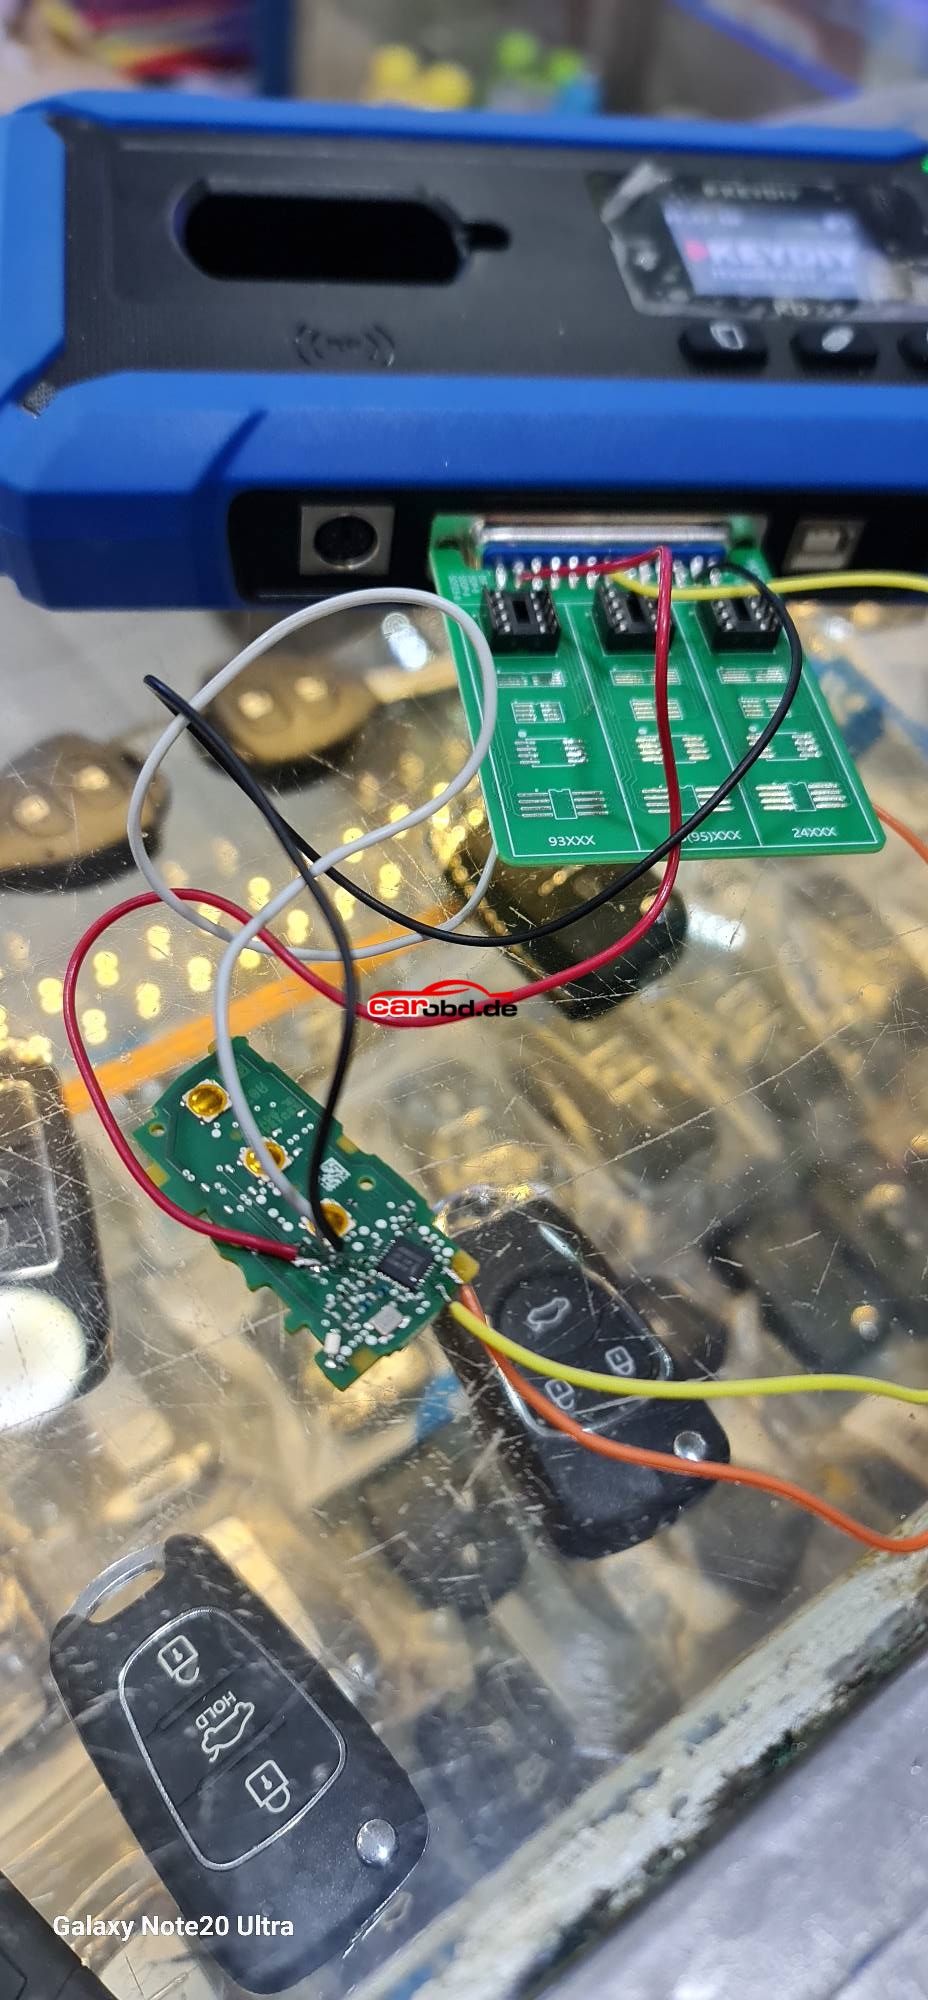
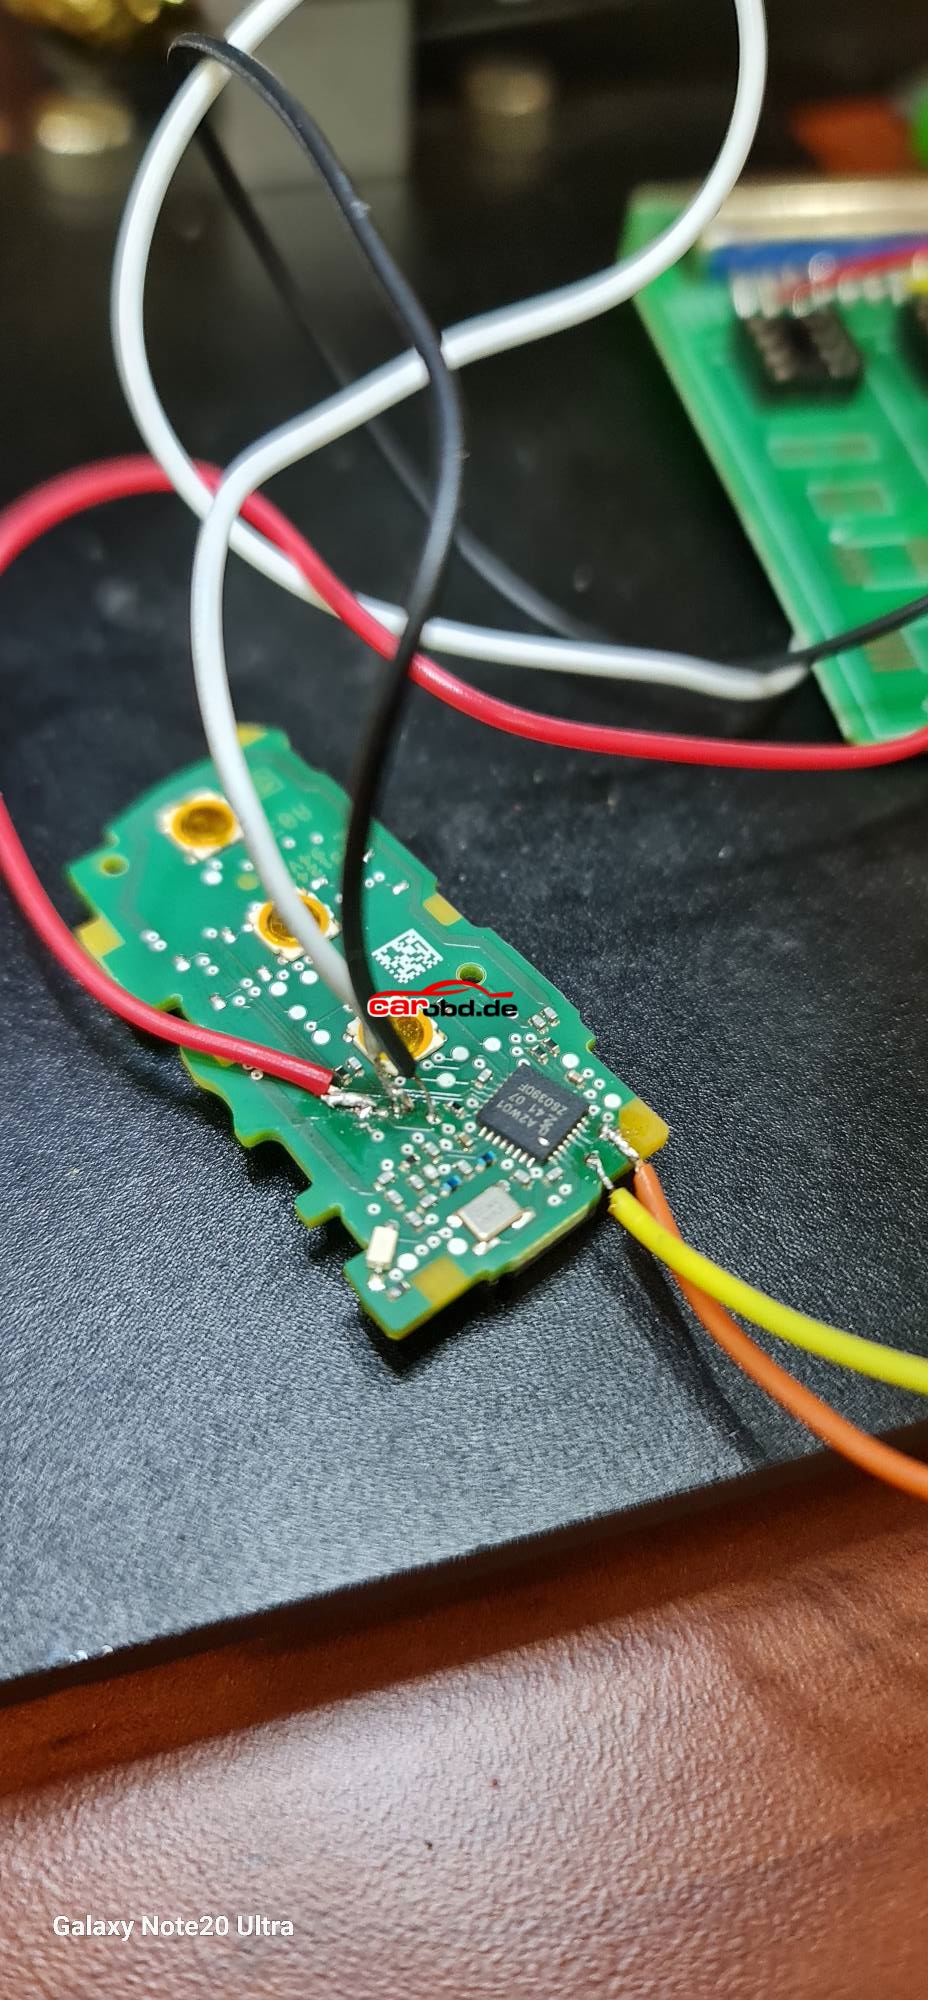
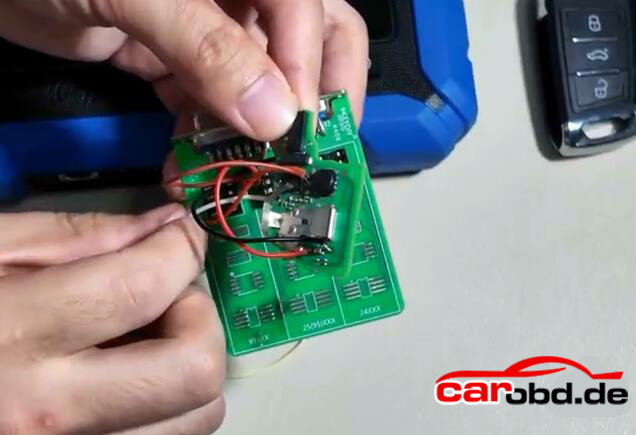
Check key wiring diagram

You’ve got two ways to connect the original key:
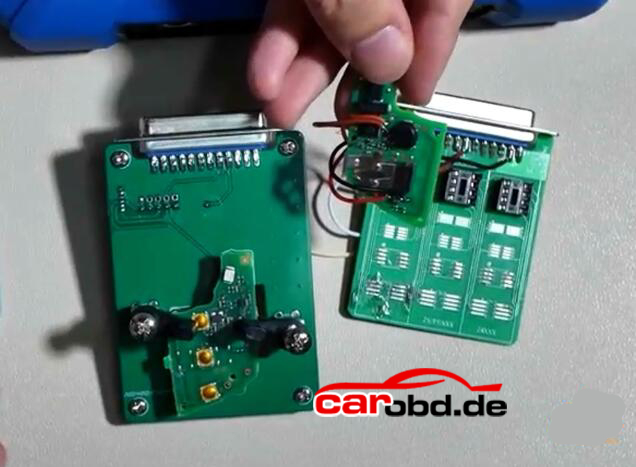
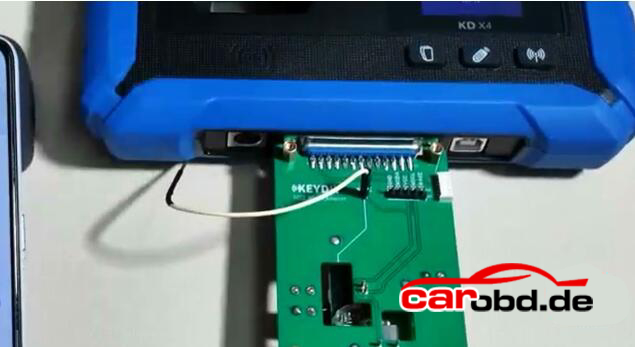
1. Use 5C 5D circuit interface board. Remove original key and install the PCB into the circuit board, then connect the circuit board with KD-X4 main unit.
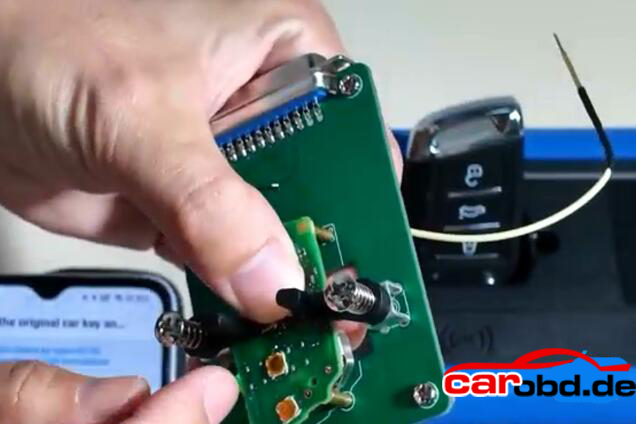
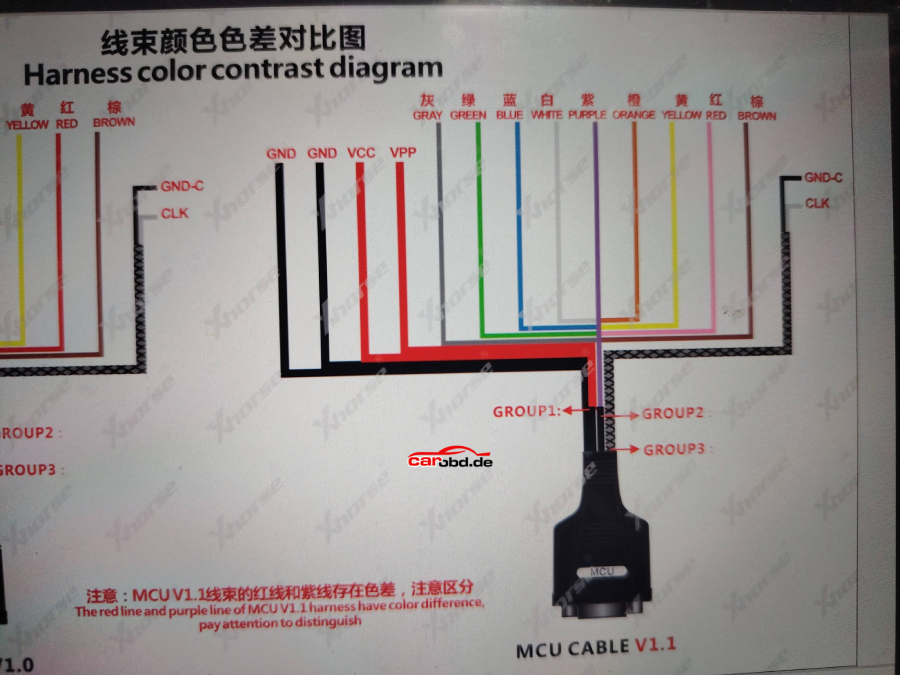
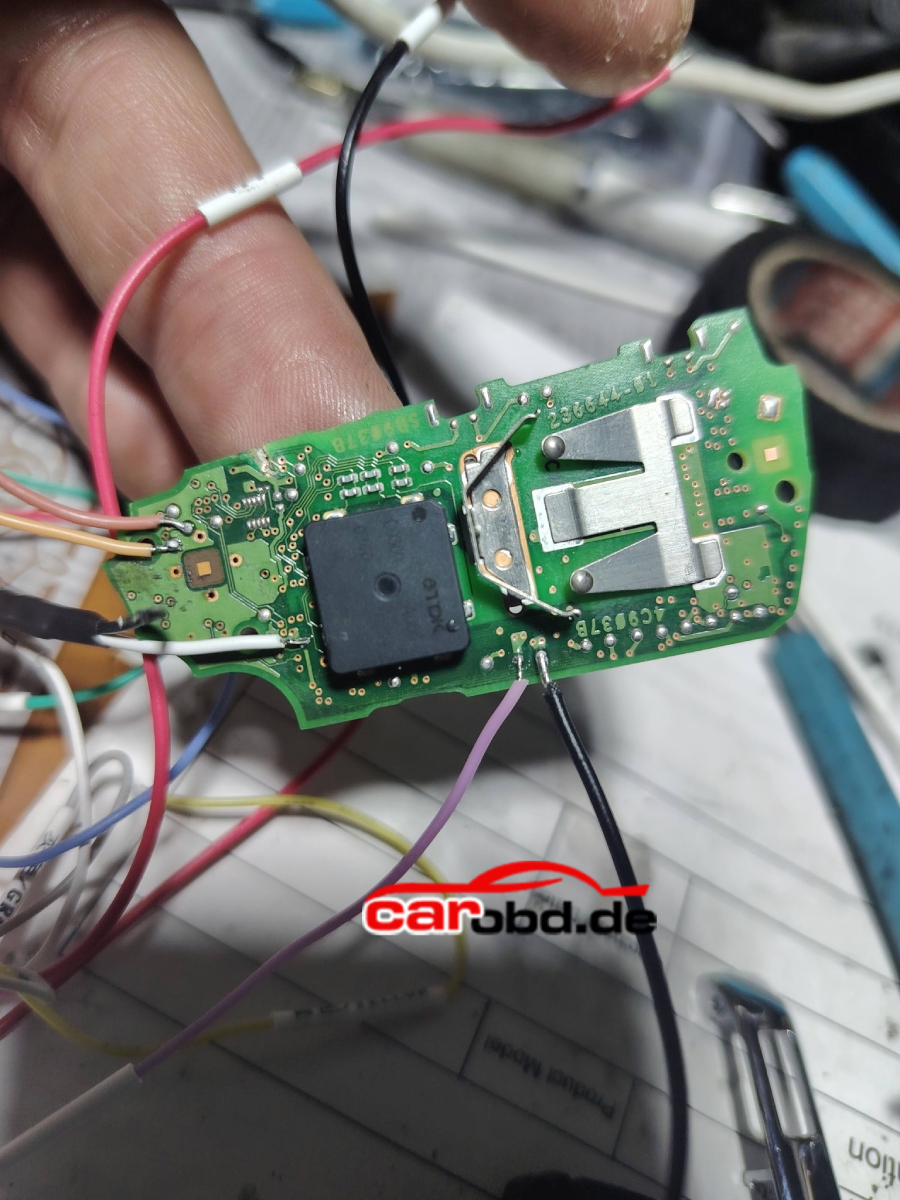
2. Use wire soldering method. Connect original key with a dedicated cable or a modified cable.
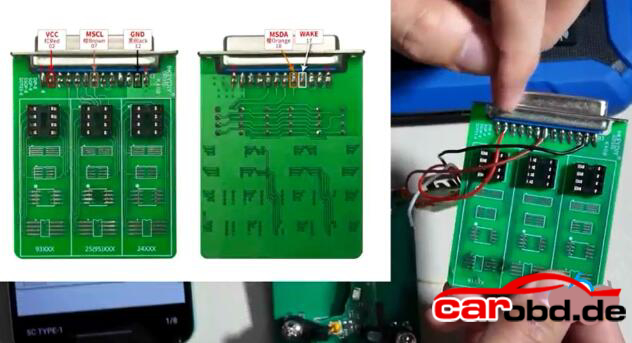
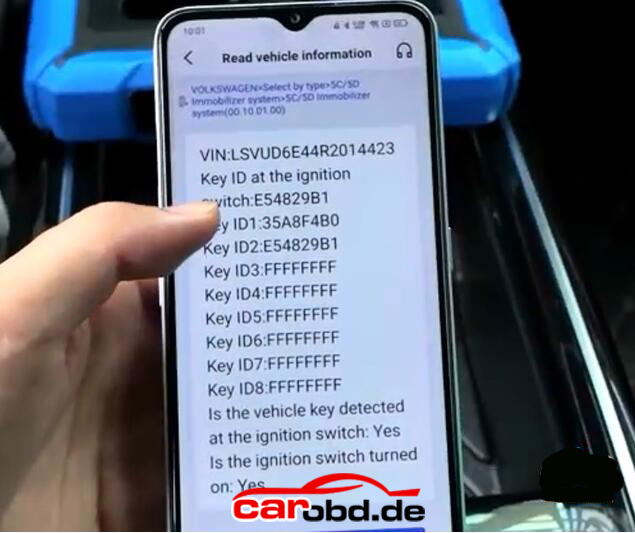
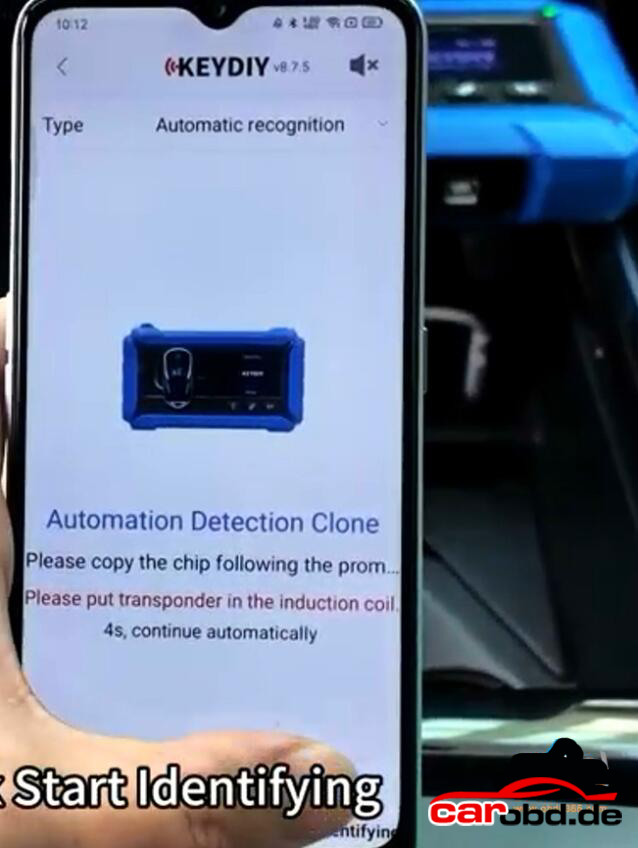
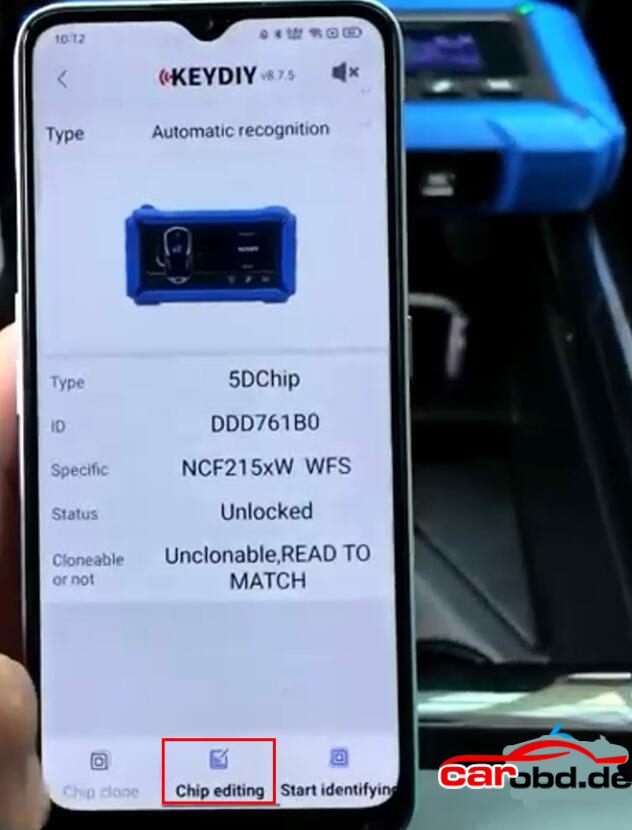
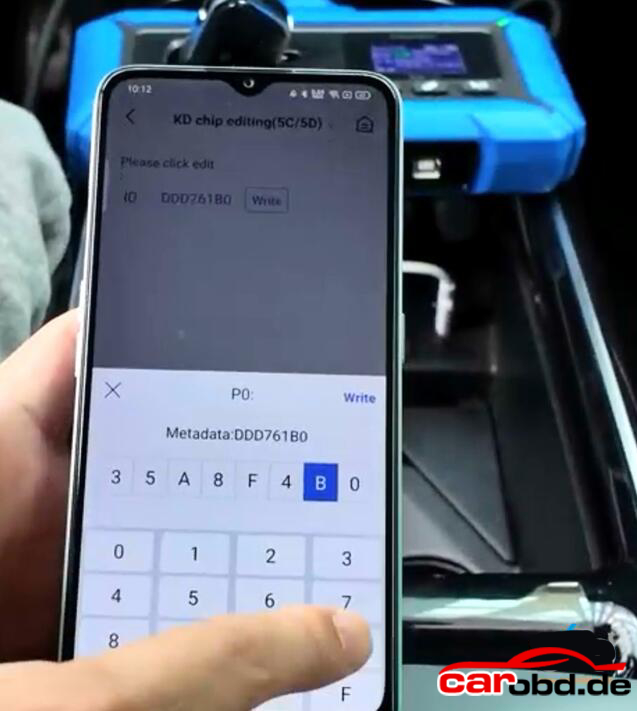
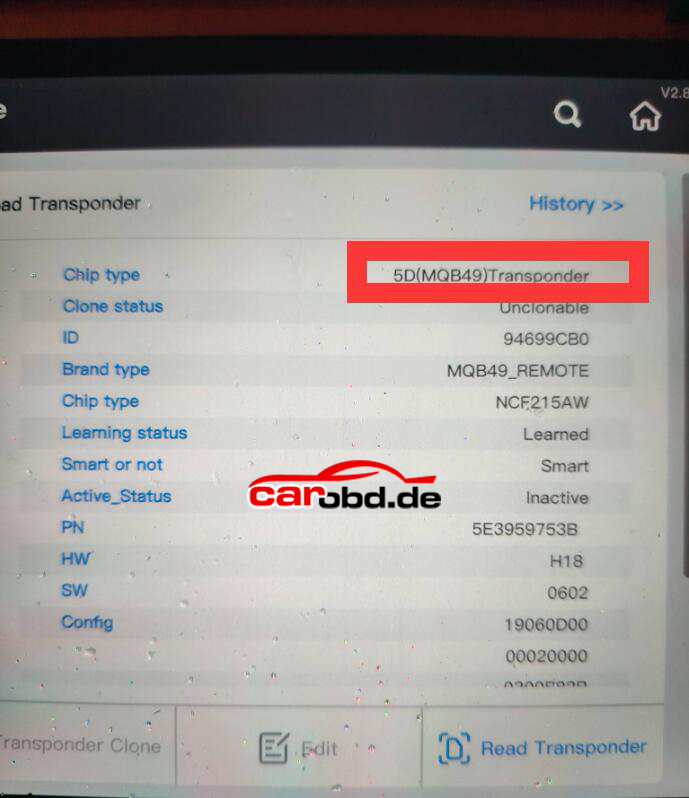
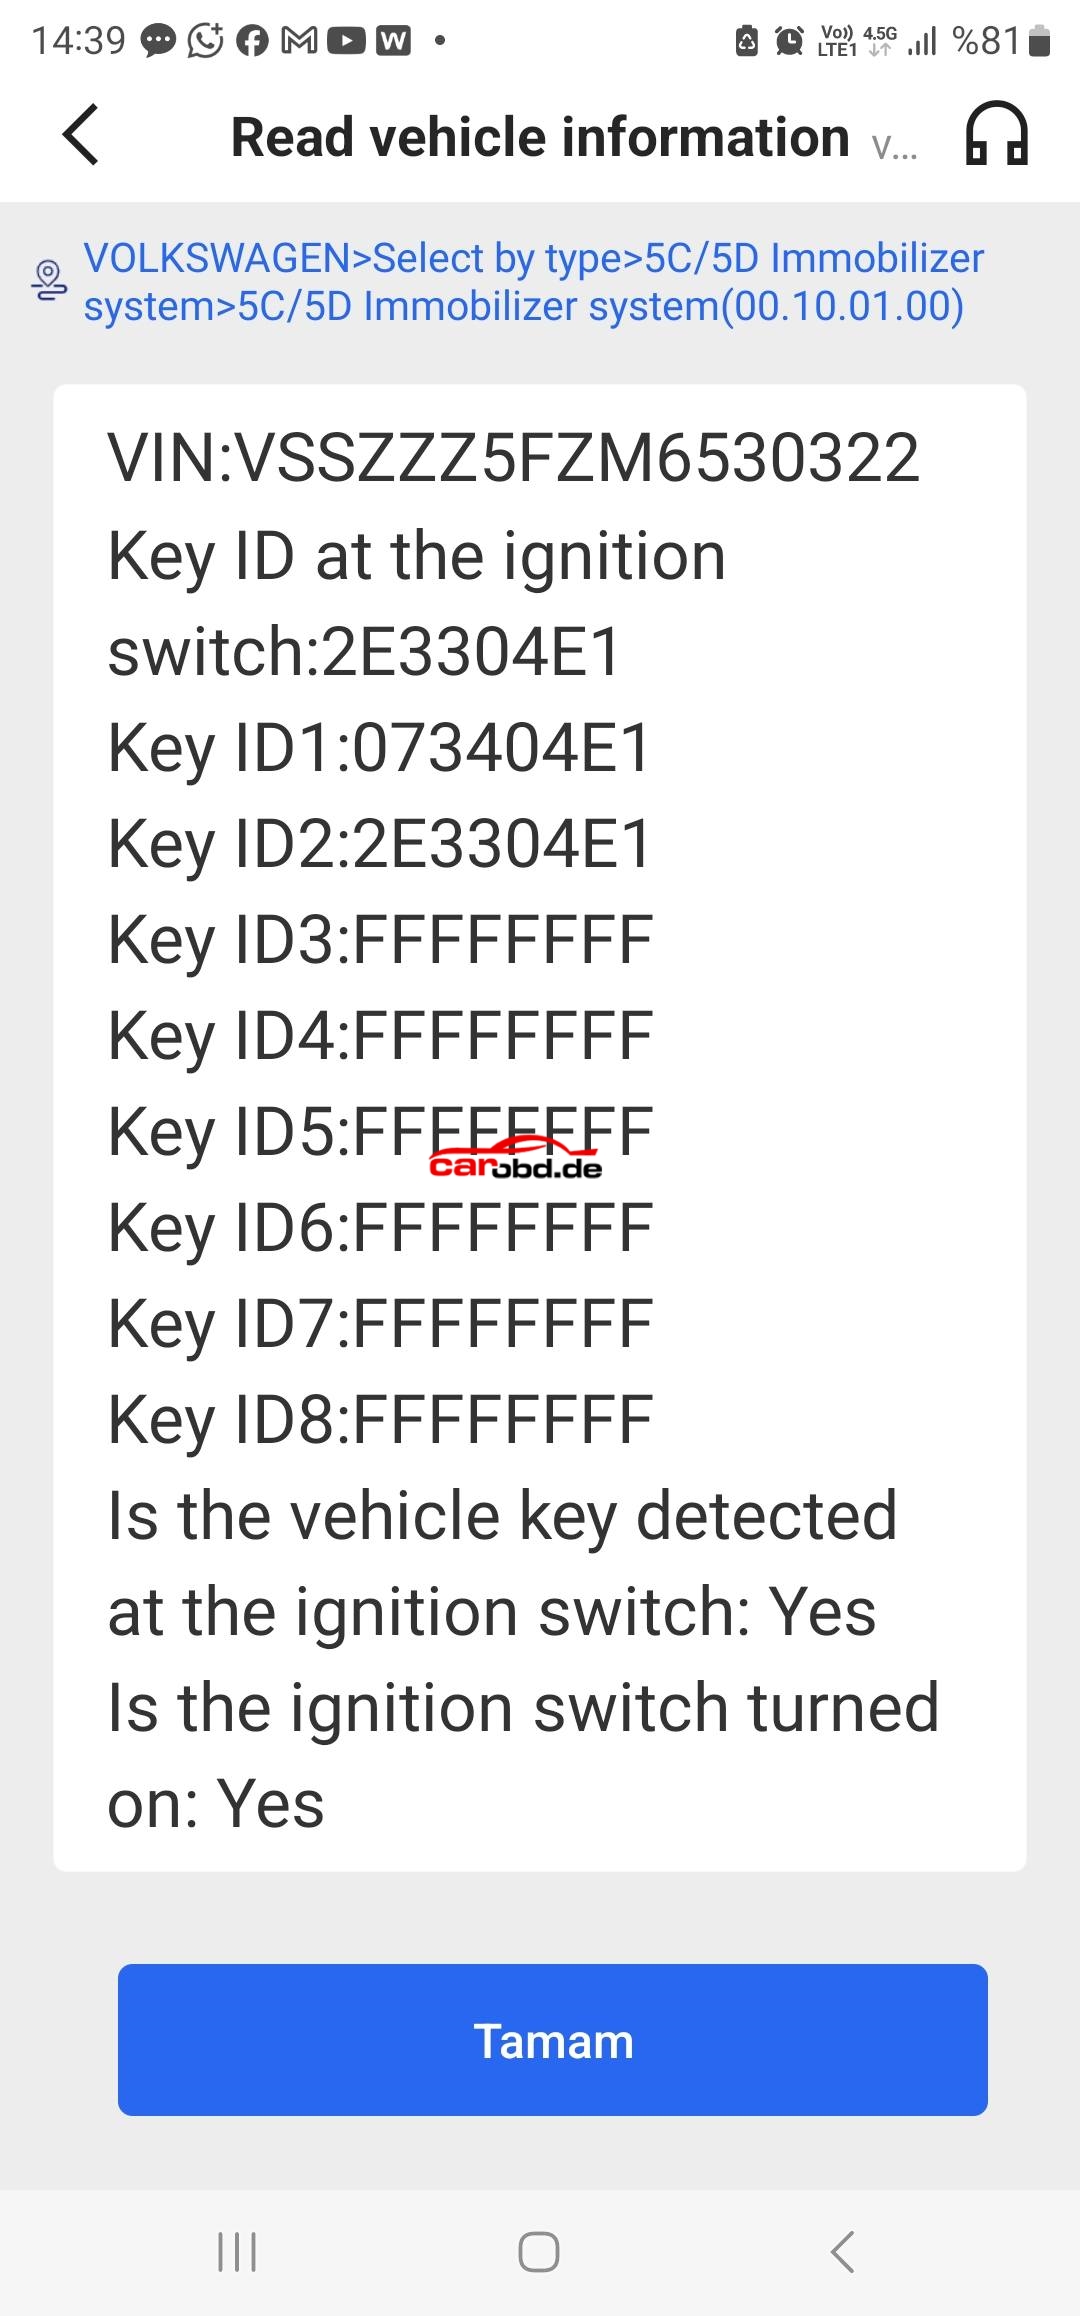
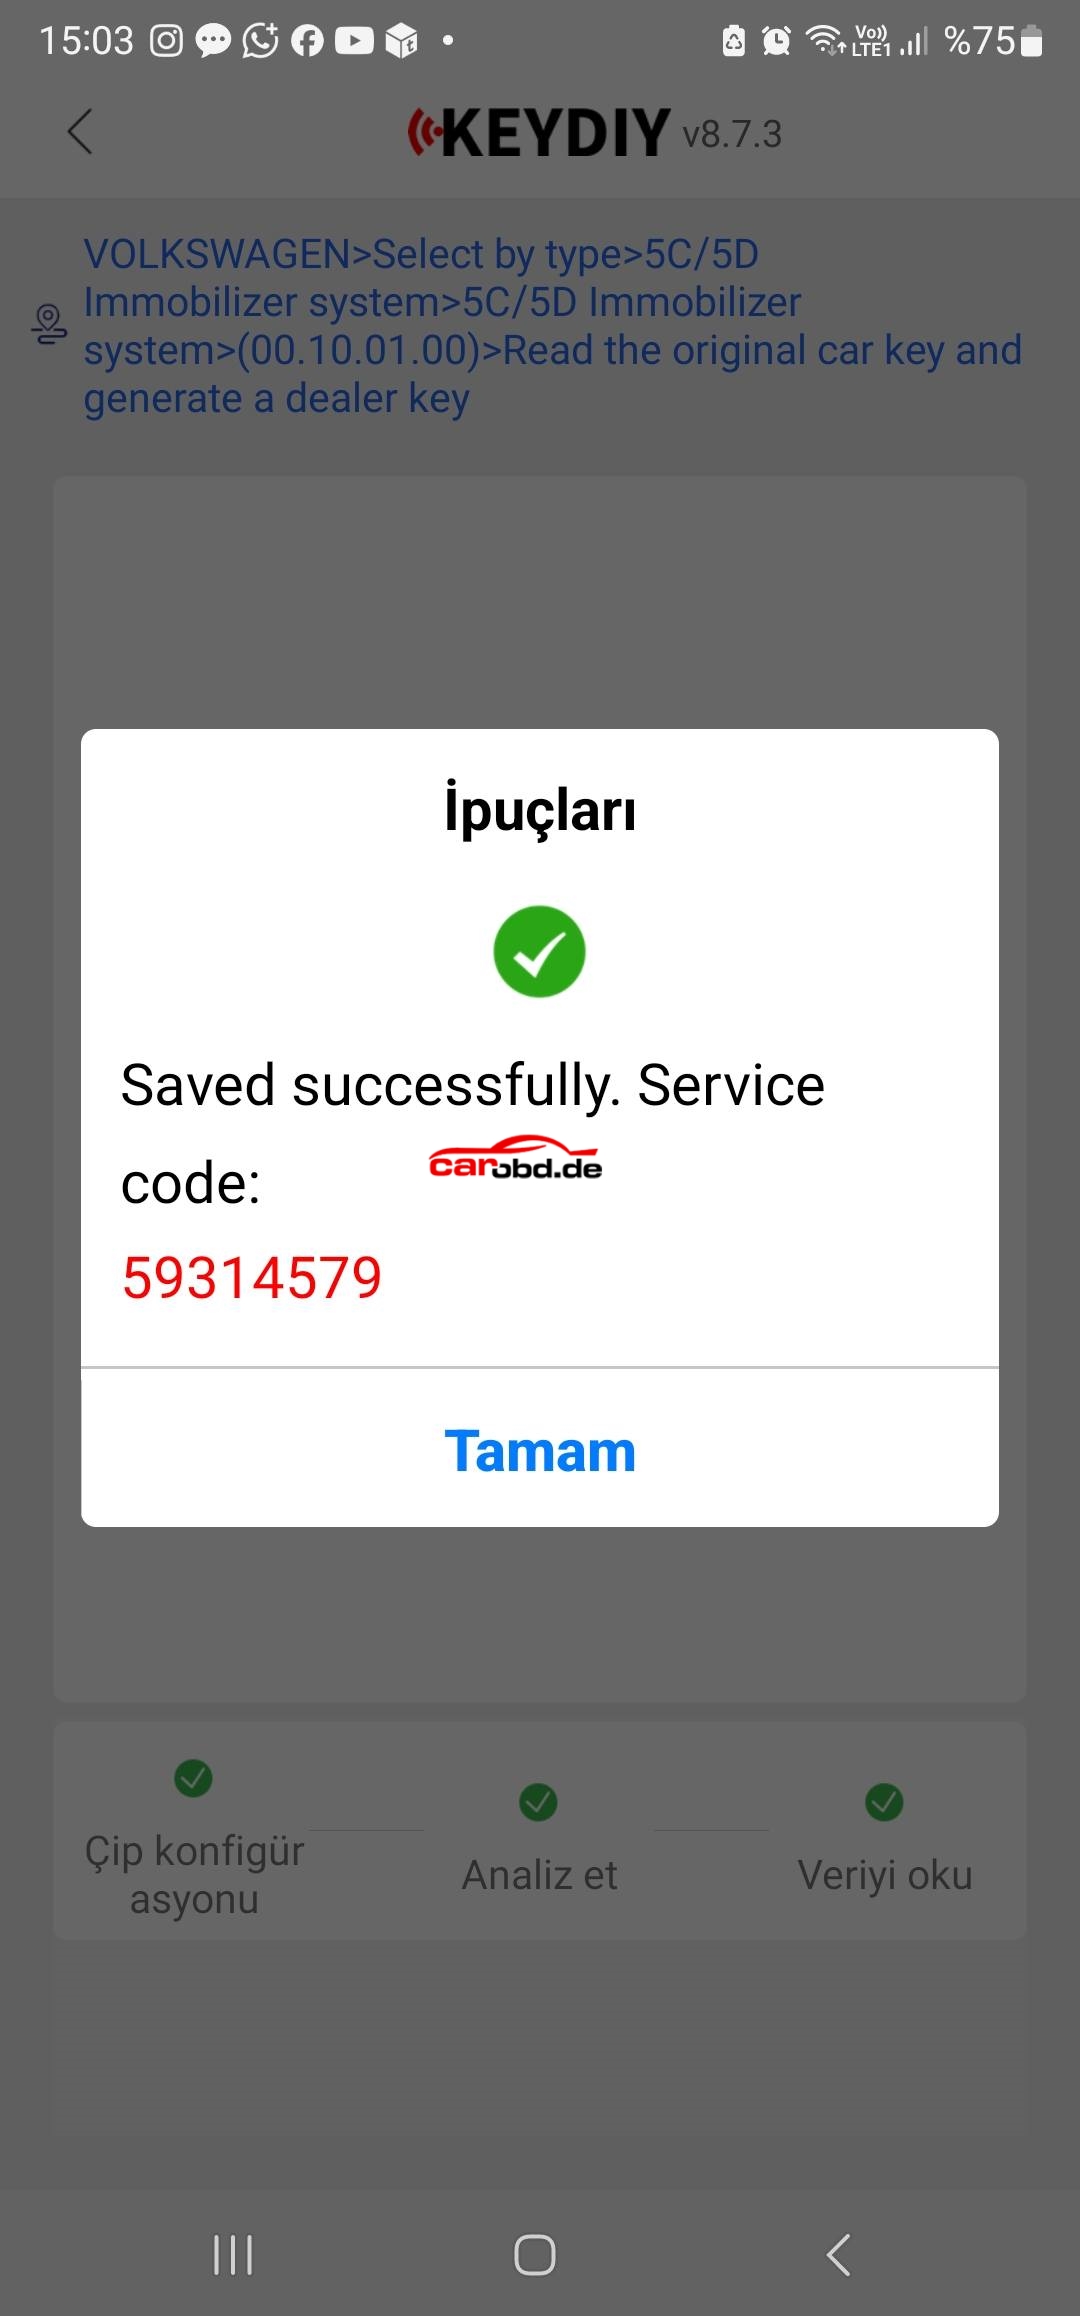
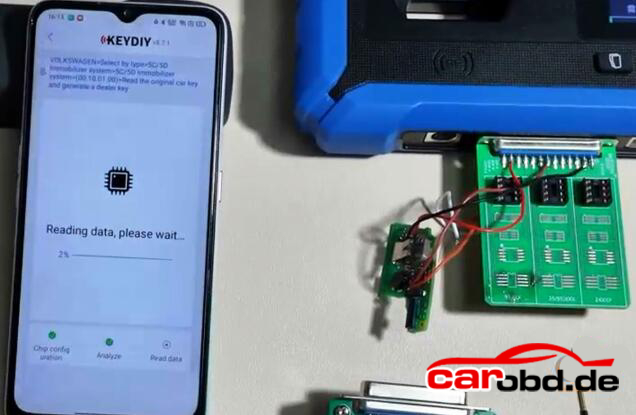
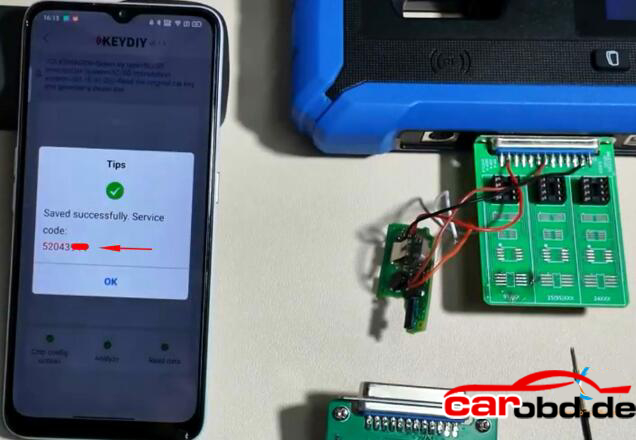
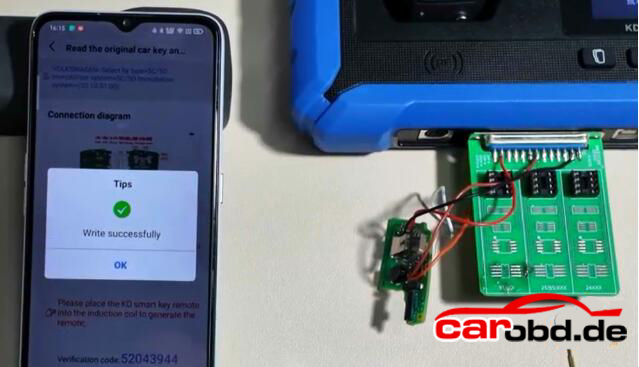
Read chip data.
After a successfull read, it will generate a service code. Take a screenshot of the service code.
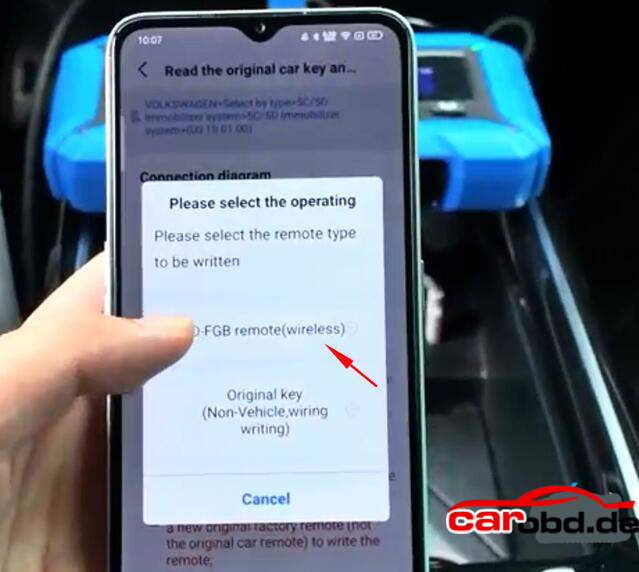
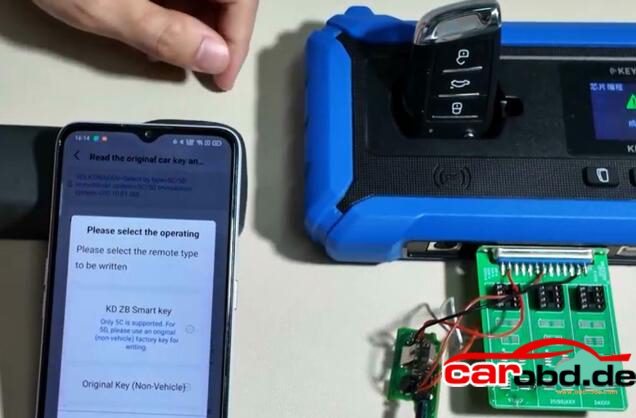
Step 2: Generate dealer key
Then start generate dealer key .
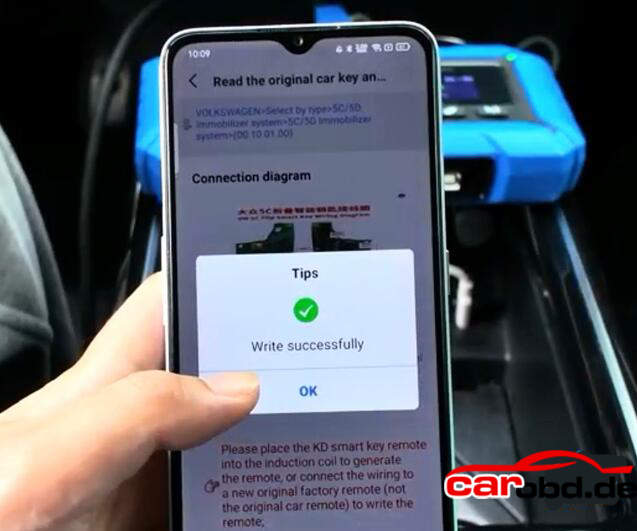
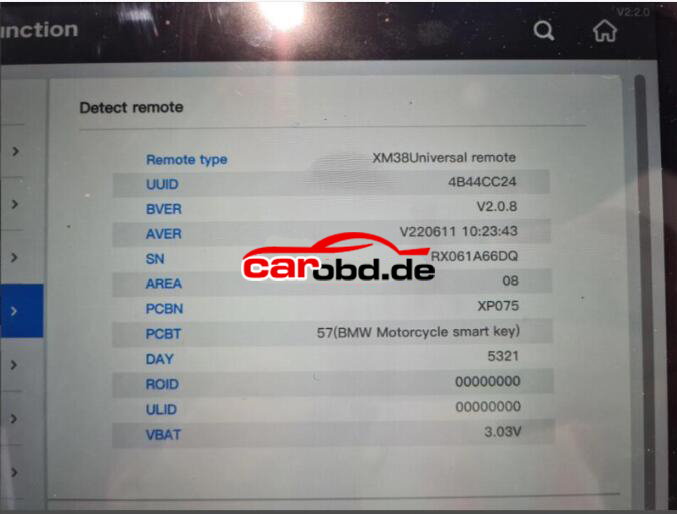
Put a KD ZB remote to the KD-X4 coil..
Generate KD ZB remote sucessfully
Step 3: Learn Key
Then we learn key in car.
Connect KD-X4 programmer with the vehicle via OBD
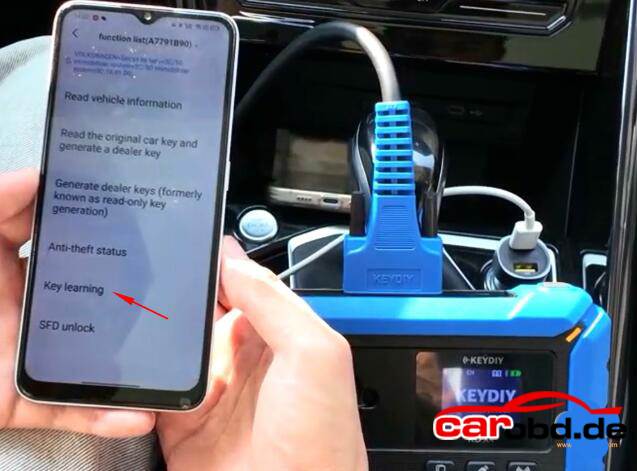
Go to IMMO Programming-VW-5C/5D Immobilizer Systems-Start execution
Select Key Learning function
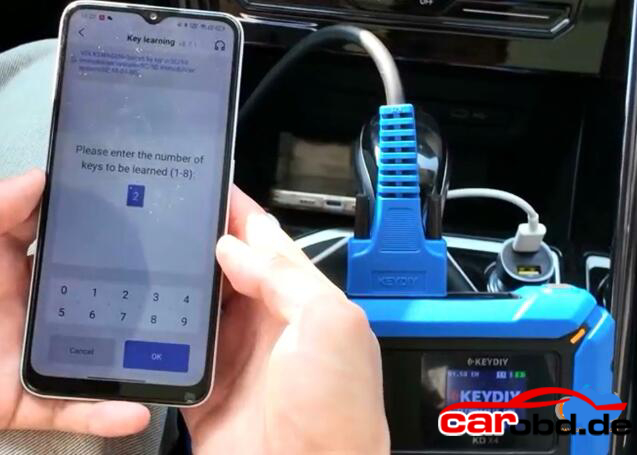
Enter number of keys to be learned. All keys need to be learned.
It will ask if it is a smart key, here click Yes(Click No if it is not a smart key)
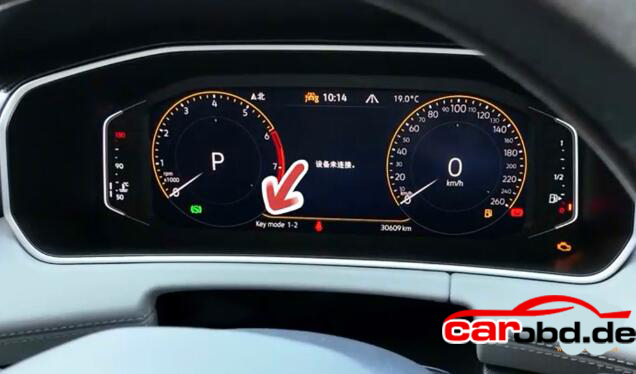
Place the original car key close to the induction coil
Open the vehicle hood

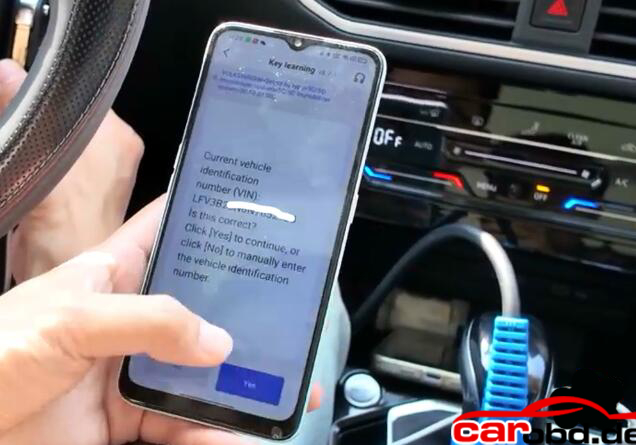
Confirm vehicle VIN
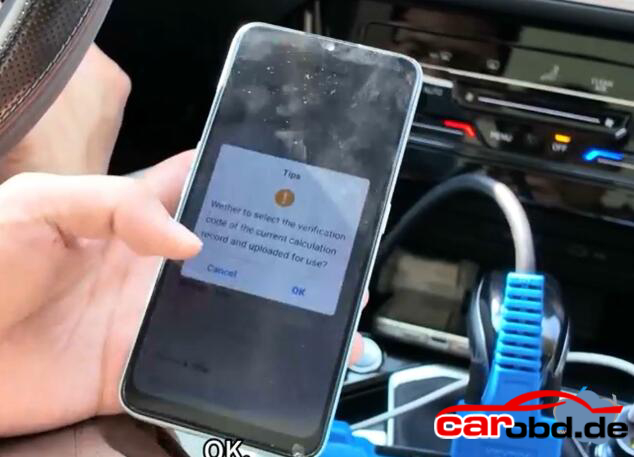
Keydiy KD-X4 will ask enter the KD service number you have obtained in Step 1.
Select the corresponding service code and confirm
Learn 1st key successfully
This indicates that the first key has been successfully learned
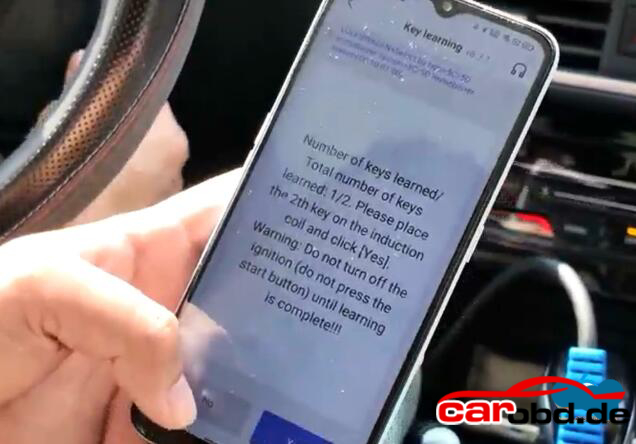
Then stick the second key to the induction coil.
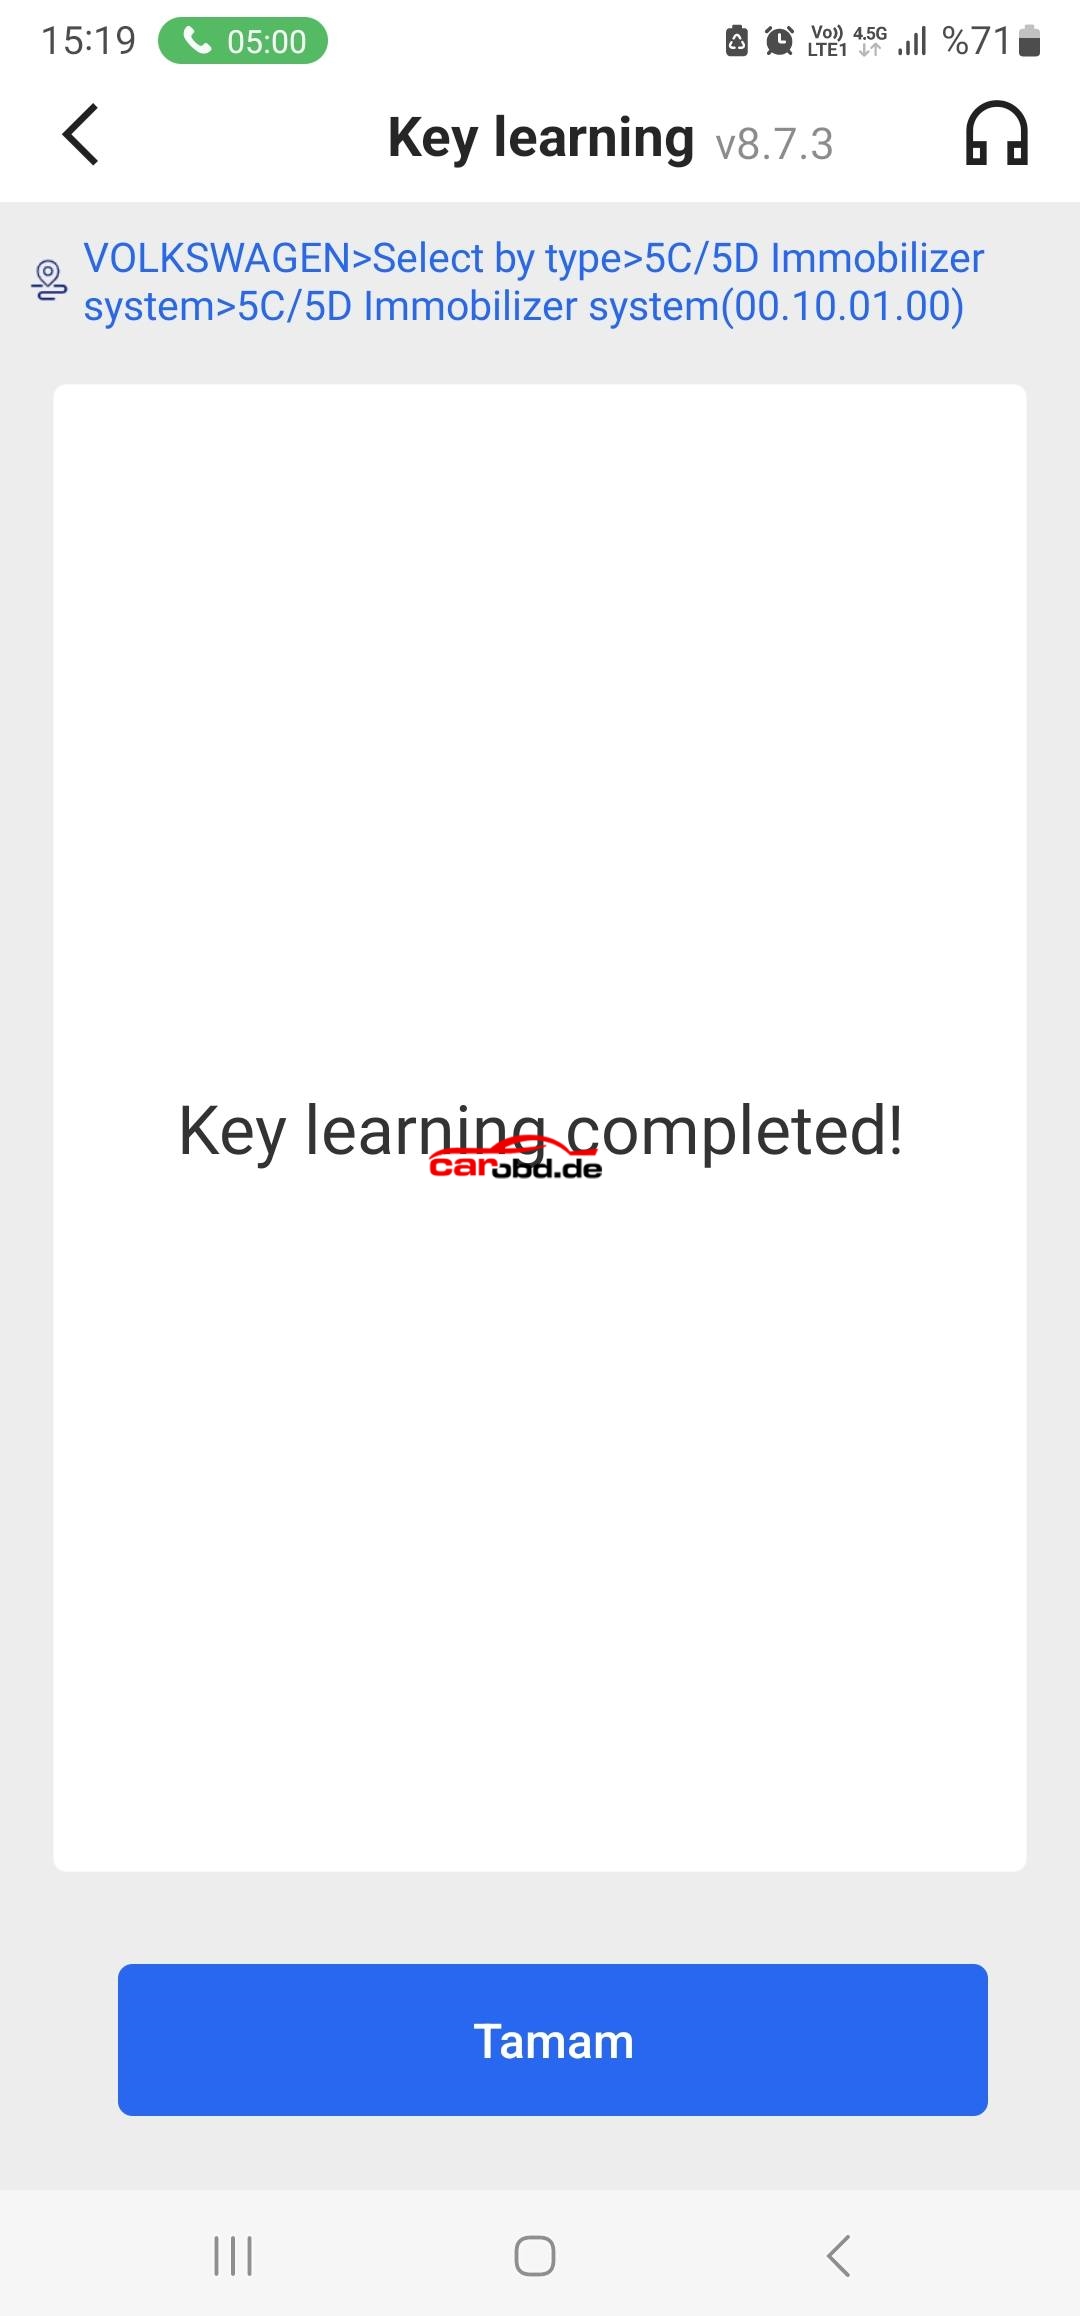
Don’t turn off the iginition until learning is complete
Key learning completed
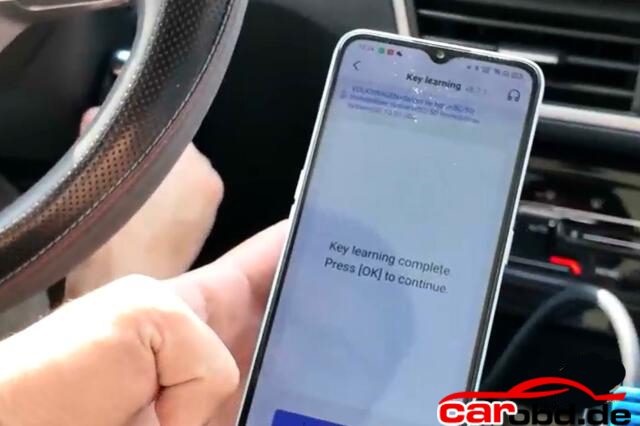
Turn off the iginition switch, wait 5 seconds and then turn ignition switch on.
Key learning finished. Test the remote control and proximity funtion.
Note: if you perform key learning on 2024 and 2025 models, you will need to unlock SFD gateway before learning key
For more informations,please contact Customer Service
Service: Jenny
Whatsapp: +86 19947637411
Email: Sales@Carobd.de