Keydiy KD-X4 Program 2021+ Ford BCM R7F701053 Key without PIN

Keydiy KD-X4 key programmer will release new Ford Immobilizer software soon-supports 2021+ Ford key programming by reading BCM module data. Keep an eye on the software upgrades.

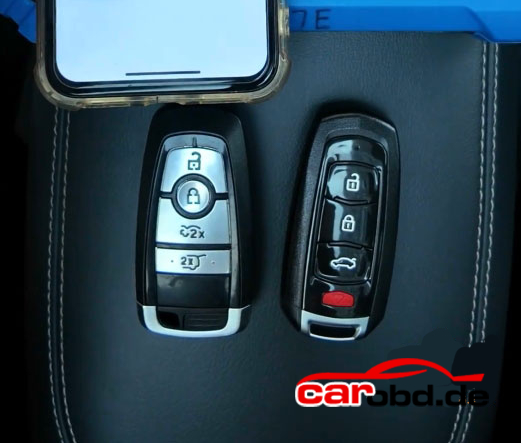
Here is an example of adding a spare key on a 2022 Ford Mustang Mach-E using KD-X4. Keydiy will do both add key and all key lost. All keys lost share the same procedure.

The same produre goes to 2021-Ford F-150, Focus, Bronco, Mondeo, EVOS etc.

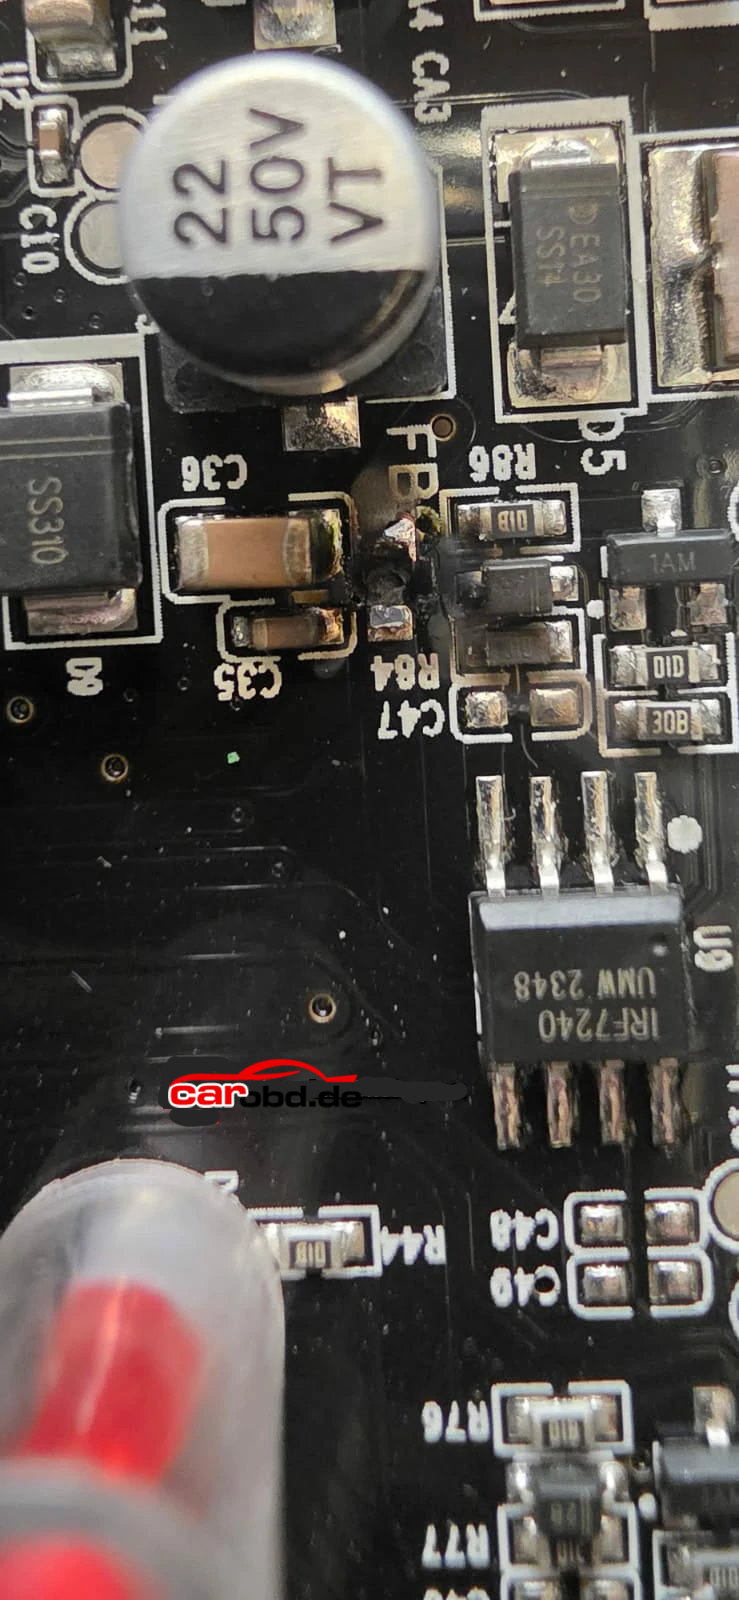
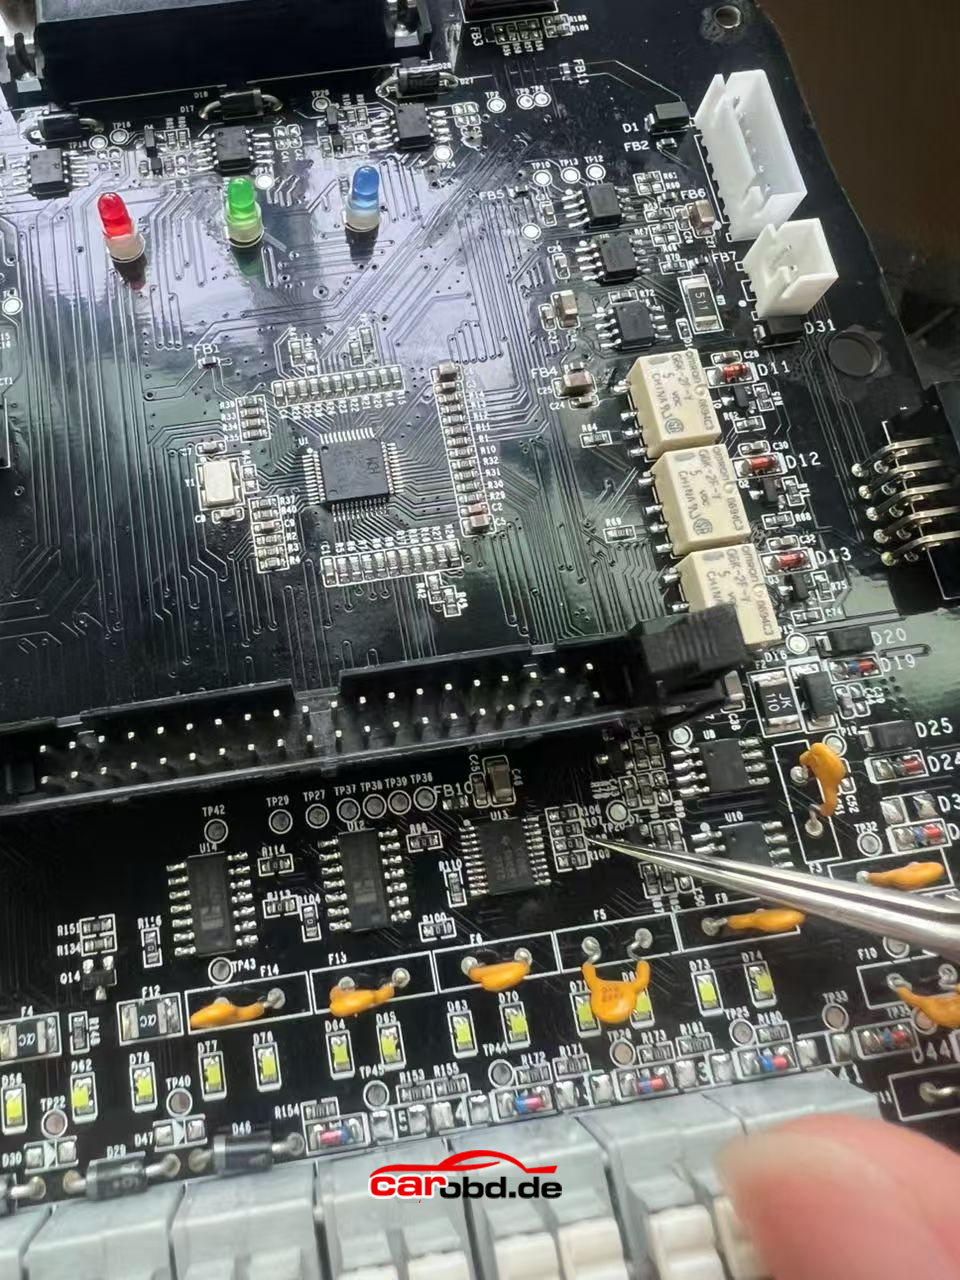
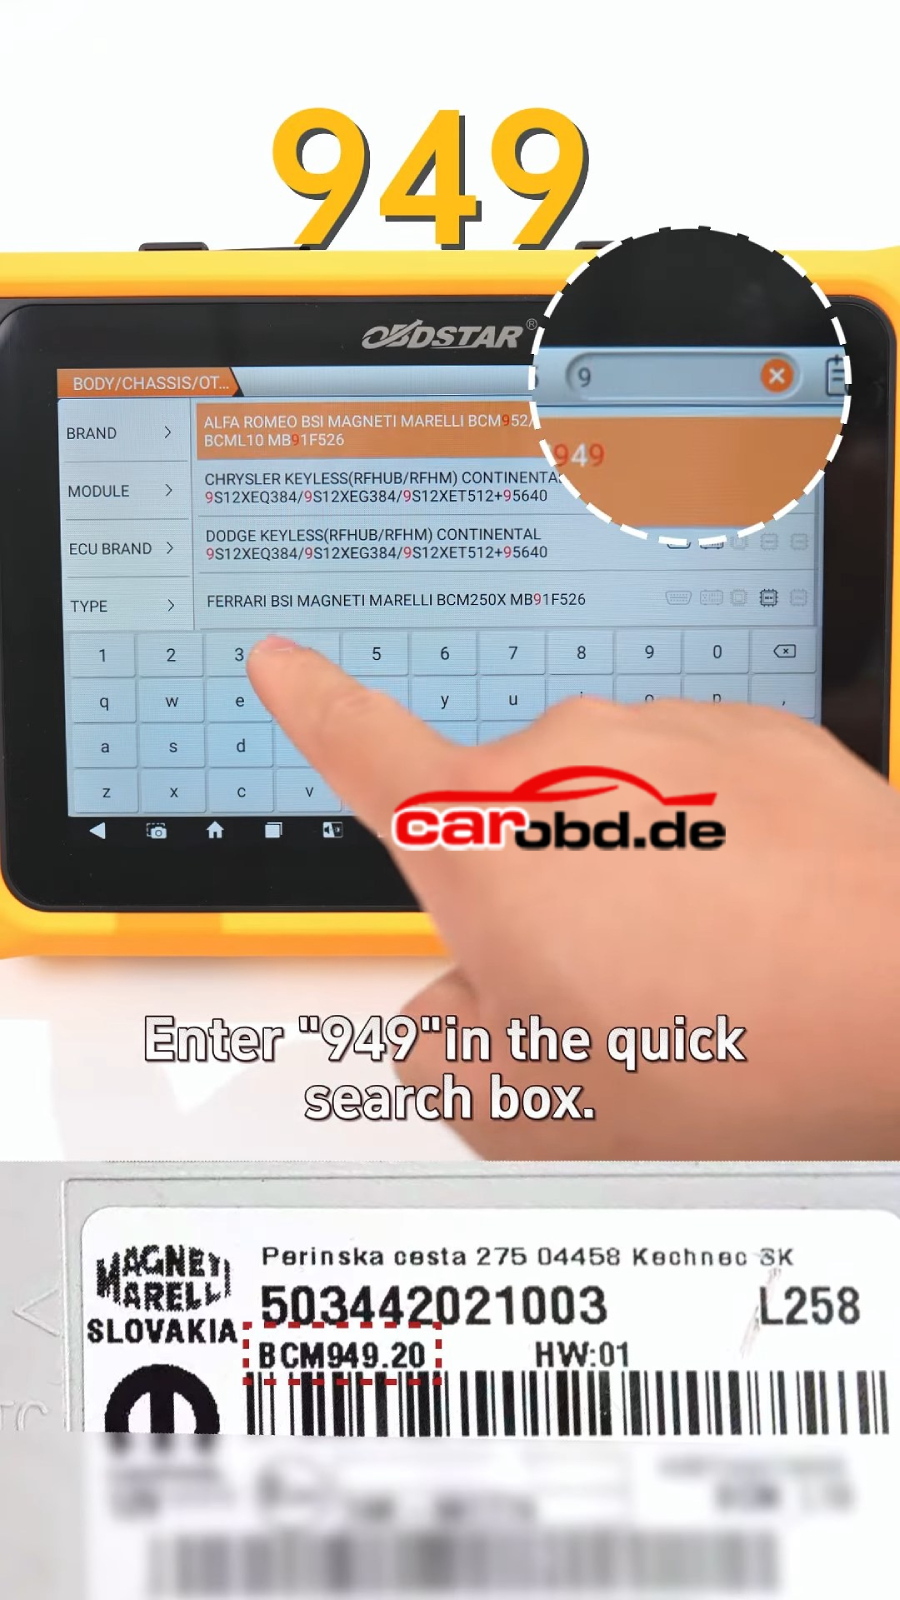
BCM: R7F701053 or R7F701073

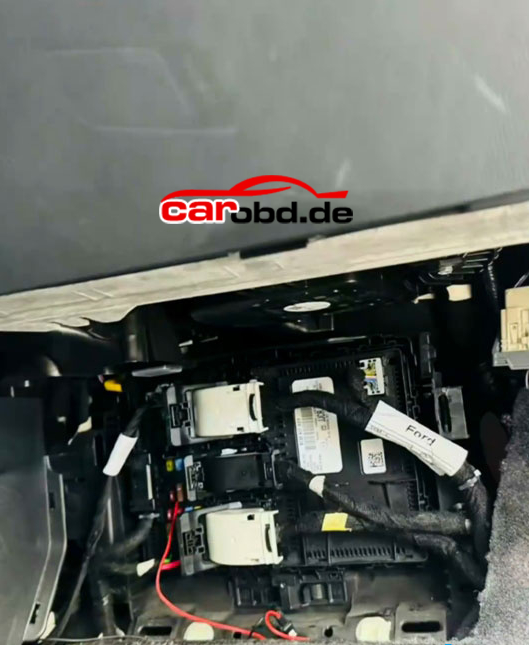
This function requires removing BMC module and back up immo data first.

The BCM is located on the passenger side of the vehicle.

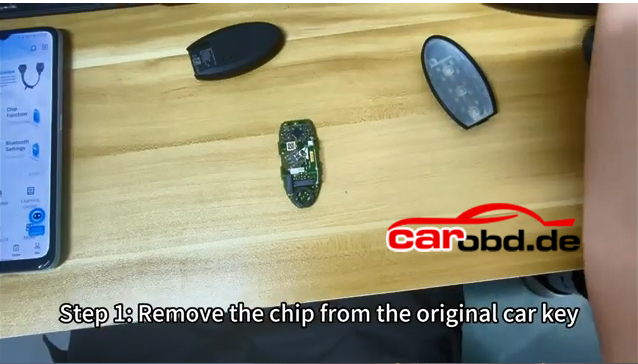
Remove the BCM module

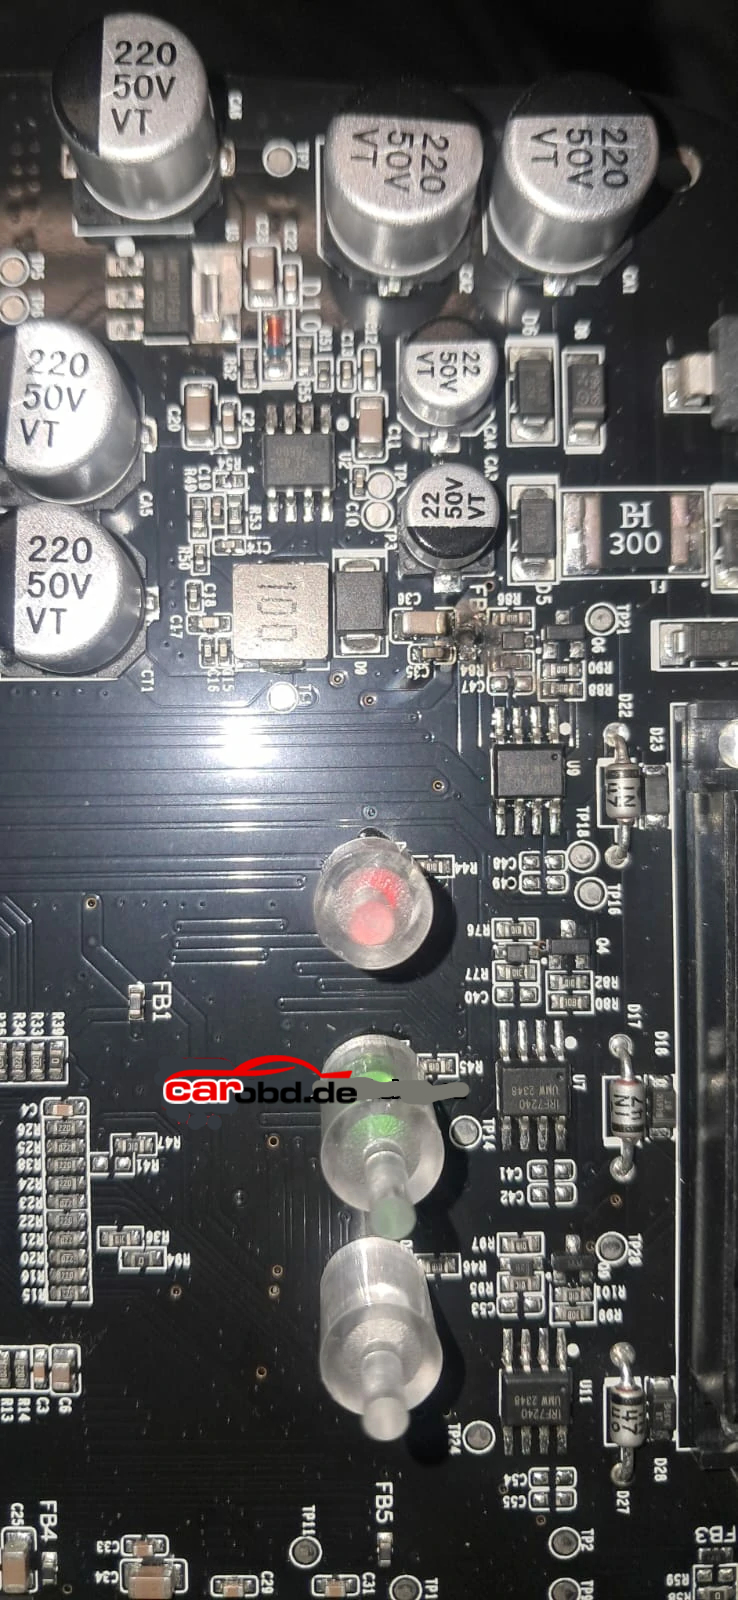
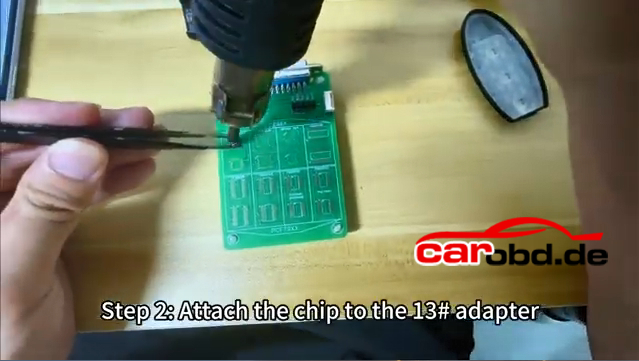
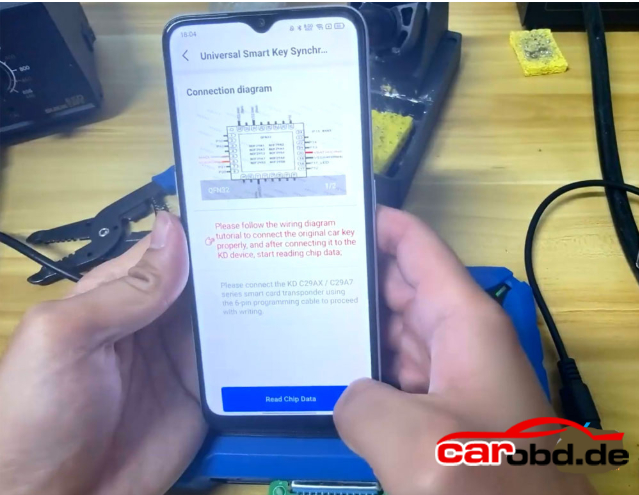
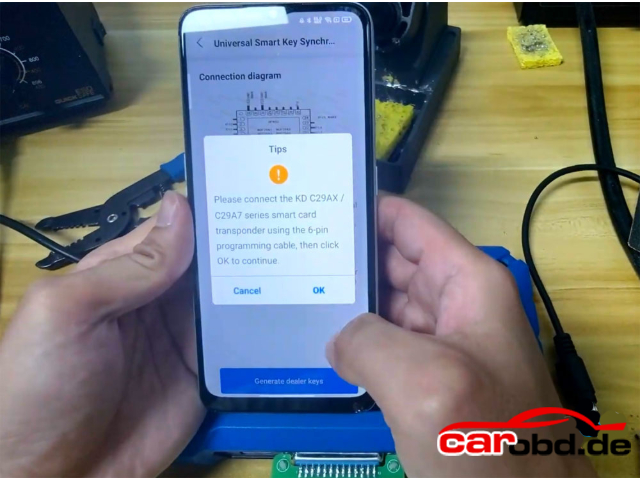
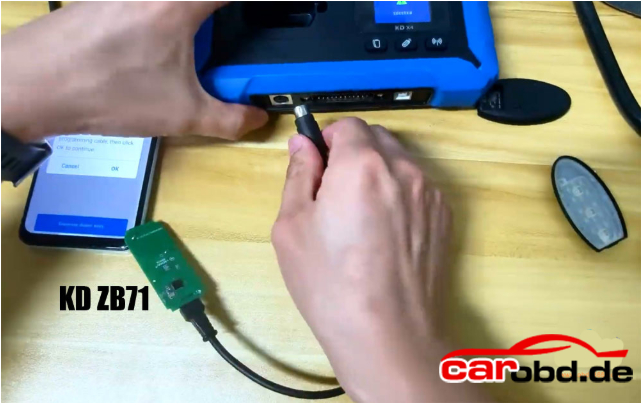
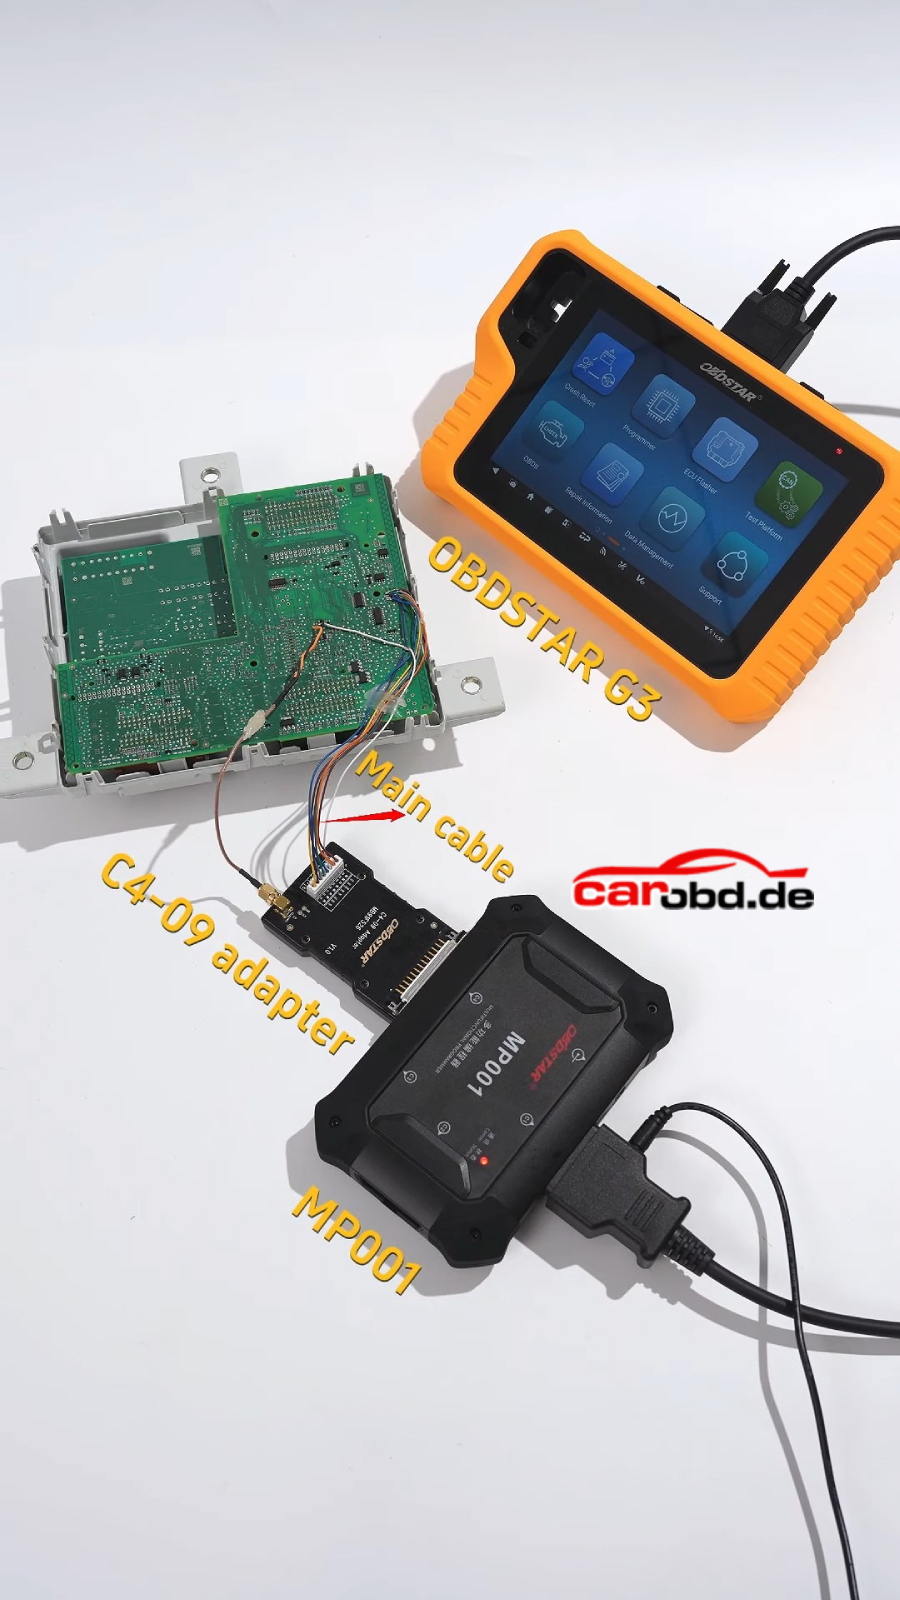
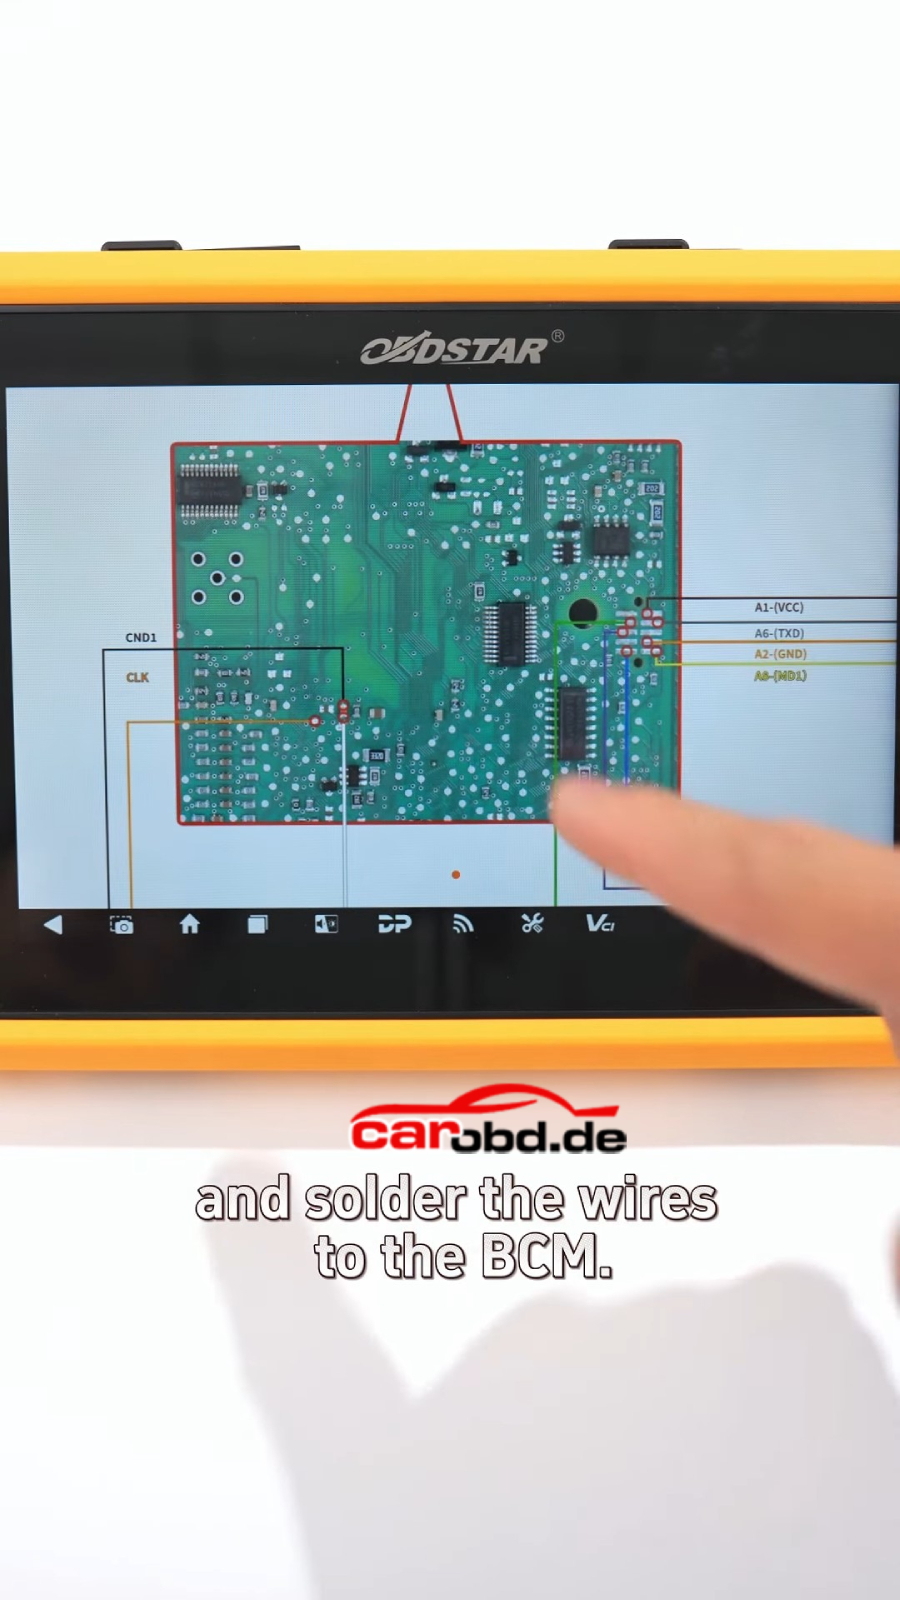
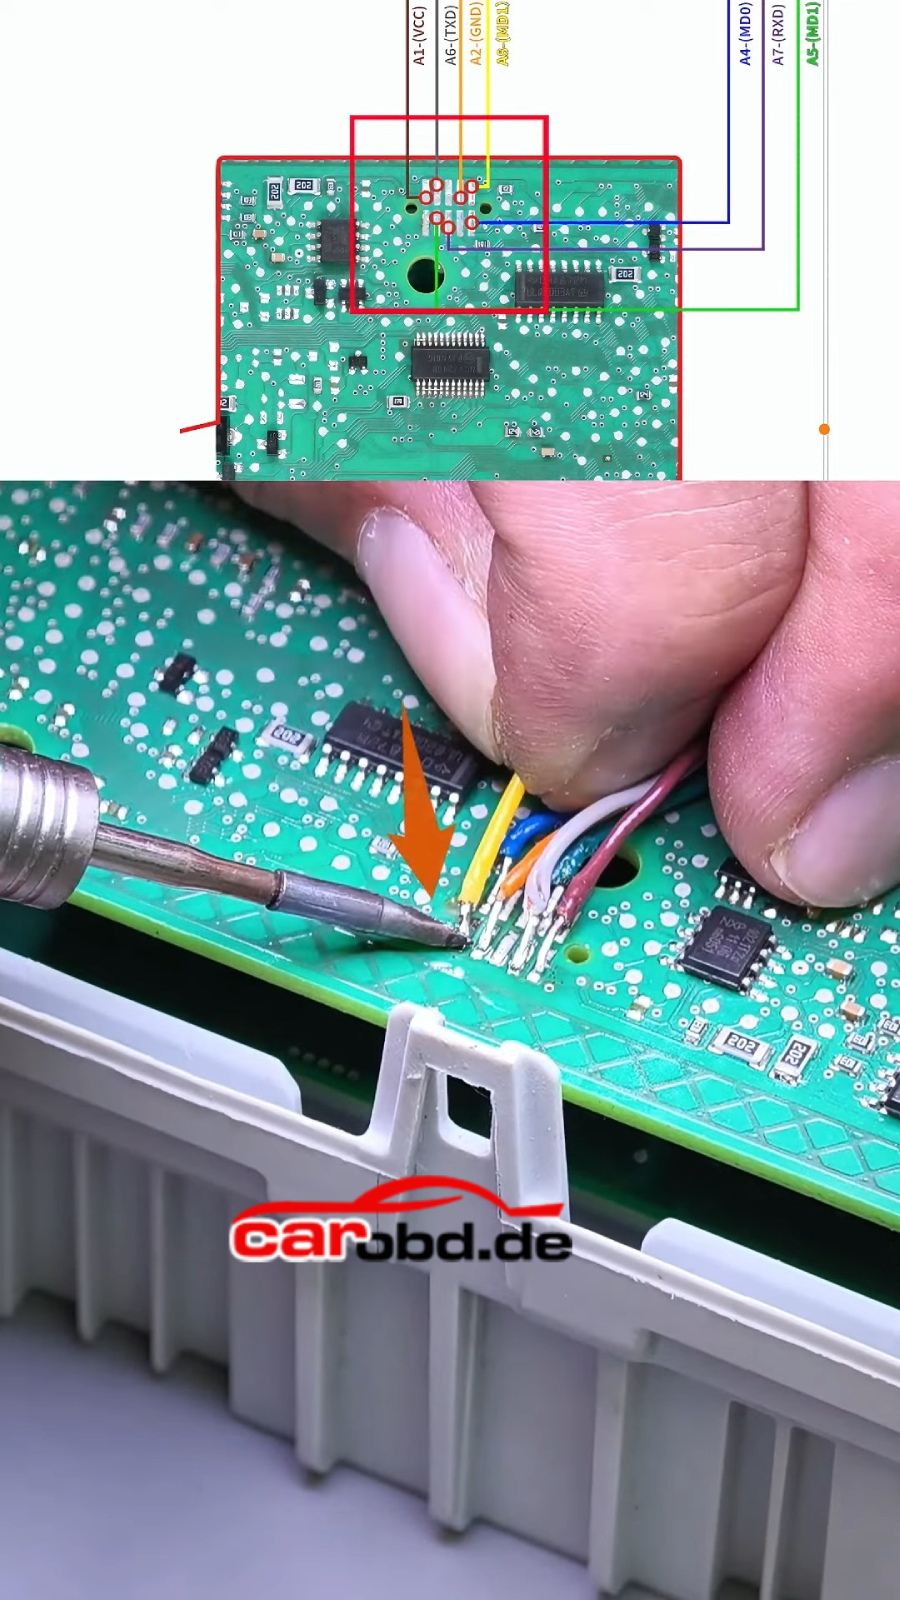
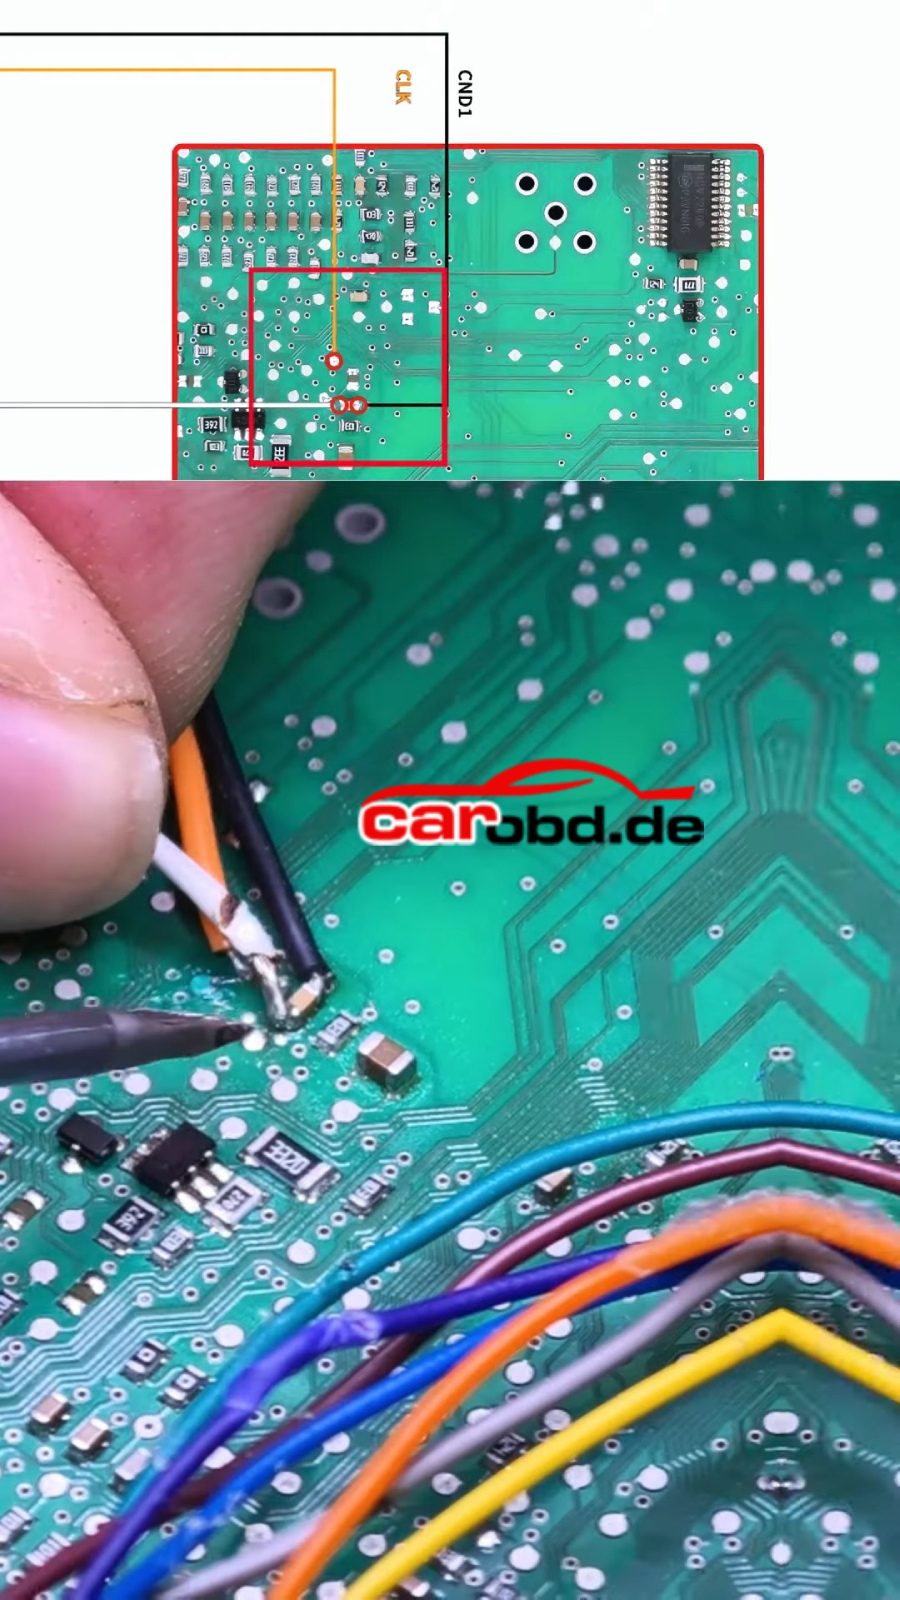
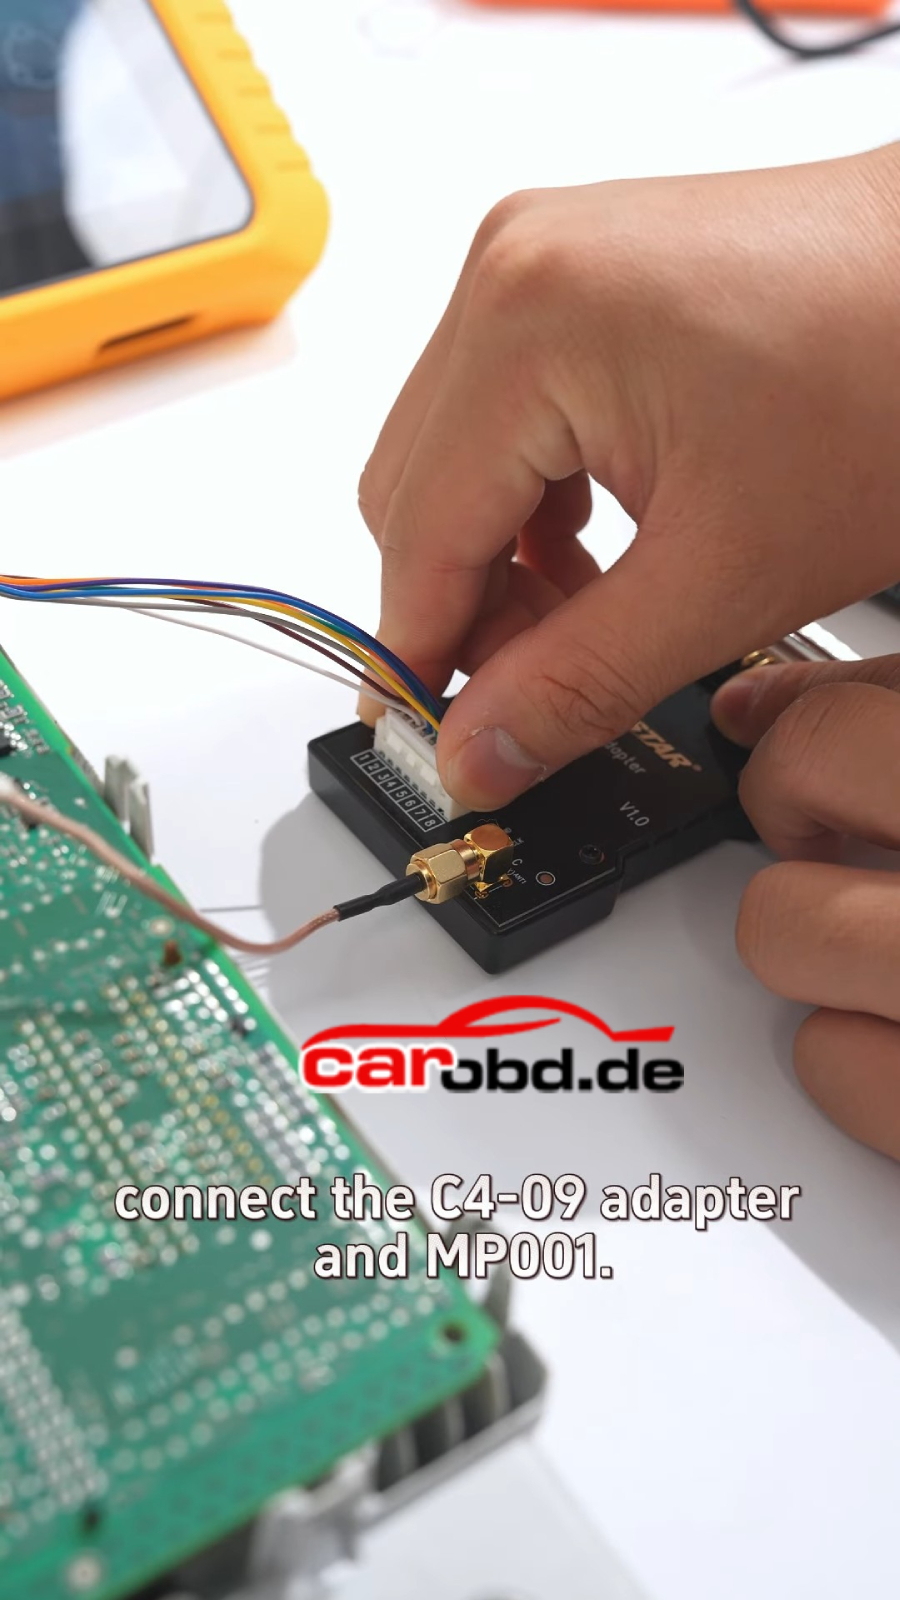
Connect the BCM and the KD-X4 MCU cable according to the wiring diagram

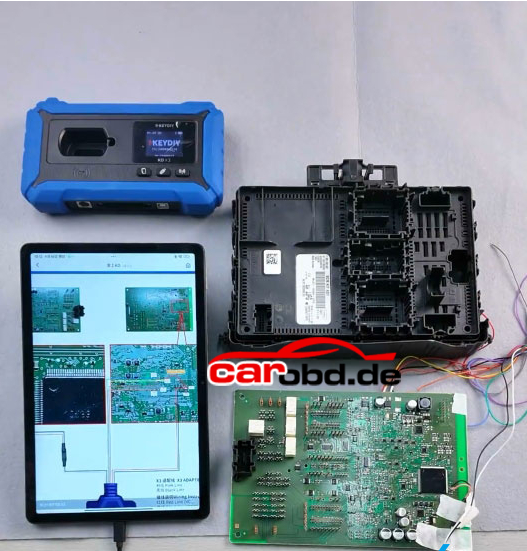
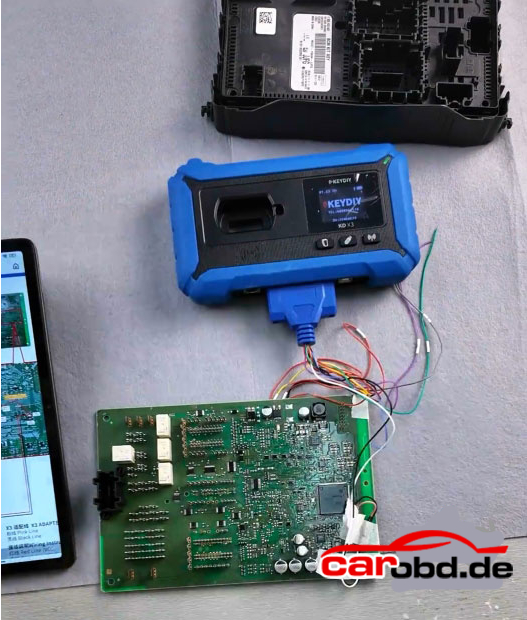
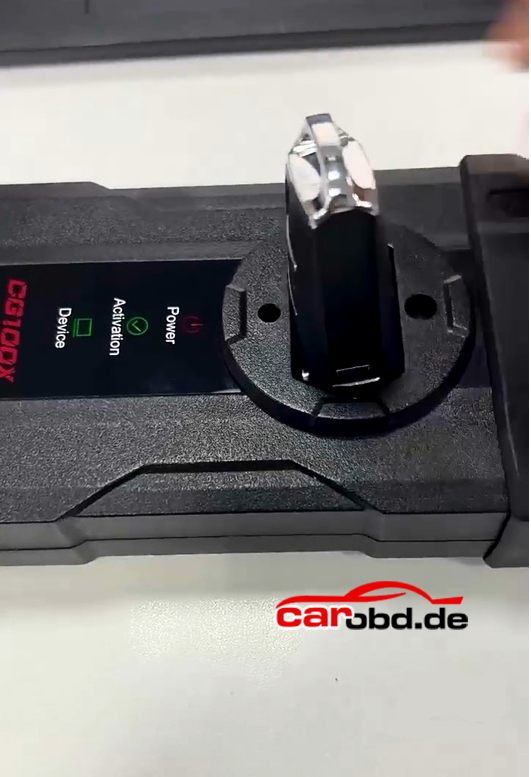
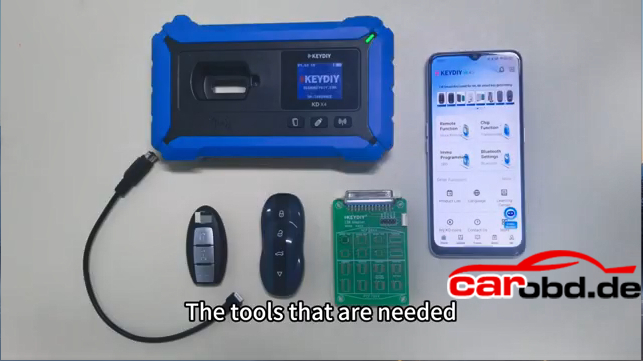
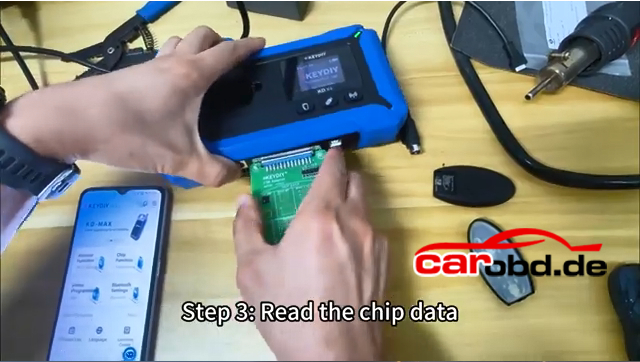
Connect Keydiy KD-X4 with tablet or phone via OTG connector

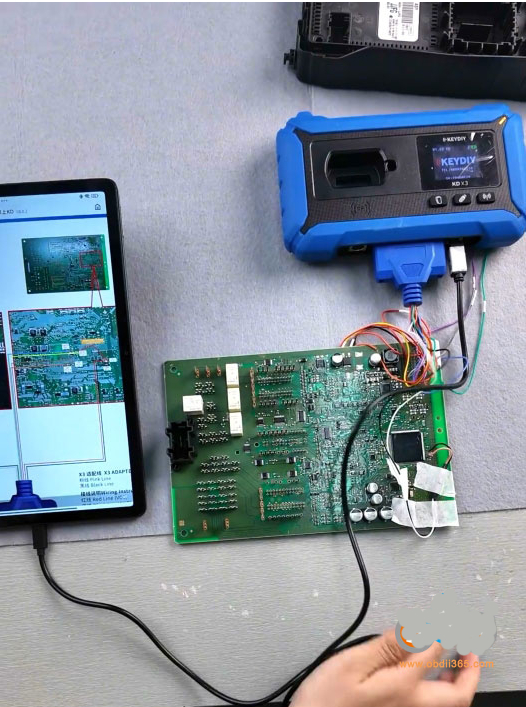
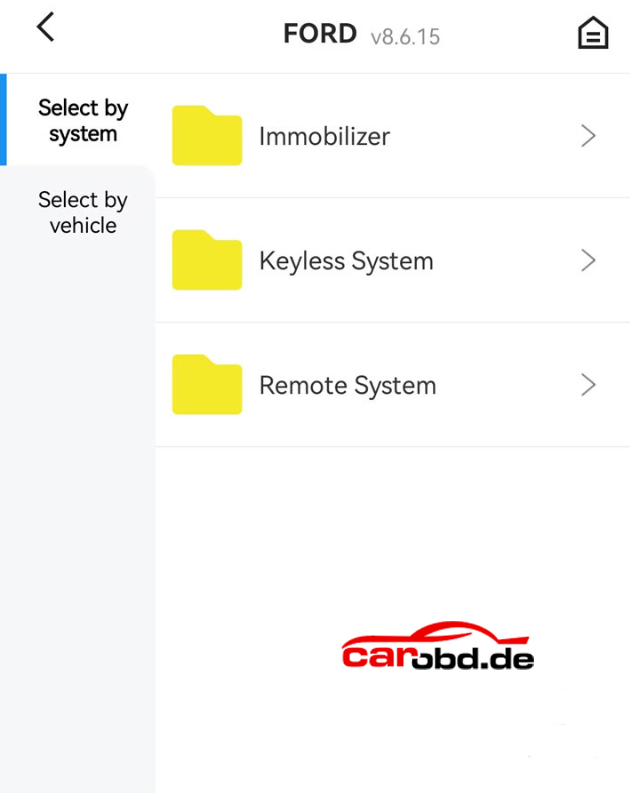
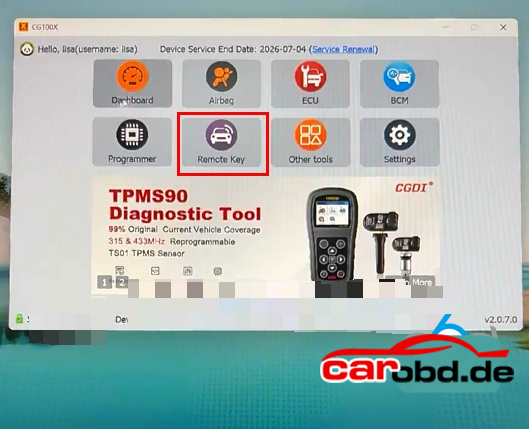
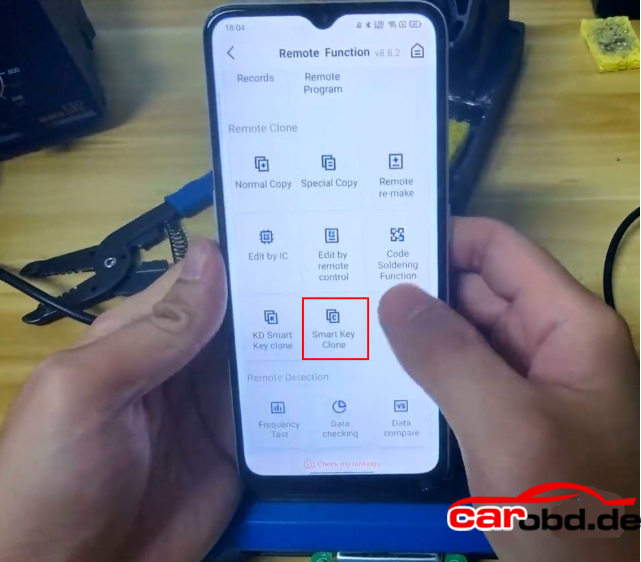
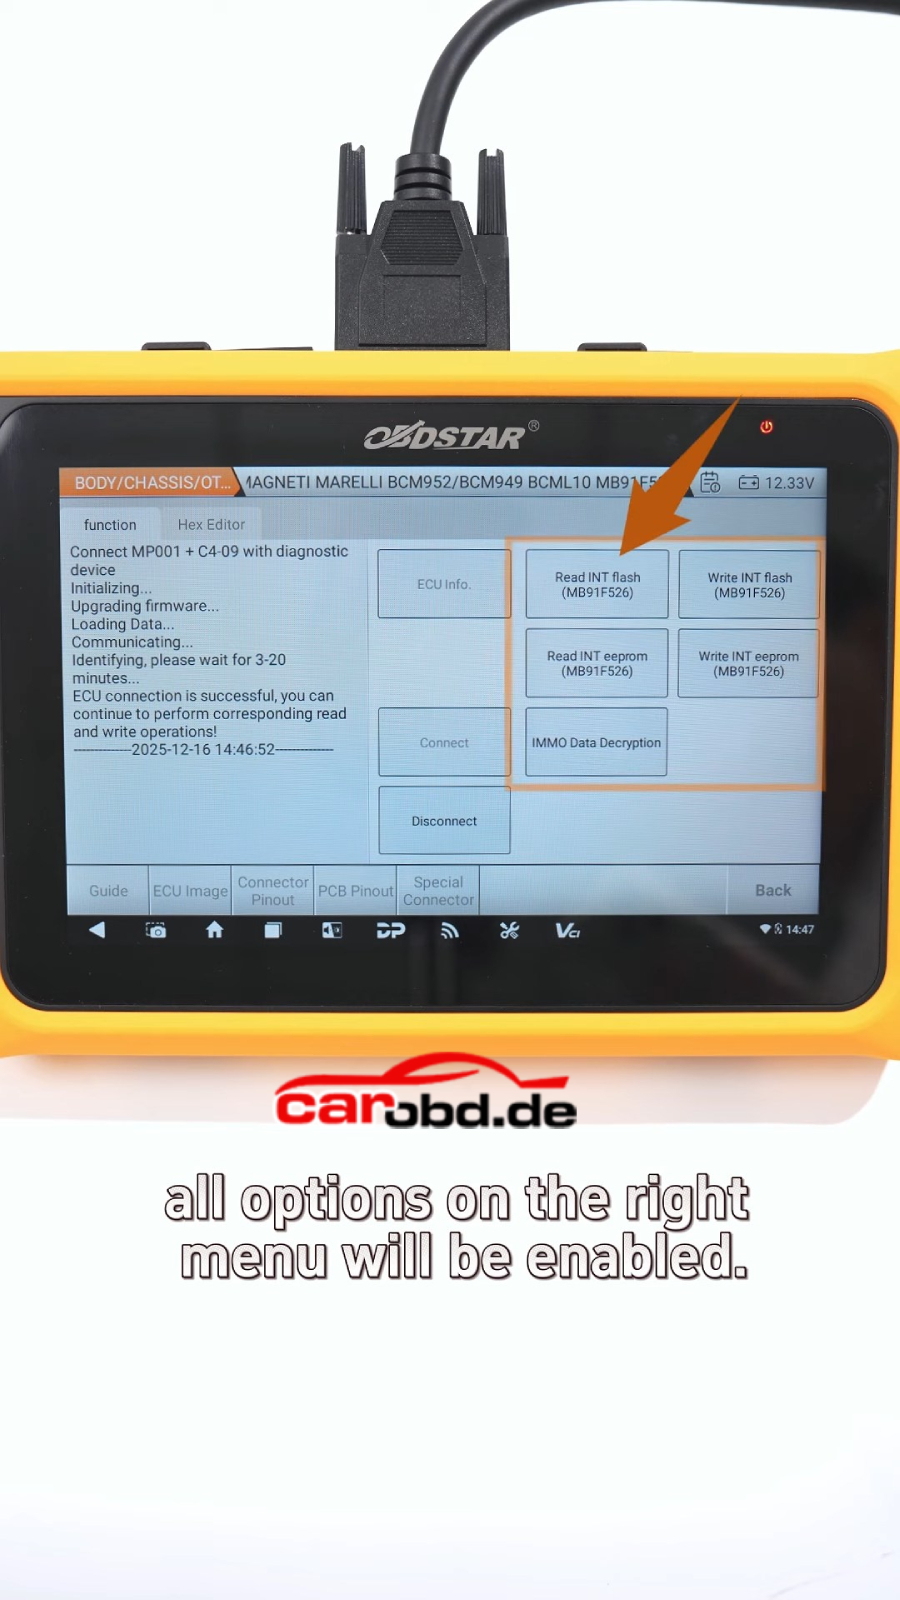
Go to IMMO programming function
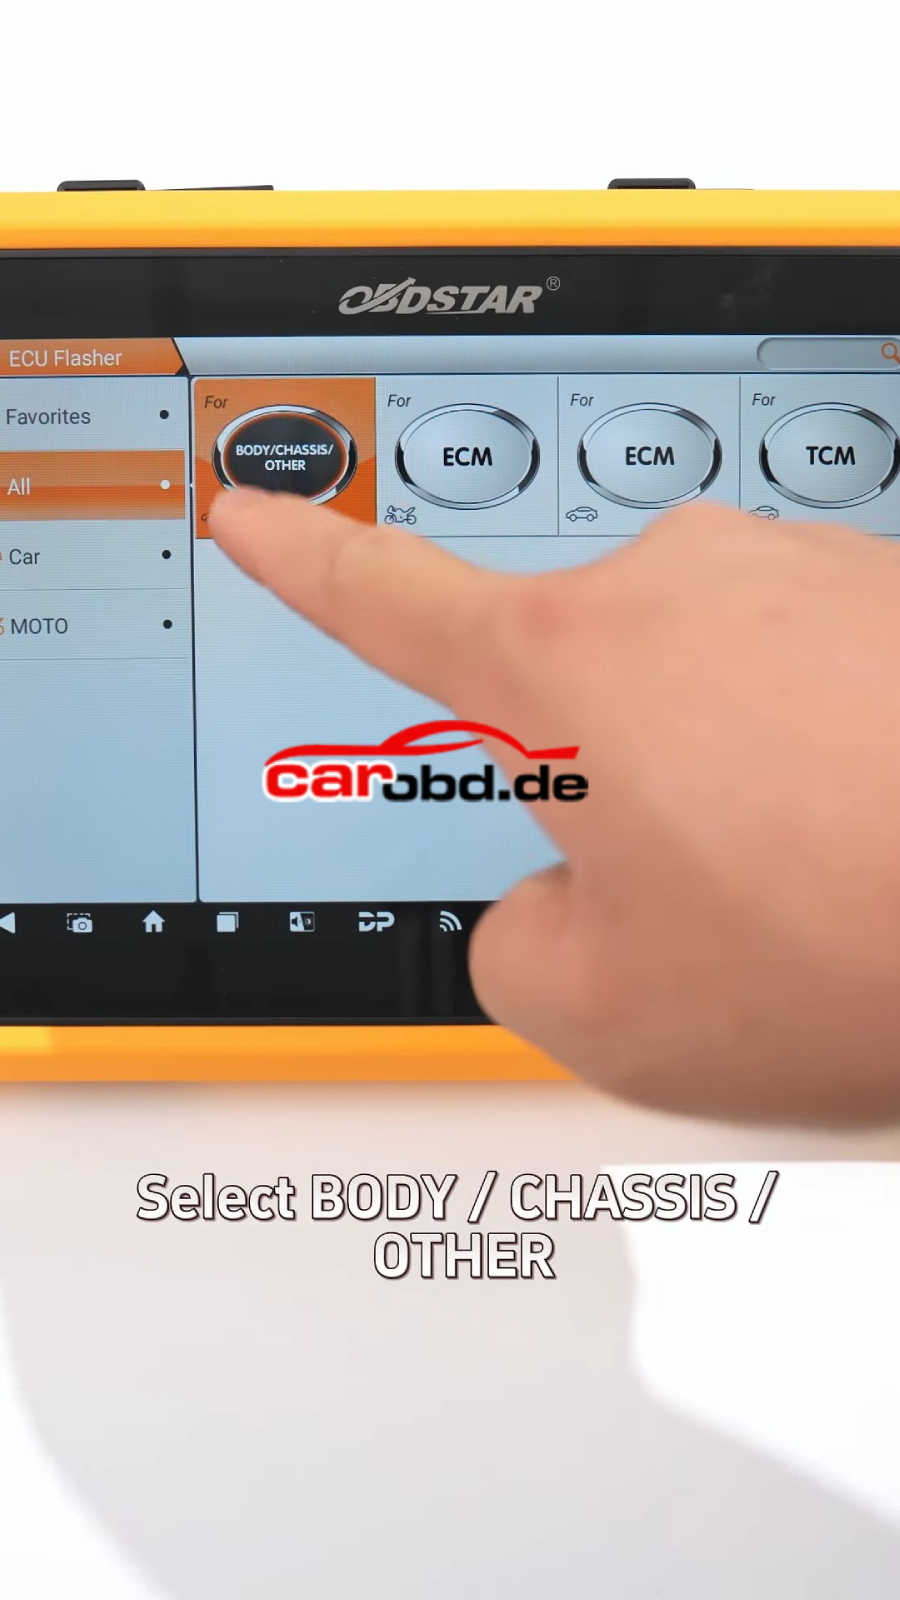
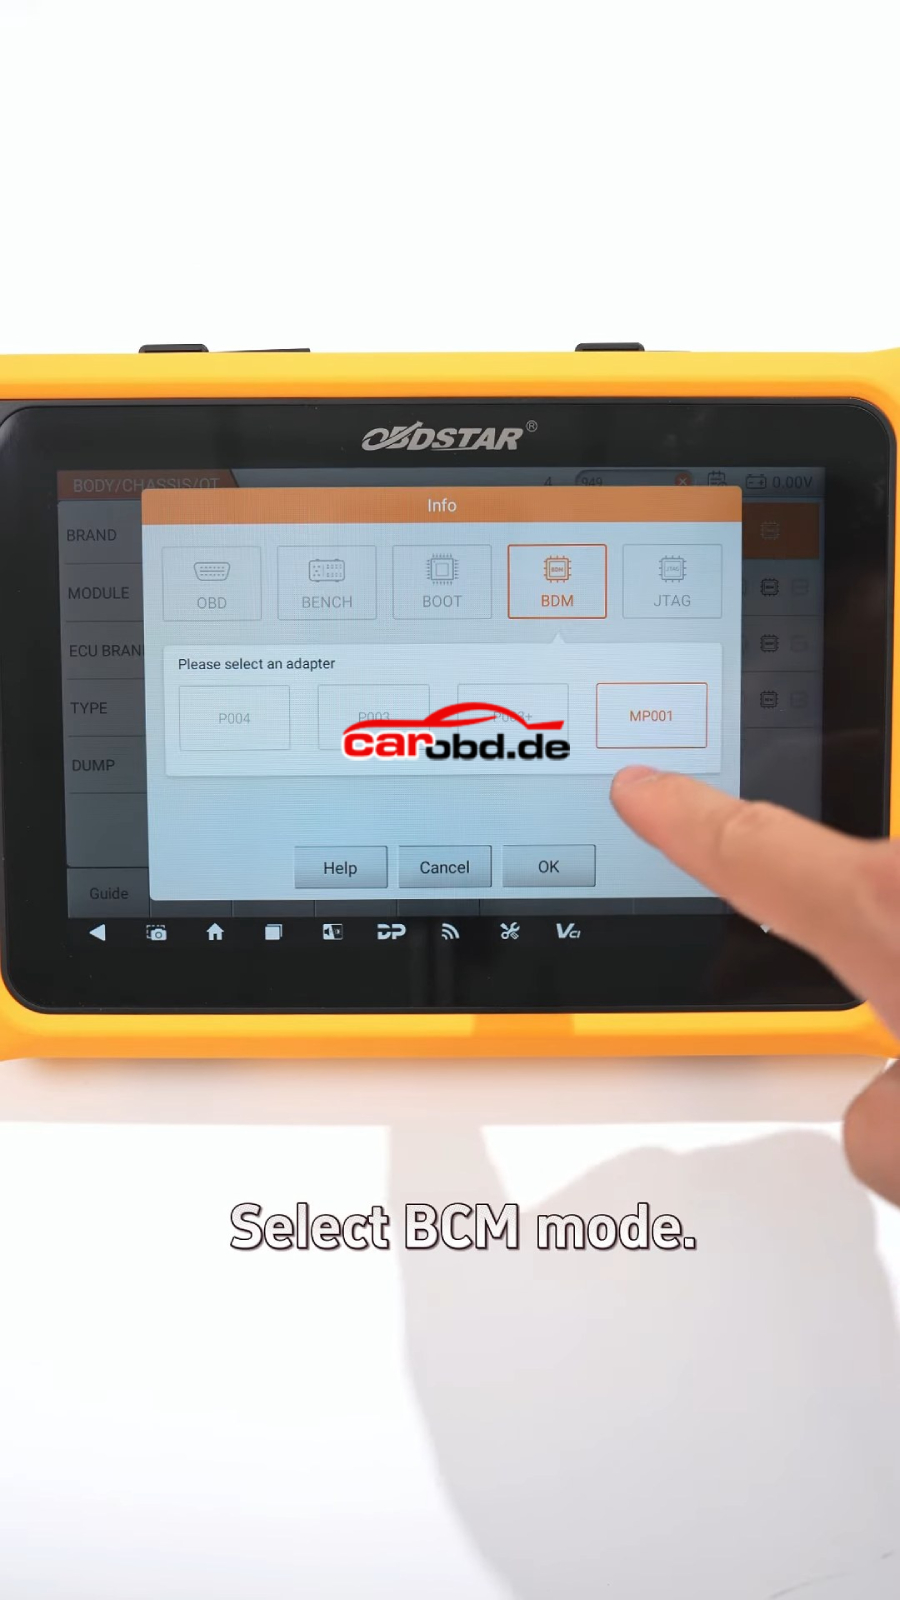
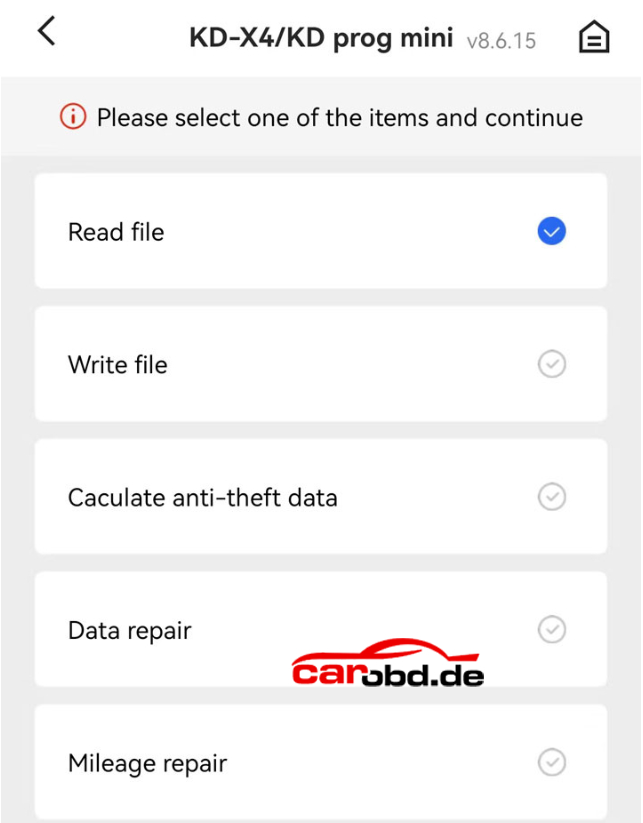
Select KD-X4 device-Programmer function
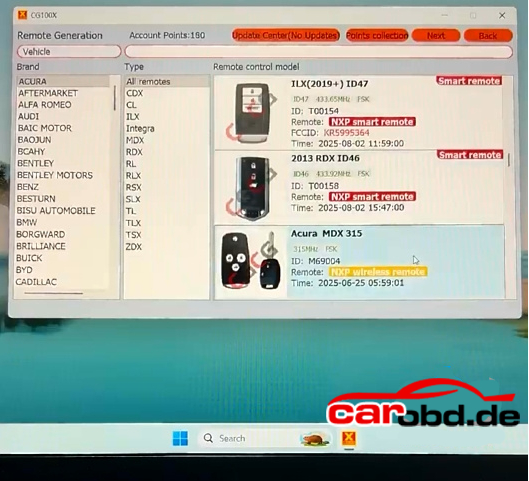
Select Read file function
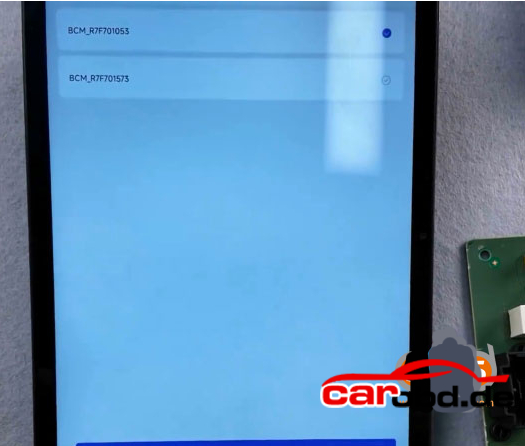
Choose Ford-BCM R7F701053 or R7F701073

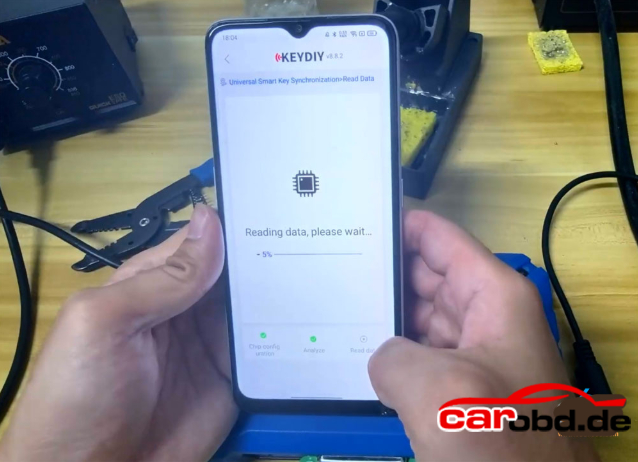
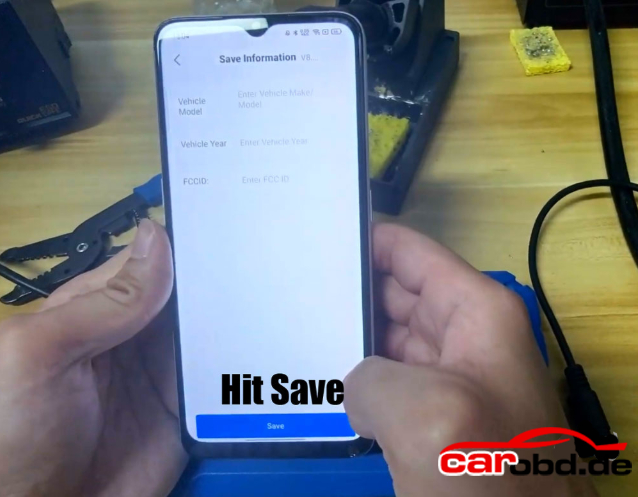
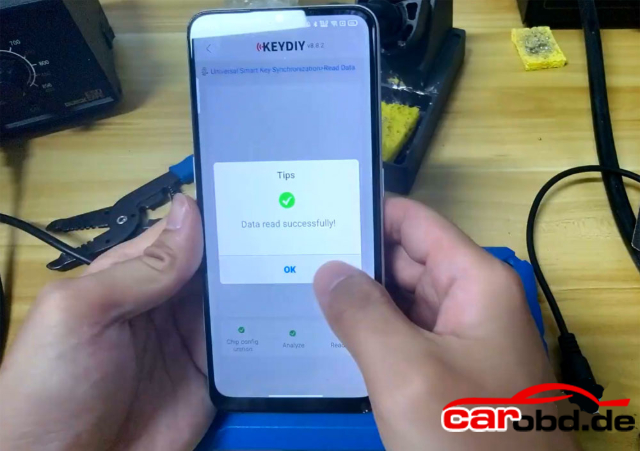
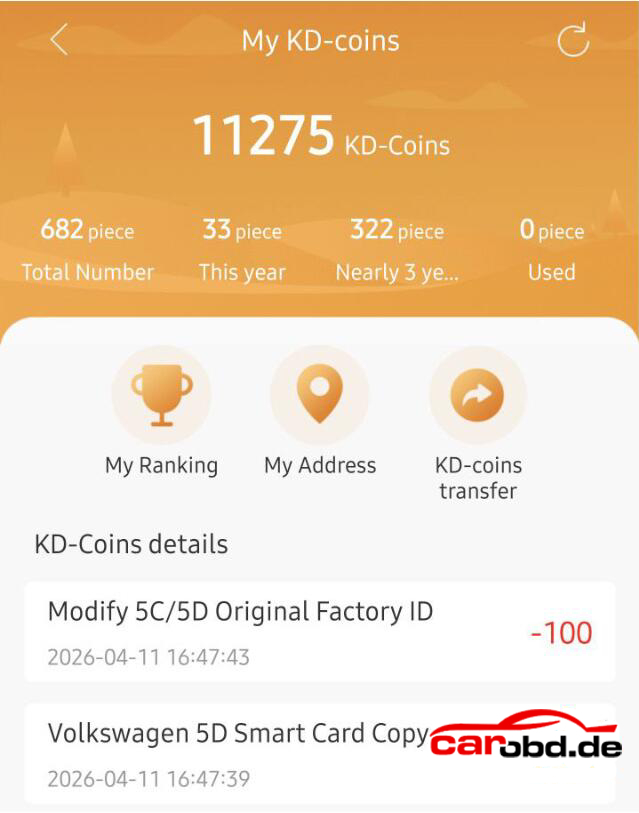
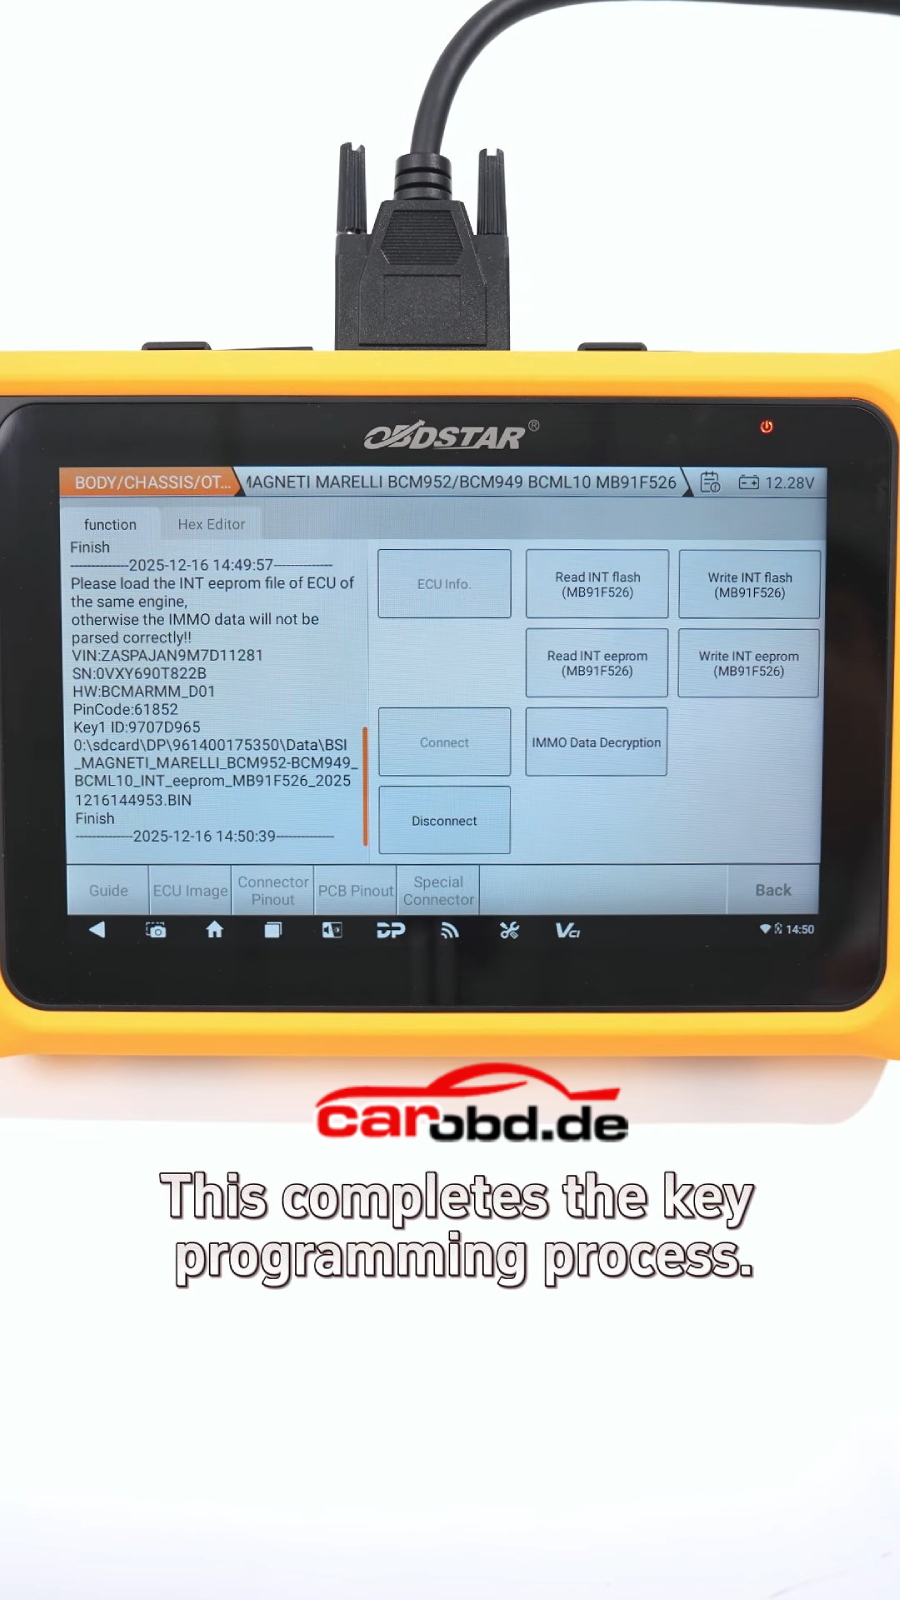
Read and save BCM data

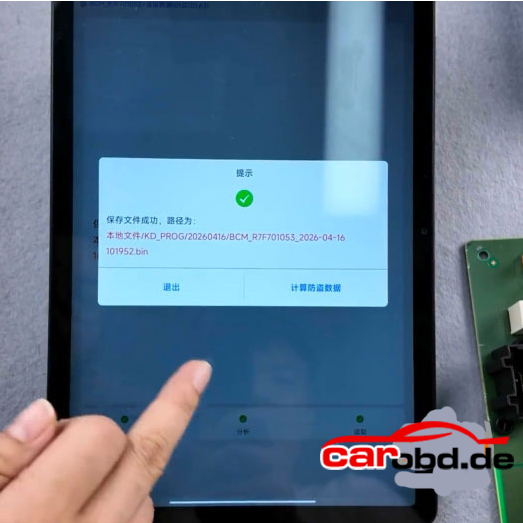
Reinstall BMC module back to vehicle and add key in car

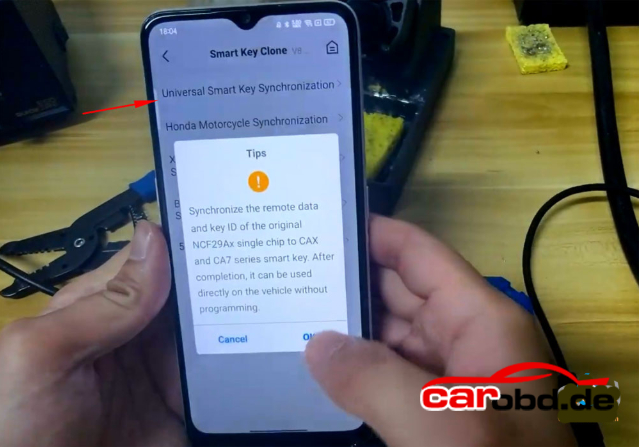
Select IMMO programming-Ford-select by type-Keyless System-Type 35-Add key or All keys lost.

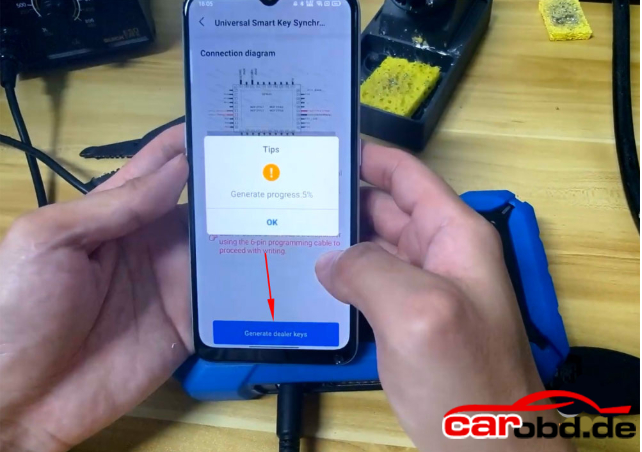
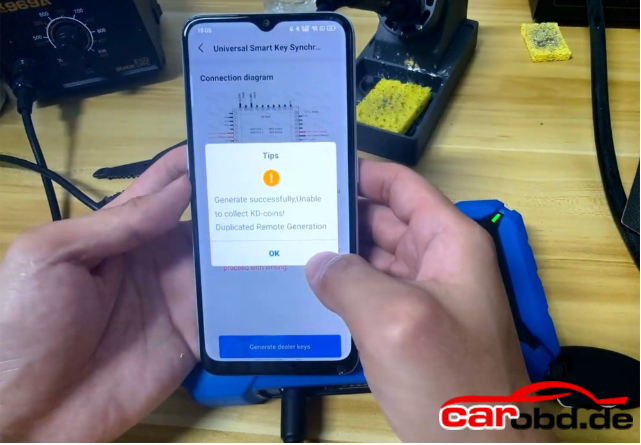
Follow KD-X4 App prompts to add a spare key.

How to Fix FormulaFlash No Power in Bench Mode (LED Not Lighting Issue)

A customer recently reported the following issue with their FormulaFlash ECU Programmer

“My device stopped providing power in bench mode. The LEDs no longer light up. Is there any chance of repairing it? It is still under warranty.

After inspection, the root cause was identified as a burnt FB0 resistor on the PCB board, which resulted in a complete loss of power output in bench mode.

Root Cause Analysis
The failure is typically caused by:

  • Overcurrent or incorrect wiring during bench operation
  • Short circuit during ECU connection
  • Component aging or unexpected voltage spikes

The damaged component (FB0 resistor) plays a key role in the power circuit. Once it is burnt, the device will:

  • Fail to supply power in bench mode
  • Show no LED activity
  • Appear completely unresponsive

Repair Solution
Method 1: Replace with a 0 Ohm Resistor
The recommended solution is:

  • Replace the damaged FB0 component with a 0Ω (zero-ohm) resistor

This acts as a jumper and restores the circuit continuity.


Method 2: Use a Donor Resistor from the PCB
If a 0Ω resistor is not available, you can:

  • Locate a row of similar resistors on the PCB board
  • Remove one resistor from that row
  • Solder it onto the burnt FB0 position

Important Notes

  • This repair requires basic PCB soldering skills
  • Improper handling may cause further damage
  • If your device is still under warranty, it is recommended to contact your supplier before attempting repair

Preventive Tips
To avoid similar issues in the future:

  • Double-check wiring before powering the device
  • Use stable power supply during bench operations
  • Avoid hot-plugging ECU connections
  • Ensure proper grounding

Conclusion
A FormulaFlash device that shows no power in bench mode and no LED activity is often caused by a burnt FB0 resistor. Replacing it with a 0Ω resistor or using a donor component from the PCB can effectively restore functionality.

If you are unsure about the repair process, always consult technical support or refer to the official documentation

For more informations,please contact technical service

Whatsapp: +86 19947637411
Email: Sales@Carobd.de

How to Generate Remote Key with CG100X ?

How to Generate Remote Key with CG100X ?

CG100X programmer’s recent upgrade 2.0.7.0 added remote key generation function.
We will show how to generate a remote key using CG100X

What remote do be used ?
CG100X will only generate CG remote

  • 1CG wired remote =25 points
  • 1CG wireless remote= 40 points
  • 1 CG Smart remote = 60 points.

The generate points generated will be tied to the user’s CG account

How to generate Remote using CG100X ?

Place a CG remote into CG100X’s induction coil.

Go to Remote Key function
Select brand-model and the corresponding remote program

For example: Acura MDX 315mhz
Supports wireless and wired generations

Here select wireless generation

Generate remote successfully

After generating remote key, program remote with CGDI A2 or other key programmers

For more infomations,please contact technical service

Whatsapp: +86 19947637411
Email: Sales@Carobd.de

KDYDIY KD-X4 Copy NCF29AX Series Smart Key using KD ZB71 Remote

KDYDIY KD-X4 Copy NCF29AX Series Smart Key using KD ZB71 Remote

Keydiy KD-X4 and KD-MAX update NCF29xx smart key synchronization function(read original key data to copy/add smart key) on April 17th 2026

Keydiy will read original key data for the following smart key chip types:

NCF29A1
NCF29A4
NCF29A2
NCF2953
NCF29A3
NCF2954

Device Used:
Keydiy KD-X4 or KD-Max key tool
Keydiy ZB71 smart remote (Must write data into the KD ZB71 remote !!)
Keydiy #13 NCF29xx interface board
Original key


Kindly Note:
Update the KD device App to the latest version.
It is not a simple read and copy procedure. Some keys require removing the chip and solder onto the KD interface board to read OEM key data.

Don’t need to generate remote program before reading key data.

Procedure:
Step 1: Remove the chip from the original car key.

Disassemble the original smart key and remove the NCF29Ax chip from the OEM key.

Step 2: Solder the chip on the KD #13 NCF29xx adapter

Connect the KD #13 adapter with KD-X4 or KD-Max

Step 3: Read chip data
Go to Remote Function-Smart Key Clone-Universal Smart Key Synchronization


Synchronize the remote data and key ID of the original NCF29Ax single chip to KD ZBX and ZB7 series smart key
It can be used directly on the vehicle without programming.

If don’t have KD#13 adapter, follow the wiring diagram to solder wires to the key circuit board.

Read Chip Data
Save chip data

Remove the #13 adapter from KD-X4
Resolder the chip back to the orignal key.

Step4: Write the chip data onto the KD ZB71 remote
Connect the KD 29AX and 29A7 series smart car using 6-pin programming cable.
Connect the programming cable with KD-X4 device.

Generate dealer key
Generate dealer key successfully

Install the key shell to the KD ZB smart remote.

Don’t need to program key in car after writing KD remote
Test the KD and OEM key’s function

For more informations,please contact Technical Service

Whatsapp: +86 19947637411
Email: Sales@Carobd.de

Keydiy KD-X4 Now Will Modify Original VAG MQB49 5C 5D Key ID !!!

Good News for everyone- the KEYDIY KD-X4 key programmre can modify the ID of original factory VAG MQB49 5C and 5D keys.
. In previous versions, the KD-X4 could only change the ID of the KD’s own 5C/5D keys. With latest update, the KD-X4 can also change the ID of original keys.

Fairly new update within the past few days.

Changing the original key ID will take 100 coins each time.


Example:

Done a VW ID.3 2021 MQB49 5D key. Changed factory key ID. Cost 100 coins to do. No SFD lock, 5D done today for ID.3 2021, changed factory key, cost 100 coins to do.

Used OEM board, second hand from ebay. Worked a treat, carefully split case, then glued together and reassembled. No one will even know. It does cost 100 coins to rewrite original board ID, but did the job.

To be fair KD FGB would be better option with the wireless remote generation. Without KD solderless adapter, you have to solder wires on the origina key.

NOTE:
Modify the ID of KD’s FGB remote does not require points.
CGDI K2 and YANHUA ACDP will also modify OEM 5C/5D key ID.

For more informations and technical support,please contact

Whatsapp: +86 19947637411
Email: Sales@Carobd.de

2021 DUCATI DIAVEL 1260 PIN CODE RESET FUNCTION PROCEDURE

Background

PIN Code Overview:
The DUCATI PIN code is a 4-digit security password. Its primary function is to serve
as an emergency unlock credential for the Immobilizer System (IMMO) and to
facilitate critical anti-theft data programming.
1). If the key transponder fails, the fob battery is dead, or the vehicle experiences an
immobilizer malfunction or lockout, the PIN must be entered via the dashboard to
unlock the vehicle ;
2). Factory default PINs are often generic (e.g., 0000 or a specific combination) and
can be modified via the instrument cluster menu to a personalized code, preventing unauthorized access ;
3). If the PIN is not stored correctly or is lost, the vehicle may be restricted from
starting, or the dashboard menu may prevent changes. In such cases

MOTOMASTER ‘s【PIN Code Reset】function is required to resolve the lockout.


Preparation: MOTOMASTER, M001A, M041.

Solution: Use OBDSTAR MOTOMASTER to perform 【PIN code reset】 function to reset PIN code

Detail Steps:
①Select 【MOTO Diag】–【DUCATI】–Latest Version to enter 【Diagnosis】
obdstar motomaster
obdstar motomaster
obdstar motomaster

②Choose【By model】;
obdstar motomaster
③Sequentially select 【D】 >【Diavel 1260 E5】 > 【1262】 >【MY 21】 ;
obdstar motomaster
④Click【Manual selection】;
obdstar motomaster
⑤Click【Hands Free (Smart Key)】and tap【Enter】;
obdstar motomaster
obdstar motomaster
⑥Click【Special Function】, follow the prompts, enter the password 123, Click
【OK】;
obdstar motomaster
obdstar motomaster
obdstar motomaster
⑦Click【PIN code reset】 function;
obdstar motomaster
⑧Click【OK】;
obdstar motomaster
⑨Click【OK】;
obdstar motomaster
⑩Operation complete. The PIN has been reset. You may now proceed to the instrument cluster menu to change the PIN.
obdstar motomaster

Manual PIN Change Procedure
1). Turn the ignition switch to the ON position ;
2). Wait for the dashboard to display the home page, then press and hold the
MENU ENTER button on the left handlebar to access the dashboard menu ;
obdstar motomaster
3). Select the【PIN CODE】function from the menu ;
4). Enter the reset PIN: 0000 ;
5). Set a new PIN to complete the modification.

Summary
Pls strictly follow your device tips in your operation process.

FOr more informations,please contact

Whatsapp: +86 19947637411
Email: Sales@Carobd.de

Autotuner Update PSA MD1CS003 ECU ON Bench (After Mail-in Unlock)

The Bosch MD1CS003, the essential ECU managing the extremely popular 1.5 BlueHDI, 1.5 Turbo D, 1.5 Multijet, and 1.5 D-4D engines, opens the doors to a massive market across the Stellantis group and Toyota.

🔒 Method: Bench (After Mail-in Unlock) To guarantee the long-term protection of this highly sought-after solution and secure your business, this protocol requires the ECU to be sent to us for unlocking first. Once the Mail-in Unlock is complete, you will be free to read and write the ECU via Bench Normal Read (NR) right in your workshop.

Compatible Models:

Citroen – Berlingo, C3 / Aircross, C4 / Cactus / Space Tourer, C5 Aircross, DS3 Crossback, DS7 Crossback, & Jumpy
DS – DS7 Crossback
Fiat – Scudeo
Opel – Astra, Combo, Corsa, Crossland X, Grandland X, Insignia Grand Sport, Mokka, Vivaro, & Zafira Life
Peugeot – 2008, 208, 3008, 308, 5008, 508, Expert / Traveller, Partner, & Rifter
Toyota – ProAce, & ProAce City
Vauxhall – Astria, Combo, Corsa, Crossland, Grandland X, Insignia, Mokka, Vivaro, & Zafira

Supported Engines:

1.5L – Diesel, BlueHDI, D-4D, Ecotec D, MultiJet, & Turbo D

For informations ,please contact

Whatsapp: +86 19947637411
Email: Sales@Carobd.de

OBDSTAR X300 Classic G3 Encypted BCM for 2021 Alfa Romeo Stelvio

Encrypted BCM Read and Write Without Dealer Tools Yes It’s Possible

Think encrypted BCM work can only be done by dealer tools?

Not anymore. With the right setup, you can handle it yourself 👇

🚗 Real Case 2021 Alfa Romeo Stelvio BCM
Using OBDSTAR X300 Classic G3, the full process of encrypted BCM read, write, and key data extraction can be completed step by step.

🔧 Tools Required
OBDSTAR X300 Classic G3
✔ MP001 programmer
✔ Main cable
✔ C409 adapter
✔ 12V power supply

⚙️ Key Operation Process
1️⃣ Enter ECU Flasher → Body / Chassis
2️⃣ Identify BCM model and select correct option
3️⃣ Follow wiring diagram and complete soldering
4️⃣ Connect device and start automatic decryption

🔑 After Decryption

✔ Read and save Flash data
✔ Read and save EEPROM data
✔ Write data to clone BCM module

🔓 Advanced Function
✔ Decrypt immobilizer data
✔ View VIN, PIN code, and key IDs
✔ Generate keys directly

💡 From BCM data reading to key generation, OBDSTAR X300 Classic G3 handles the entire workflow

How to Register and Update Xhorse VVDI Key Tool Max Pro?

This is a guide on how to register & update Xhorse VVDI Key Tool Max PRO for the first time. Follow the steps below to get started.

How to register VVDI Key Tool Max PRO?

  1. Power on Key Tool Max PRO>> Select language >> Set date & time zone >> Agree to enter >> Start to set >> Connect WiFi

  1. Enter cell phone number & password to login >> Send >> Enter security code >> Combine device

Tip: Please contact your dealer if cannot receive security code.

Warning

– After device combined to account, account will share this device bonus points;

– Parts of devices support to share function.

Press “Combine device”.

Combined device success.

Device activation success.

Press “Start to use” to next step.

How to update Xhorse Key Tool Max PRO?

Tips: current device need to synchronize, please go to Update Center to synchronize device, in case device no working.

Press “Update”.

* This may take some time, make sure good network before upgrade.

Here users can update system, APP, firmware & database.

Please update to the latest version as prompted:

Update APP >> Install >> Open >> Agree to enter >> Update

Update database >> Update all

Completed.


For more support,please contact Service

Jenny

Whatsapp: +86 19947637411
Email: Sales@Carobd.de

OBDSTAR MB FBS3/FBS4 TCM OBD Virginization First to Launch !

Breaking update news 
MB FBS3/FBS4 TCM OBD Virginization
First-to-Launch! No Risk!
OBDSTAR X300 Classic G3 AND DC706

Support Functions

  • Virginization
  • Write yN
  • Personalization (Data Transfer)

Function Background
When replacing a used Mercedes-Benz TCU, the interna immobilizer data must be erased before installation. Only after virginization can the unit be installed and programmed online
or undergo personalization transfer by using the original diagnostic tool.

1.Drawbacks of Traditional Open-Cover & Soldering

Methods :
At present, the market only allows destructive operations
on FBS4 (VGS4-0-NAG2)7-speed TCM units through cutting or soldering
These procedures are complex and carry extremely high risk of module damage. They also require highly skilled techniciansAny operational error may result in irreversible damage and significant financial loss.

2. Advantages of the New OBD Virginization Solution:

  • No cutting. No soldering

Through OBD or BENCH mode, used FBS3 (VGS2 /VGS3-NAG2) andFRSA/CSA-0_NACD) CVs can oe restoreo to factory- original (virgin) condition, after reading the original vehicle ECU data and completing personalization, no additional online programming is required.
Install the module and start the vehicle immediately-significantly improving workshop efficiency while eliminating operational risk
VGS3-NAG2
VGS2-NAG2
VGS4-0-NAG2
The software updates may different depending on the product configurations.