Archives

How to brush the GM MDI?

GM MDI Multiple Diagnostic Interface is with Opel Global tis global diagnostic system and GDS2 diagnostic system. GM MDI is an interface between the vehicle DLC and a PC (by wired USB, wired Ethernet, wireless Ethernet ) and TIS2web,it is support Multi-language,the function is strong ,can support online programming and coding.

Last Week

One of my customer told me that his GM MDI Manager software can not connect with MDI, however it can find MDI unit.like below picture.

problem-1

And prompt”It says that I need to update the software on my PC.”

problem-2

So,for this,we need to brush the main unit,you can follow the step to operate.

Step 1press this button and prepare to connect power

step-1

Step 2waiting the light about 10 second

step-2

Step 3when all the lights are blight,it entry into brush state

step-3

Step 4connect the usb cable to the computer,prepare brush the device

step-4

Step 5open GM MDI manager,choose the recover

step-5


At last,my customer deal with the problem successful!

Xtool EZ400 vs PS2 GDS vs Autel MS906 vs DS708

Xtool EZ400 vs PS2 GDS vs Autel MS906 vs DS708

www.carobd.de provide the high quality of XTOOL EZ400 diagnostic tablet,and Autel MS906 comes also here to replace DS708.

Here is the comparison tablet of Xtool EZ400, PS2 GDS, Autel MS906, DS708.

Product XTOOL EZ400 XTOOL PS2 GDS Autel MaxiSYS MS906 Autel MaxiDas DS708
Appearance  XTOOL EZ400  XTOOL PS2 GDS  Autel MaxiSYS MS906  Autel MaxiDas DS708
Screen 7 Inch 8 Inch 9.7 Inch 7 Inch
Language EZ400 language info will be released later. English & Russian Only English now, but France/ German/ Spanish/ Japanese/ Portuguese/ Russian version will be released in future. Multilanguage: English/ France/ German/ Spanish/ Japanese/ Portuguese/ Russian
Update One-click update via WIFIfor 3 years Online upfate for 3 years Free update online for 1 year Free update online for 1 year
Memory Memory: 1GB RAM,16GB FlashSupport 32GB extension SD card Random Memory: SDRAM 64MB
Programming Memory: Supports SD card slot-in and slot-out
2GB RAM & 32GB Solid State Drive (make MS906 run fastest) Max. 4 Gb SD card
WIFI YES NO YES YES
Bluetooth YES, 100 Meters YES NO NO
Operating system Android 4.4.4 WINCE 5.0 Android TM 4.0 OS Windows CE
Vehicle coverage Most US, Asian and European OBDII vehicle makes since 1996 most US, Asian and European CARs more than 80 US, Asian and European vehicle makes more than 40 US domestic, Asian and European Petrol and Diesel 12V cars models
Programming NO NO NO. (autel MS908P support online programming & ECU coding) NO
Special function ABS bleeding, service light reset, DPF regeneration, steering angle calibration, battery reset, throttle body adaptation, Service light reset, Throttle Sensor Adjustment Key programming, reset oil service light, oil inspection, service mileage, service intervals and airbag NO NO
Capabilities Codes, live data, actuation tests, adaptations for FULL systems(Diagnosis reports in PDF file) Codes, live data, actuation tests, adaptations Codes, live data, actuation tests, adaptations Codes, live data, actuation tests, adaptations for full systems
Built-in On-board battery Built-in printer Built-in 5-megapixel rear camera & lithium-ion battery Built-in overvoltage protection
Warranty 3 years 3 years 1 year 1 Year
  Xtool EZ400, PS2 & Autel MS906, DS708 in different shapes are all excellent diagnostic tablets with all basic functions and a wide range of vehicle coverage 

1. Autel MS906 replace DS708, with a faster running speed

2. Xtool EZ400 replace PS90, the same function as ps90 but can not read EEPROM

How to Update Old Models?-NT600 NT300 NT200 NT405

How to Update Old Models?-NT600 NT300 NT200 NT405

How to Update Old Models?

e.g. NT600/NT300/NT200/NT405 which may not be found at our website any longer?

To update NT100, NT300, NT405 and NT600, please follow steps below:

1. Visit our website www.foxwelltech.com and then select Support>Update . Or just click the link here : http://www.foxwelltech.com/support/update/

2. Click the image of your tool to download update package which includes update tool Foxlink, and update files.

3. Follow the on- screen instructions to install the update tool Foxlink and double click the desktop icon to launch the application.

4. Connect the tools with the computer with the USB cable and Foxlink identifies the device automatically.

5. Click <Select file> to locate the update files you downloaded.

6. Click <Update> to start updating.

How do you think Porsche 911 GT3 engine problem issues?

Porsche 911 GT3 This morning, I was shocked by a piece of breaking news entitled “Porsche warns 911 GT3 owners of fault”, the general content is “DETROIT — Porsche is asking owners of its 911 GT3 models to stop driving them because they can develop engine problems and catch fire. The problem affects 785 GT3 cars from the 2014 model year, including 408 in the U.S. Porsche says engines were damaged on two cars in Europe, and both caught fire. The company says there were no crashes or injuries.”

testerii-diagnostic-scanner-for-porsche-piwis-main-unit-3
Wish the Porsche 911 GT3 engine problem issue have a fast resolution. It happens that I also have a Porsche 911 and I also had the engine problem several months ago, but as the time suggest, my engine problem is not quality problem.

Time back to one morning of several months ago, when I entered into my car, and turn on the ignition, the check engine light on and keep flashing. I have no idea and called my friend, he suggest me if it is the Engine problem, he prompted me check whether I forgot to close the gas cap, or a component has malfunction. The gas cap is closed, as for which component has malfunction, I have no idea and have to drive it to the garage, and the garage repairman said, there is some trouble codes stored in the engine ECU, he picked out one Porsche diagnostic tool named Porsche PIWIS Tester 2 (it looks like the following picture), and a Panasonic laptop, then he use cable to connect the tester with the laptop and the car, in order to check and display the problem on the laptop. Then he install the software, during the installation he called the dealer for authorization, after the installation finished, he use the PIWIS tester to test, he showed me the trouble code , it is P0197, he said it means “Engine Oil Temperature Sensor Low”, after knowing where the problem is, he fastly and definitely solve the problem with PIWIS tester. The engineer is talkative and he said my problem is just a little case to PIWIS tester, PIWIS tester not only has diagnostic function, but supports offline programming as well as online programming, it not only work with car, but also sports car.

This is my personal experience about Porsche PIWIS Tester II, wish it can help you if you also have the same problem.

Foxwell GT80 PLUS Diagnostic Platform Coverage More Wild Cars

Foxwell GT80 PLUS Next Generation Diagnostic Platform

Foxwell GT80 Plus can do the latest 2015/2016 models,with comprehensive functions.it support win 8.1 Operate System,10 inch LED touch screen,kindly interface,very convenient to use.

Foxwell GT80 Plus Vehicle Coverage:
USA Coverage
Chrysler,Ford,GM,Brazilian GM(For Brazilian Market Only)
ASIA Pacific coverage
Au Ford (For Australian Market Only), Acura, Brilliance, BYD, Chery, Daewoo, Geely, Great Wall, Honda, Holden (For Australian Market Only), Hyundai, Infiniti,
Isuzu, JAC, Kia, Lexus, Mazda, Mitsubishi, Nissan, Perodua, Proton, Scion, Subaru, Suzuki, Toyota
European Coverage
Audi, Bentley, BMW, Bugatti, EU Ford, Jaguar, Land Rover, Maybach, Mercedes Benz, Mini, Opel, Porsche, Rolls-Royce, Saab, Seat, Skoda, Smart, Sprinter, Vauxhall, Volvo, VW
French & Italian Coverage
Abarth, Alfa-Romeo, Citroen, Dacia, Fiat, Lancia, Maserati, Peugeot, Renault

GT80 PLUS Identifies Vehicle By VIN

GT80 PLUS lets you identify the vehicle you are testing rapidly and accurately on the basis of its VIN number. With the diagnostic tool connected to the vehicle’s OBD socket, it automatically retrieves the VIN code or you can enter it manually to identify the model you are working on.

gt80-plus-next-generation-blog-1

GT80 PLUS Checks Available Controllers Automatically

GT80 PLUS automatically checks and recognizes all available electronic control units on a vehicle in a matter of seconds. In addition, it instantly displays all the errors detected on the vehicle, and allows errors to be viewed and cleared with just a single click.

gt80-plus-next-generation-blog-2

GT80 PLUS Is Easy to Use

GT80 PLUS is designed to be easy to setup and use. With genuine Windows 8.1 operation system, Intel quad-core processor and 10.1” LED capacitive touch display, GT80 PLUS delivers much faster and easier diagnosis.

So you can focus on what’s important—servicing the vehicle. It comes with menu-driven navigation and one-click update, so you won’t have to waste your time on learning how to use the scan tool. Vehicle information is so user friendly presented that you can quickly navigate through to find what you need to get the vehicle fixed. GT80 PLUS provides simple ways to get to wherever you want to go from wherever you are.

Notes: one GT80 PLUS machine includes 2 languages – one customize language + English default language


SSD or HDD, which better for Xentry DAS with SD connect C4 ?

Here is the differences between SSD and HDD for SDconnect c4 with Dell D630.

mb-sd-c4-dell-d630

Price:

SD C4 software with SSD for 118 euro, HDD for 99.99 euro

Speed

            SSD VS Common HDD in terms of running speed
(test on our DELL D630 PC)
        4G SSD       4G HDD       1G SSD     1G HDD
boot time about 1min

30 Secs

about 4 min about 3 Min

15 Secs

about 5 Min
shutdown time about 20 Secs about 50 Secs about 22 Secs about 2 min
time to use Xentry

test one vehicle

module

about 2 min

25 Secs

about 3Min

27 Secs

about 4 Min

28 Secs

abou 5 Min


This is where SSDs shine. An SSD-equipped PC will boot in seconds, certainly under a minute. A hard drive requires time to speed up to

operating specs, and will continue to be slower than an SSD during normal use.

A PC or Mac with an SSD boots faster, launches apps faster, and has faster overall performance.

Witness the higher PCMark benchmark scores on laptops and desktops with SSDs,

plus the much higher scores and transfer times for external SSDs versus HDDs.

Whether it’s for fun, school, or business, the extra speed may be the difference

between finishing on time or failing.


Fragmentation:

Because of their rotary recording surfaces, HDD surfaces work best with larger files

that are laid down in contiguous blocks. That way, the drive head can start

and end its read in one continuous motion. When hard drives start to fill up,

large files can become scattered around the disk platter,

which is otherwise known as fragmentation.

While read/write algorithms have improved to the point that the effect is minimized,

the fact of the matter is that HDDs can become fragmented,

while SSDs don’t care where the data is stored on its chips,

since there’s no physical read head. Thus, SSDs are inherently faster.


Availability:

Hard drives are simply more plentiful. Look at the product lists from Western Digital, Toshiba, Seagate, Samsung, and Hitachi, and you’ll see many more HDD models than SSDs. For PCs and Macs, internal HDDs won’t be going away completely, at least for the next couple of years. You’ll also see many more HDD choices than SSDs from different manufacturers for the same capacities. SSD model lines are growing in number, but HDDs are still in the majority for storage devices in PCs.


Noise: 

Even the quietest HDD will emit a bit of noise when it is in use from the drive spinning

or the read arm moving back and forth, particularly if it’s in a system

that’s been banged about or in an all  metal system where it’s been shoddily installed.

Faster hard drives will make more noise than slower ones.

SSDs make virtually no noise at all, since they’re non-mechanical.


Multilingual OTC GTS (IT3) Toyota Lexus Diagnostic Tool Compare with Intelligent IT2

New Arrival:

OTC GTS (IT3) Toyota Lexus diagnostic Tool is verified working fine, and newly released at www.cardiag.co.uk. After Toyota Denso Intelligent IT2, OTC GTS (IT3) brings Toyota Lexus technicians one more choice when they want to diagnose the Toyota Lexus.

toyota-global-techstream-gts-blog-1

Let’s firstly have an overview on OTC GTS (IT3) Toyota Lexus diagnostic Tool.

OTC GTS (IT3) Toyota Lexus diagnostic Tool outlook and adapters:

OTC GTS (IT3) package include: 1pcs x The OTC GTS host, 1pcs x OBD cable, 1pcs x USB cable and 1pcs x CD (contained driver and user manual).

You see GTS is a new PC-based diagnostic tool; it is built-in with no screen in the front of the multiplexer.

What is GTS? How it communicate with the vehicle?

GTS is a new PC-based diagnostic tool developed by Toyota Motor Corporation.GTS diagnostic tool is connected with its software and vehicle VIM. GTS software is the core part of this diagnostic tool and VIM is the communication between GTS and vehicle ECU. These will help technicians diagnose and reset vehicle’s program.

GTS Language available:

English, German, French, Spanish, Italian and Chinese

GTS (IT3) vehicle coverage:

Cover Toyota and Lexus up to 2015 year.

GTS Features and function:

”Legacy” module can work with all DLC3 (OBDII) port from 1993.

User-friendly graphical User Interface displays the trouble codes on the PC monitor, it is easy to understand.

GTS (IT3) compare with Intelligent IT2:

Item OTC/GTS Toyota Intelligent IT2
Toyota Lexus coverage Up to 2015 year Before 2012
With Oscilloscope and voltmeters No Yes
memory Larger than IT2 Less than OTC/GTS
Date Keeper <60 mins <15 mins
DTC Code Yes No
Monitored State Yes No
Health Report Yes No
Multisystem Yes No
Vehicle identification Yes No
Online Update Yes No
Logging System Yes No
OTC VIM installation

PC requirements:
Operating system (OS): WINDOWS XP/ VISTA/WIN7

CPU: Intel Pentium M1.2GHZ or higher

Memory: 1GB or more

Disk space: at least 256MB

Display resolution: 1024*768 (recommended) 1024*600 (lowest)

USB: at least one USB 2.0

Package including: 
1pcs x The OTC GTS host
1pcs x OBD cable
1pcs x USB cable
1pcs x CD

How to use BMW ENET cable to do BMW F-series coding

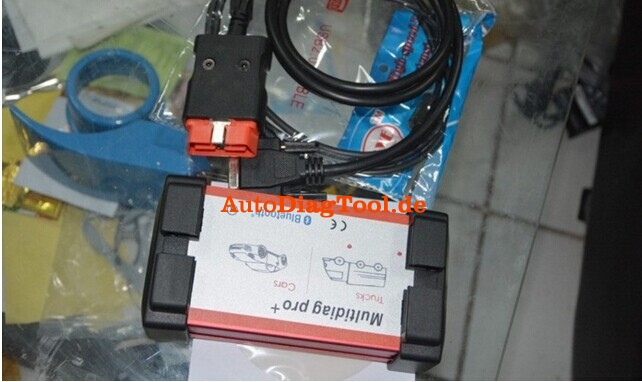
Received my BMW ENET cable and did some DIY job for F30 already.
This BMW ENET (Ethernet to OBD) Interface Cable is designed to work on BMW F-series alone. Let’s go straight to the point.

You need:
A BMW ENET cable
E-Sys program, datafiles, token and PIN
A PC/laptop running Windows XP system (mine second-hand Panasonic Win xp 64 bit OS)
Just spending a little money and you will get a powerful ENET cable for €11.00 without postage. I recommend get one from OBD Tools which offers good technical support. Usually, after he receives payment, they can have the cable shipped as soon as possible and arrive with you between 3 to 4 days.
I have found some clue on how to solder the cable list as below. Better understanding with the pictures guidance.

BMW ENET cable
The package comes with E-Sys program, datafiles and such which enable me to use directly without downloading. I was offered E-Sys v3.18.4 in combination with the v46.3 datafiles. I have to mention that the datafiles contains more than 10GB memory, so you have to take hours and hours to download it all. And you have no choice but to wait patiently.

BMW ENET (Ethernet to OBD) Interface Cable E-SYS ICOM Coding F-Series


Then please refer the pdf guide here E-Sys – MacOSX installation and configuration.pdf to start install the E-Sys. As soon as you start the vehicle, the E-Sys program will automatically saves the CAF files into “C:ESysDataCAF”. Then copy all these files on to the certain folder.
After that, please do as the following steps:
1) Connect the laptop to vehicle and click the connect symbol
2) Select “F20”(not F020 direct) and click connect. Close the popping out message when you see your car VIN, if not, repeat the progress again.
3) Accept following windows message and close the program
4) Switch to coding mode, go to expert mode and click on coding icon on the left vertical pane.
5) Come to the coding program. Click Read button under the VO pane and then FA appears
6) Now Click on Read VCM or Read button under VCM pane. You will find it it will be on your right hand-Center
7) All the ECU’s will display on the main program. Then expand the ECU’s and all most all ECU’s will have a file starting with CAF (With green indicator) right click on the CAF file and select Read coding data, ignore whose who did not contain CAF. But remember do not click all CAF files. Four or five is the maximum.
8) After complete above procedures, go to c:/esydata/CAF. All the .ncd files have been generated on the CAF folder.
9) Copy .ncd files and on your pc or laptop. Run the software program and then start to do F30 coding according to the window instructions.
I have successfully realized these things by using the ENET cable:
–Remove PDC + cam disclaimer
– Mirrors open automatically when closed with comfort access
–Change DVD region code
– Remove disclaimer
– Video in Motion
– Turned the Seatbelt Gong off
– Side View Cameras on at all speeds
– Change DVD region code
– Tire pressure + temperature in TPMS
– Mirrors close by pressing doorknob (comfort access only)
– Disable A.S.S. by default (can still be enabled but starts with setting ‘off’)
– Remember last setting of A.S.S. (works only when not disabled by default)
– Change ringtones

I am still working on it and will figure out more functions later. I have to clearly that these are all the tested result on F30. I am not sure how other F-series works.

Where to buy best Multidiag Pro+ for MAN, IVECO Trucks?

Today, I will guide you all to learn the best-quality Multidiag Pro+ at www.autodiagtool.de, for MAN, IVECO Trucks.

multidiag pro+

Multidiag Pro+ package:

Multidiag Pro+ interface

LED OBD2 Cable

USB cable (3 meter)

Software CD

Carrying Case

obd2-bluetooth-scanner-blog-1

obd2-bluetooth-scanner-blog-2

Multidiag Pro+ Test:

We test Multidiag Pro+ interface on many vehicles. Here Ford is one of them tested.


Multidiag Pro+ function:
FLIGHT RECORDER
With the flight recorder function, you can record parameters in real time while you are driving a vehicle. During recording, you can, with a press of a button, highlight the specific error so that you can investigate the detected error at a later time. CDP+ is equipped with built-in memory thus removing the need to bring a computer. Memory cart not include in package .

VOLTAGE CHECK
When CDP+ is connected to the vehicle, the unit will check the battery voltage of the vehicle and automatically adjusts itself to the vehicle’s voltage level of 12 or 24 volts. If the voltage gets too high or too low, CDP+ will warn you with both sound and light and you will also be alerted through the battery icon in our diagnostic software.

CHASSIS NUMBER VIN
In our CARS software, we have a smart function that allows you to read out the chassis number from the vehicle that you would like to diagnose. This ensures that the right model and year is selected automatically. In addition, engine code for vehicles, which are commonly available on the markets, is also selected automatically.

ISS
Intelligent System Scan (ISS) scans through all the systems in the vehicle and displays the fault codes that are stored in each system. This saves time and you get a quick overview of the actual status of the entire vehicle. When the ISS is complete, you can then select a specific control system to analyse the results further on.

ISI
Intelligent System Identification (ISI) identifies and selects automatically the type of controller that is mounted in the vehicle. This ensures that the diagnostic session is performed correctly with the correct parameters as required.

REPORT FUNCTION
Under this function tab, you will be able to see the adaptations and adjustments that are possible for a specific vehicle without having the vehicle near you. Together with the help texts as a guide, you can plan and be effective in your work; even under complex situations.

OBD-FUNCTIONS
CDP+ is equipped with an unique multiplexer technology, which allows it to be used on all types of vehicles, regardless of voltage levels and communication standards. For those vehicles that do not use the standard 16-pin connector, we offer a complete set of certified and customized adapter cables and kits.

HELP FUNCTION
For most OBD functions, such as adjustments and programmings, there are detailed instructions and help texts to assist you in your diagnosis work. You will find step by step information about prerequisites, preparation and implementation of various functions; making even the most complex function simple to perform.

Why choose Multidiag Pro+ for MAN, IVECO Trucks?

Multidiag Pro+ for MAN, IVECO trucks— this is the conclusion we obdtool learn from customer feedback. Our truck customers bought Multidiag Pro+ scanner mainly to do some adjustments (diagnosis) and programming.

Multidiag Pro+, the BEST??

obd2-bluetooth-scanner-blog-3
Best or not?? You can learn that from the PCB board.

But this version Multidiag Pro+ is without 4GB TF card. If you need this, you can choose Multidiag Pro+ Scanner with 4GB TF Card and Bluetooth.

We say “BEST” here is that the most appropriate for Multidiag Pro+ for MAN, IVECO Trucks.

MINI DSG Reader DQ200+DQ250 Installation Step

How to install MINI DSG Reader?

www.carobd.de provide the details step to install mini DSG reader for you.

Step 1: Copy the software in the CD, paste them to your local disk. Step 2: Disable all Network Connection, including: the local area connection, wireless network connection and 1394 connection.

Step 2: Disable all Network Connection, including: the local area connection, wireless network connection and 1394 connection.

mini-dsg-reader-blog-1

Step 3: Open the MINI DSG Reader folder, click “run me first registration entries”, and a windows dialogue popup reading: Registry Editor„, click OK.

mini-dsg-reader-blog-2

Step 4: Click icon “DSG Reader” and a windows dialogue popup displaying License expired, click OK, then another one popup showing machine ID, press “ctrl+v” to paste, and click OK.

mini-dsg-reader-blog-3

mini-dsg-reader-blog-4

Step 5:Create one txt file in the desktop and into it paste the machine ID, then send it to your seller for activation.

mini-dsg-reader-blog-5

Step 6: your seller send back the license file activated, cut it and paste it in to the Mini DSG reader folder.

mini-dsg-reader-blog-6

Step 7: right click the green icon “DSG Reader” to open it, then close the appeared screen, and again right click “DSG Reader”-send to-Desktop(create shortcut).

mini-dsg-reader-blog-7

Step 8: connect the DSG reader to the computer and the car, then it will popup windows “ found new hardware”, step-to-step to install it.

mini-dsg-reader-blog-8

Step 9: click “my computer-device manager”, if you find “USB OBD II cable”, it means the computer and the DSG reader establish communication.

mini-dsg-reader-blog-9

Step 10: Open the “Shotcut to DSGreader” in the desktop.

mini-dsg-reader-blog-10

mini-dsg-reader-blog-11

mini-dsg-reader-blog-12

Now, you are ready to start to use DSG reader to read and write latest dual-clutch DSG gearbox data for AUDI and VW~!