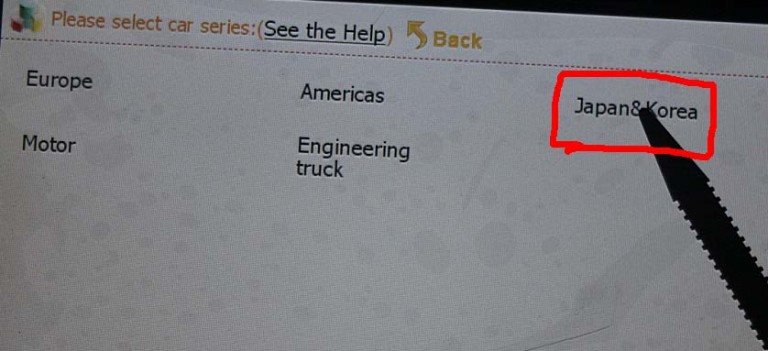
How to operate the SKP-900?
This operation instruction will tell you how to use your scan tool. For other vehicles, you
can perform it by referring to the instructions or according to operation tips on the screen.
Take FORD as an example, if all key is lost, you can use SuperOBD SKP-900 to match
key. Firstly, you must connect this device to the OBDⅡconnector via Main Cable.
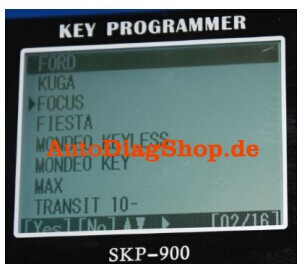
Select Vehicle: [FORD]→[FOCUS]:
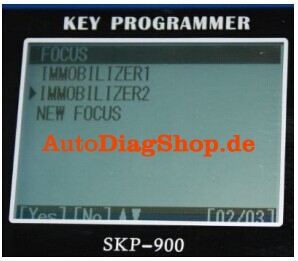
Press [YES], and select ‘IMMOBILIZER’ according to your vehicle:
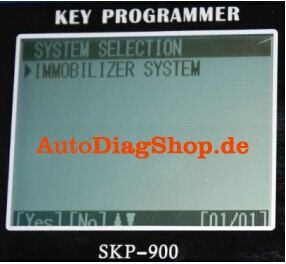
Press [YES]
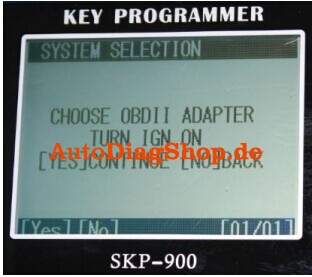
Press [YES]
Press [YES]
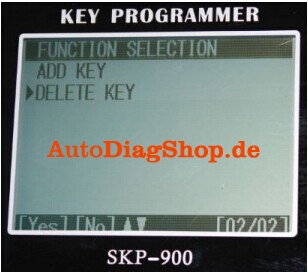
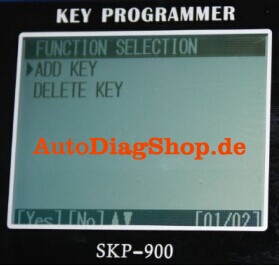
ADD KEY: for matching new key
DELETE KEY: for deleting all registered keys and so the lost keys can’t be used neither
We suggest that you delete all keys before matching new keys.
Select [DELETE KEY] and press [YES]:
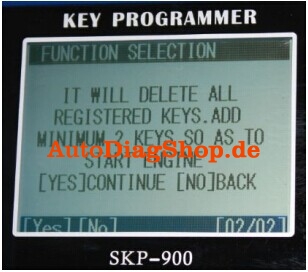
As shown on the screen, you must add at least 2 new keys to start the engine after
deleting all registered keys.
Press [YES]

Press [YES]

Press [YES]

It shows that deleting keys is succeeded.
Press [NO]:

Press [YES]
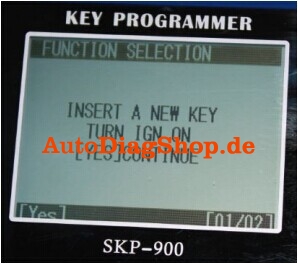

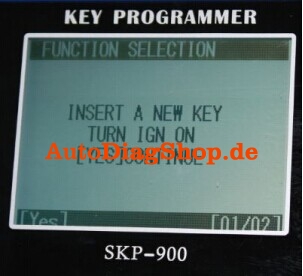
According to the instruction on screen, you should insert a new key and turn IGN on.
You may see the IMMO indicator light will flash when inserting a key which cannot start
Engine.
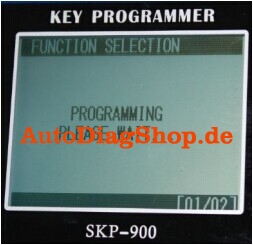
Press [YES]

Press [YES]

Press [YES]
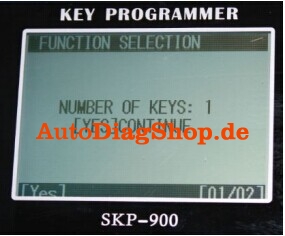

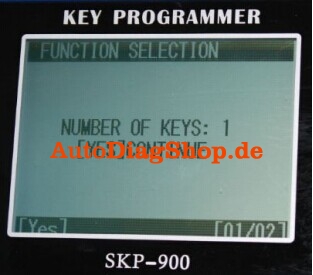
You have successfully programmed the first new key. Press [NO]:
Press [YES], continue to program another key:
Press [YES]
Press [YES]
Press [YES]

So far two new keys have been successfully programmed. Now you can use any one of them to start the engine. Of course, if you want add more keys, you just need to repeat the above operations.