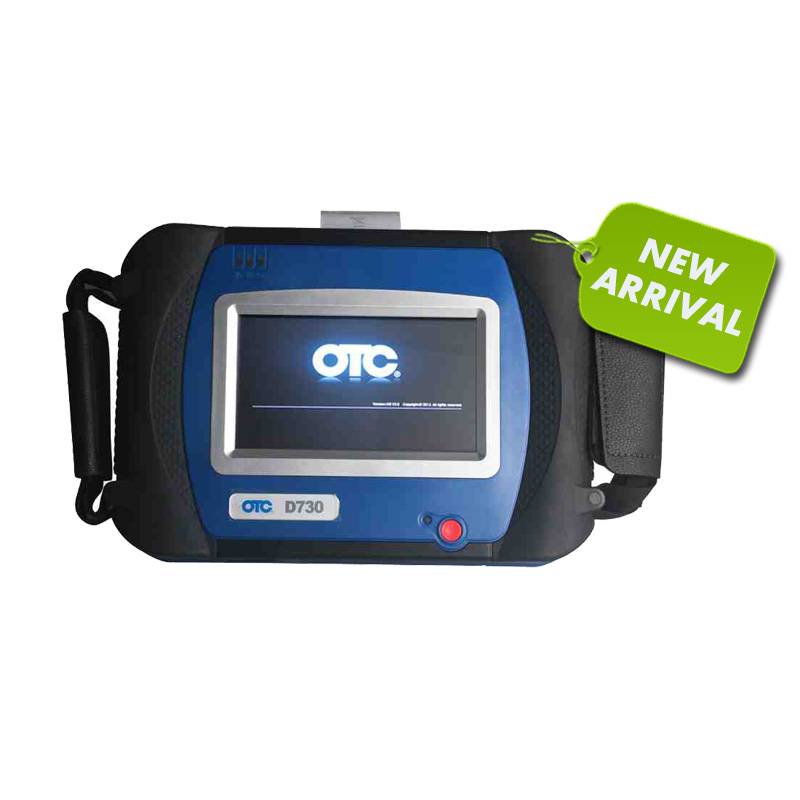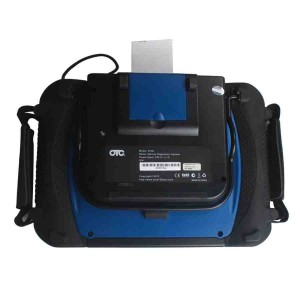
SPX AUTOBOSS OTC D730 highlight:
Multi-language available: English, Italian, German, French, Spanish, Russian, Polish and Turkish. Note: the default language is English; you are optional to download the language you want.
2. Update: frequent Internet based software updates.
4. Access to powertrain, chassis and body systems, it is new and powerful scan tool for workshop and car owner’s.
5. Covers more than 50 vehicle makes from Europe, America, Australia and Asia.
6. One Year Warranty
Built in Printer
High resolution 7” VGA colour TFT touchscreen display
Stand allowing hanging on steering wheel
Operation System (OS):
Windows CE operating system
SPX AUTOBOSS OTC D730 Automotive Diagnostic Scanner more details:
Following Content include:
1) SPX AUTOBOSS OTC D730 packages
2) OTC D730 Included Accessories
3) OTC D730 Vehicle Cable Complete Set
4) OTC D730 Scanner function
5) OTC D730 Scanner works with what electronic control system
6) OTC D730 works with what car models
Details:
SPX AUTOBOSS OTC D730 packages:
Being an automotive diagnostic scanner for all makes, it has a big package with all kinds of adapters and cables, its package weights 12.3KG (27.12LB )
Package including:
ASSM D730 EMEA
SD Card 8GB
Label of Microsoft WinCE
Benz-38 Adaptor
Chrysler-16 Adaptor CCD
Toyota-22 Connestor
Mitsubishi 12+16 Connestor
Honda-3 Connestor
Audi-4 Connestor
Nissan-14 Connestor
Benz-4 Connestor
Citroen-16C Connestor
Benz-14 Connestor
OBDll-16 Connestor
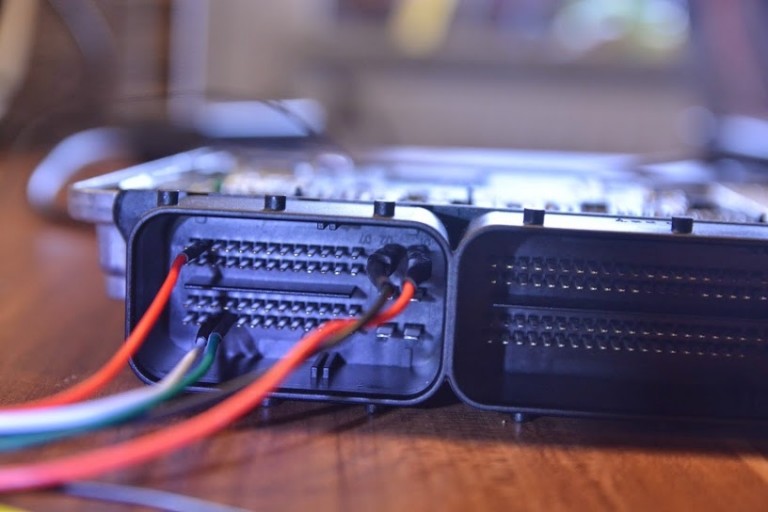
BMW-20 Connestor
Marelli-3 Connestor
GM/DEAWOO-12 Connestor
KIA-20 Connestor
Mazda-17 Connestor
TOYOTA-17 Connestor
Mini-3 Connestor
CITROEN-2 Connestor
Fiat-16 Connestor
Cigarette lighter line
Battery Cable
Main Cable 2M
Fuse 5A 30X6
Fuse 5A 20X6
PRINTING PAPER
SD Card Reader
D730 User Manual
AC/DC Adaptor
European Power Supply Plug
OTC D730 Included Accessories:
Carrying case
100 – 240 volt power supply
SD card reader
Built-in printer kit
OTC D730 Vehicle Cable Complete Set:
OBD II adapters
European OBD I adapters
Australian OBDI adapters
Asian OBD I adapters
USA Domestic OBD I adapters
Chinese adapters
We can FREE added new cars for you (if you need leave message on order)
OTC D730 Scanner function:
Quick Test function to test most vehicle systems
Fault codes (DTC’s), Data Stream and Service Reset
Actuations, Adaptations- and Control Module Coding
CAN Bus with high/low speed
One OBD II/EOBD connector for all CAN Bus systems
6 .Demo Mode for many OEM’s
Data graphing
Self-check function
OTC D730 Scanner works with what electronic control system?
Chassis :
SBC – Sensortronic Brake Control
ESP – Electronic Stability Program
AIRmatic – AIRmatic ABC
TPC – Tyre Pressure Monitor
ABS – SRS
Body:
Seats and Doors
Actual Values
Actuations
Initial Startup
Control Unit Adaptations
Correction Programming
Air Conditioning:
AAC – Automatic Air Conditioning
REAR AC – Rear Air Conditioning
STH – Stationary Heater
HSW – Heated Steering Wheel
Informatio n and Communication:
ICM – Instrument Cluster
SCM – Steering Column Module
PTS – Parktronic System
Audio, Video, Navigation
Telematics
Drive:
Transmission
ESM – Electronic Selector Module
DTR – Distronic
Motor Electronics
Idle Re-learn
Diesel Injector Coding
Diesel Pump Initialisation
OTC D730 works with what car models?
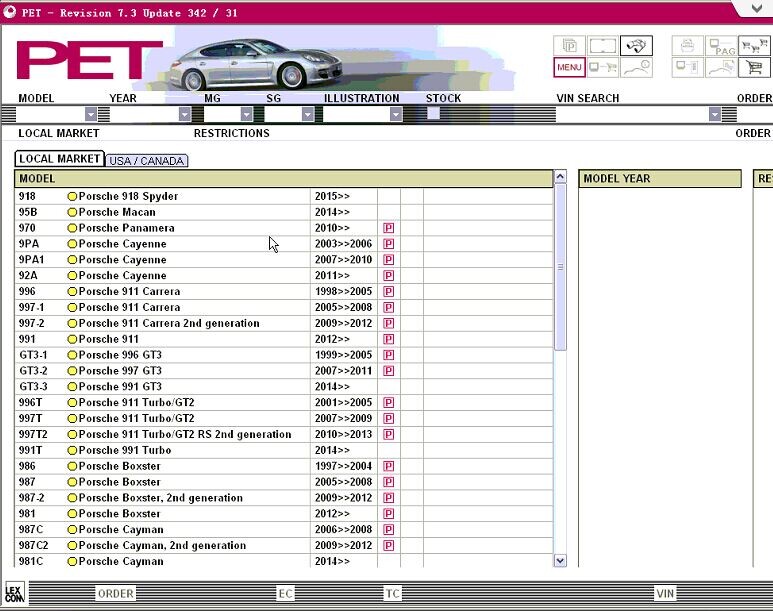
European Vehicles : Audi, BMW, Citroen, Fiat, Ford, Jaguar, Lancia, Land Rover,Mini, Mercedes-Benz, Opel, Peugeot, Porsche, Renault, Seat,Skoda, Smart, Volkswagen and Volvo
American Vehicles: Chrysler, Ford and General Motors
Chinese Vehicles: Chery, Foton, Geely and Great Wall
Asian Vehicles: Daewoo, Honda, Hyundai, Infiniti, Isuzu, Kia, Lexus, Mazda,Mitsubishi, Nissan, SsangYong, Subaru, Suzuki and Toyota
AUSTRALIAN Vehicles: Ford and Holden