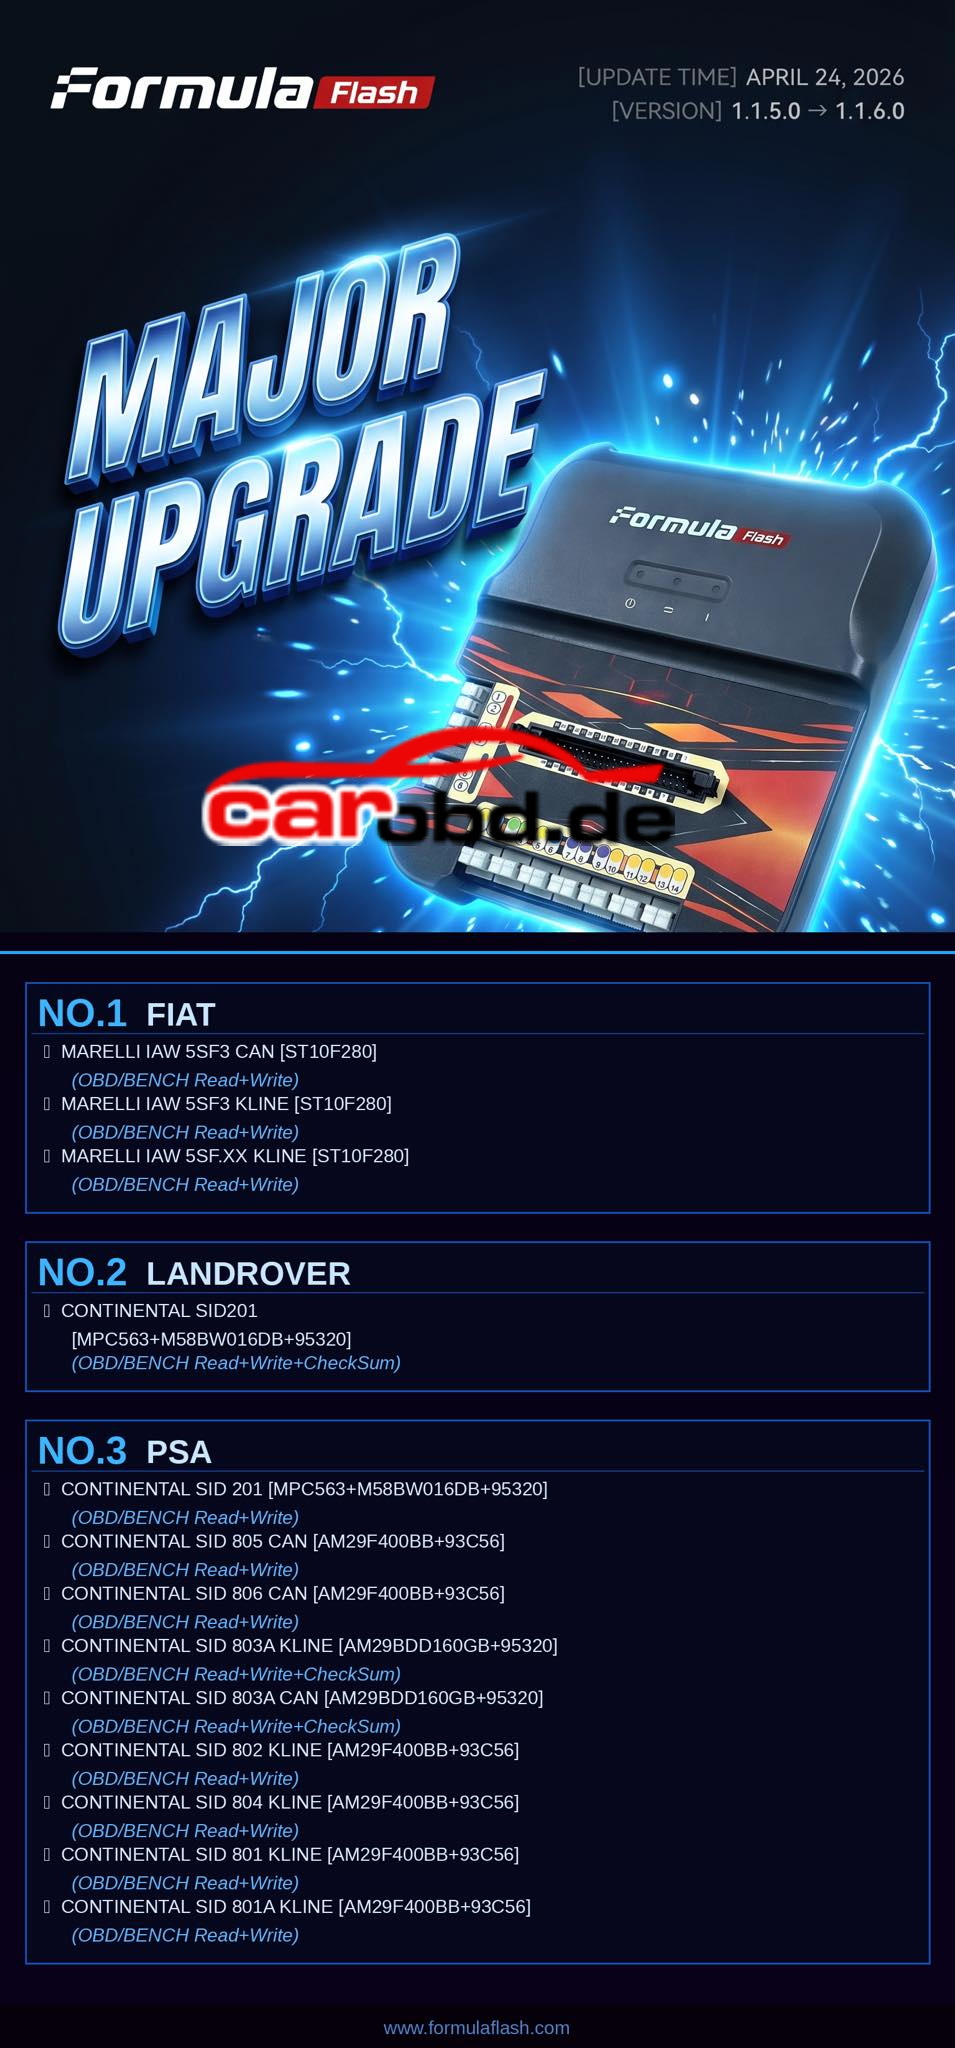
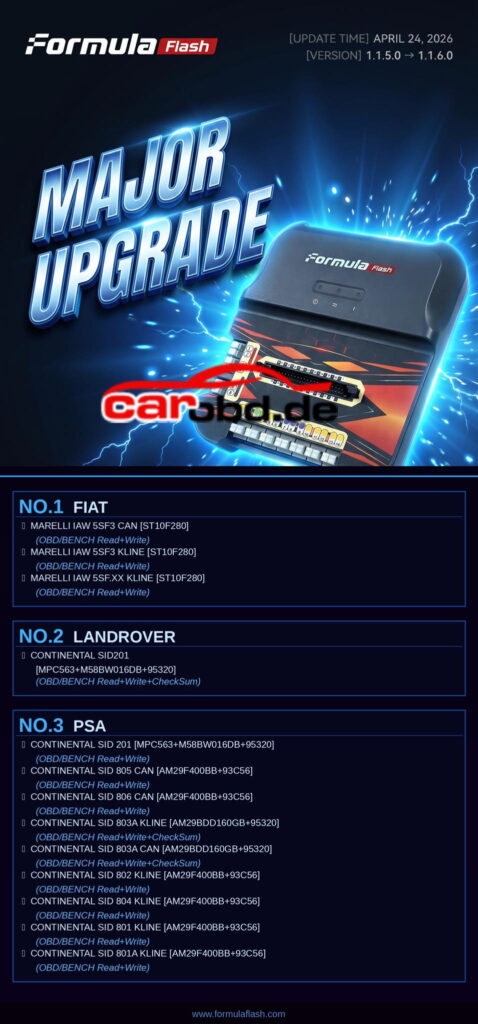
FormulaFlash V1.1.6.0 Released: New Support for SID201,SID805, SID803A&More ECUs
April24,2026- The latest software update for the FormulaFlash ECU programmer, Version 1.1.6.0 is now officially released. This update introduces 13 new protocols across Fiat, LandRover, and PSA vehicles, further expanding coverage and improving performance for professional ECU tuning and diagnosis.
As we move into a busy summer season, even more updates and protocol expansions are already in development.
What’s New in Version 1.1.6.0
- Release Date: April24,2026
- Previous Version: 1.1.5.0
- New Protocols Added: 13
- Supported Operations: OBD/Bench Read&Write, Checksum(on selected ECUs)
This update focuses on enhancing compatibility with popuplar ECU types, especially the widely used Continental SID series.
Newly Supported ECUs by Brand
Fiat
- Expanded support for Marelli ECUs with full OBD and Bench Read/Write capabilities:
- Marelli IAW 5SF3 CAN[ST10F280]
- Marelli IAW 5SF3 K-Line [ST10F280]
- Marelli IAW 5SF.xx K-Line[ST10F280]
Land Rover
Improved support for advanced Continental ECUs:
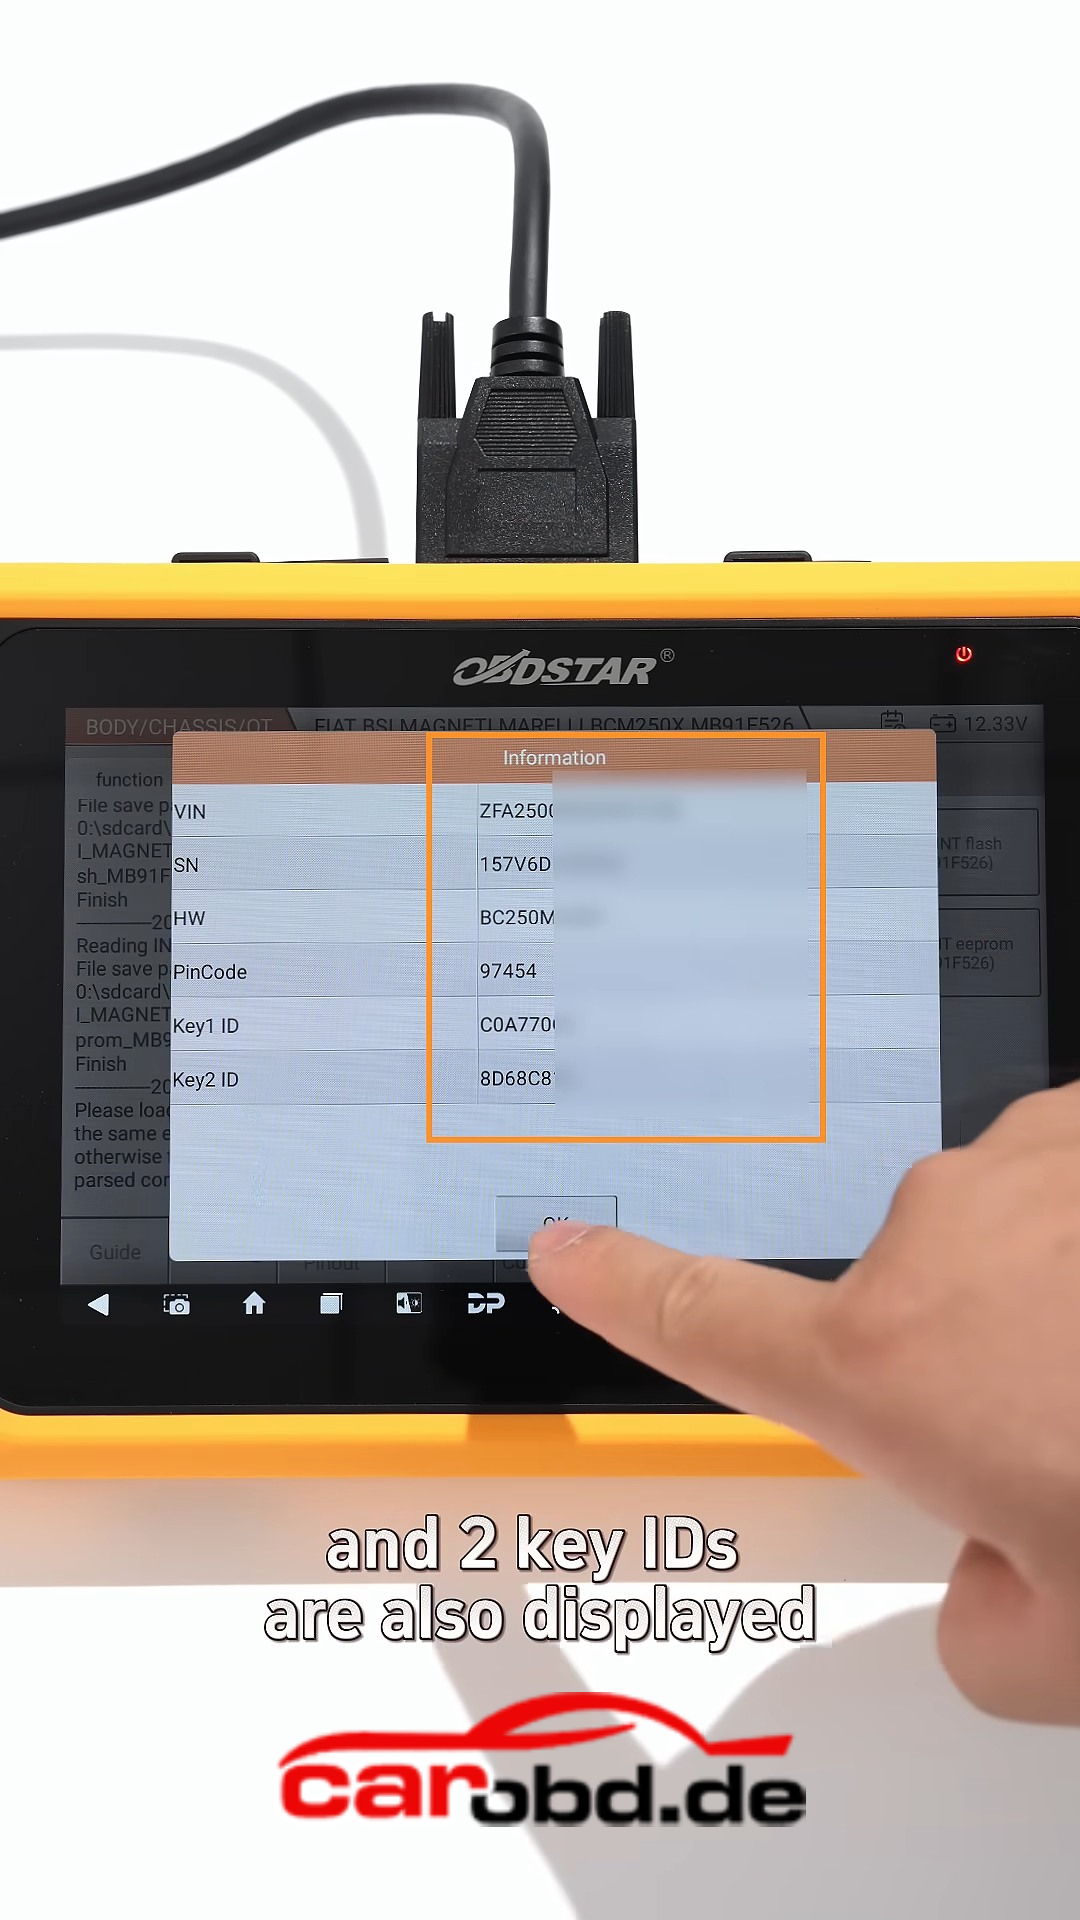
- Continental SID201
- Processor: MPC563+M58BW016DB+95320
- Functions: OBD/Bench Read, Write, Checksum
PSA(Peugeot/ Citroen)
Major expansion for the Continental SID ECU family, covering multiple variants:
- Continental SID201—OBD/Bench Read&Write
- Continental SID 805 CAN/ Continental SID806 CAN —– OBD/Bench Read&Write
- Continental SID803A K-Line/CAN —–OBD/Bench Read, Write, Checksum
- Continental SID802 K-Line/Continental SID804 K-Line/Continental SID801 K-Line/Continental SID801A K-Line ——–OBD/Bench Read &Write
Why This Update Matters
This release significantly enhances FormulaFlash’s capabilities in handling Continental SID ECUs, which are widely used in modern diesel vehicles across European brands.
With added checksum support for selected models, users can now perform safer and more reliable ECU operations without external tools.
What’s Next ?
The formulaFlash developement team is actively working on further improvements and new protocol releases. Expect continuous updates throughout the summer, bringing even broader coverage and enhanced functionality.
Final Thoughts
with the addition of 13 new protocols and expanded support for key ECU types, FormulaFlash V1.1.6.0 continues to strengthen its position as a reliable and powerful tool for ECU programming professionals
Stay tuned for upcoming updates-and make sure your device is always running the latest version to get the best performance.
For more technical service ,please contact
Jenny
Whatsapp: +86 19947637411
Email: Sales@Carobd.de